2 rg migration – APC iSCSI SATA II User Manual
Page 73
[73]
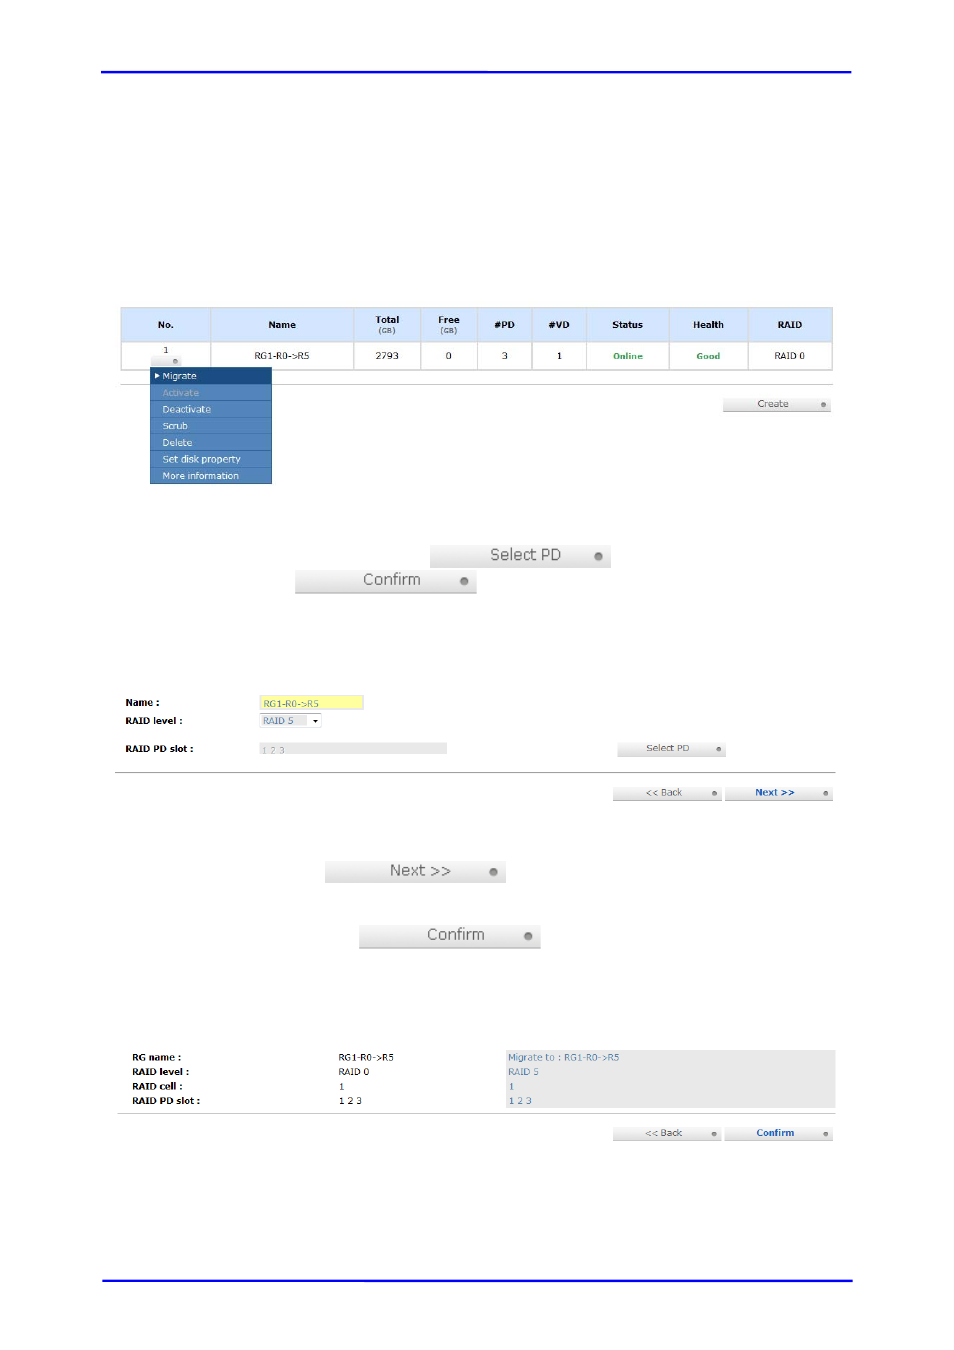
4.2 RG Migration
To migrate the RAID level, please follow below procedures.
1. Select “/ Volume configuration / RAID group”.
2. Move the mouse pointer to the gray button next to the RG number; click
“Migrate”.
3. Change the RAID level by clicking the down arrow to “RAID 5”. There will
be a pup-up which indicates that HDD is not enough to support the new
setting of RAID level, click “
” to increase hard drives,
then click “
“ to go back to setup page. When doing
migration to lower RAID level, such as the original RAID level is RAID 6 and
user wants to migrate to RAID 0, system will evaluate whether this
operation is safe or not, and appear a message of "Sure to migrate to a
lower protection array?” to give user warning.
4. Double check the setting of RAID level and RAID PD slot. If there is no
problem, click “
“.
5. Finally a confirmation page shows the detail of RAID information. If there is
no problem, click “
“ to start migration. System also
pops up a message of “Warning: power lost during migration may
cause damage of data!” to give user warning. When the power is
abnormally off during the migration, the data is in high risk.