Pc 5150, Rmc 7150 – Acnodes RMC 7150 User Manual
Page 10
© Copyright 2011 Acnodes, Inc.
All rights reserved. Product description and product specifications
are subject to change without notice. For latest product information,
please visit Acnodes’ web site at
PC 5150
15-inch touch panel PC
14628 Central Blvd,
Chino, CA91710
tel:909.597.7588, fax:909.597.1939
10
RMC 7150
14” short depth rack server
Installing with Rackmount Kit
This is a guideline for installing the unit into a rack with the optional rack kit. You should also refer to the Installation Instruc-
tions that came with the rack unit you are using. Be aware that there are a variety of rack units on the market, which may
mean the assembly procedure will differ slightly.
The rack harware includes two assblies that consists of two sections: an Inner rail that secures to the chassis and an outer rail
that secures directly to the rack itself.
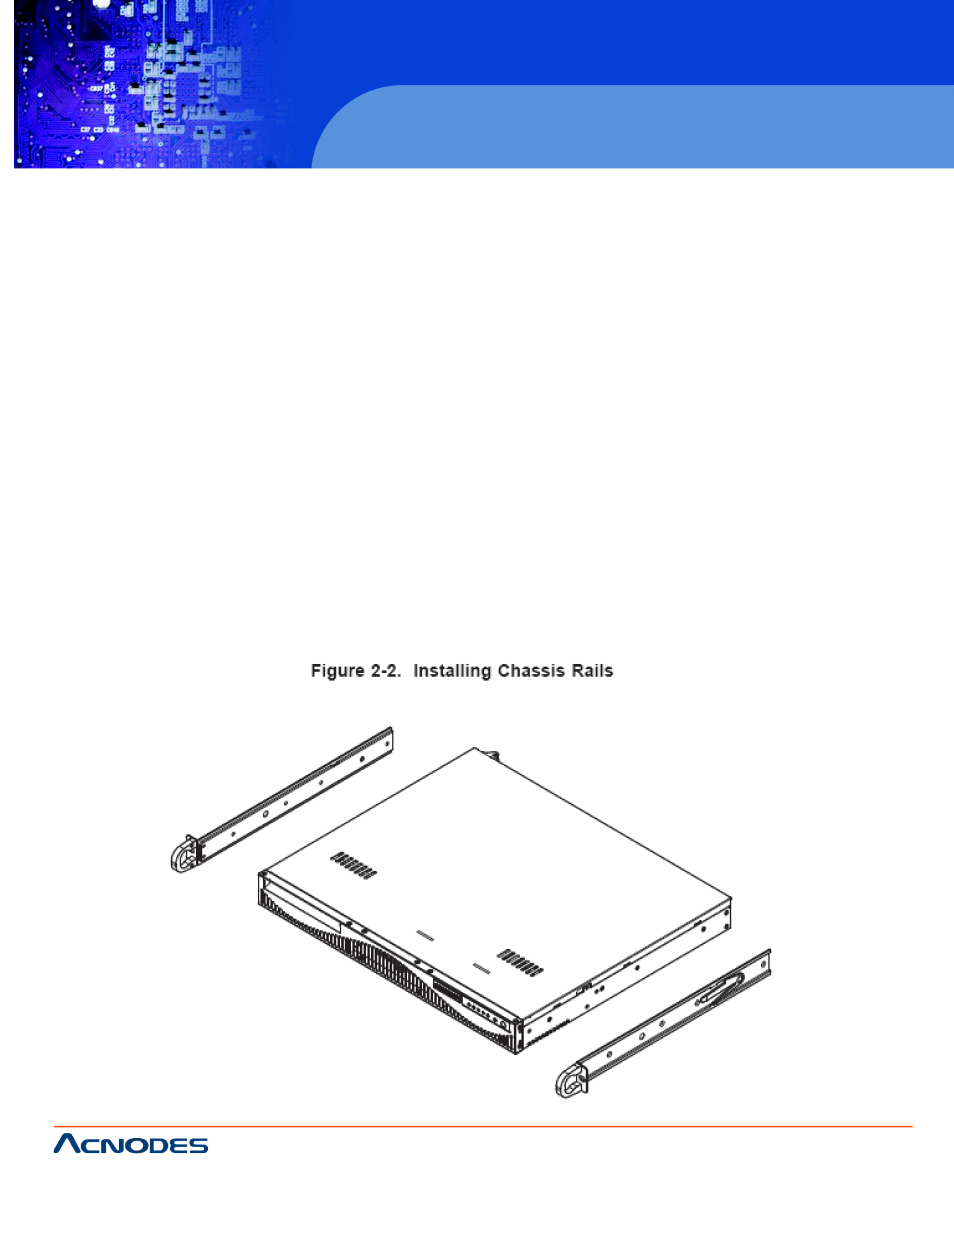
Installing the Chassis Rails
1. Detatch the two rail sections from each other by depressing the locking tab on the innter rail to release it from its locked
position, then pull the two rails completely apart.
2. Repeat step 1 for the remaining rail assemble.
3. Position the fixed chassis rail sections you just removed along the side of the chassis making sure the three screw holes
line up. Noe that the rails are left/right side specific.
4. Screw the rail securely to the side of the chassis. Repeat this procedure for the other rail on the other side of the chassis.
You will also need to attatch the rail brackets when installing into a telco rack.
Locking Tabs: Both chassis rails have a locking tab, which serves two functions. This first is to lock the server into place when
installed and pushed fully into the rack, which is its normal position. Secondly, these tabls also lock the server in place when
fully extended from the rack. This prevents the server from coming completely out of the rack when you pull it out for servicing.