Installation, Column preparation – ididit Retrofit Steering Column: 1970-74 Cuda/Challenger User Manual
Page 4
The firewall mount is first, loosen and remove the load plate and o-ring. Install fire-
wall gasket and plate loosely with the bolts and washers provided. Install the plate
with the lip facing the engine side of the firewall. (See Figure 6)
Column Preparation
Slide the load plate onto the column with the raised lip facing the wheel side of the
column. Then slip the O-ring against the load plate. This will hold the load plate out
of the way while sliding the column in. Locate the 2 nuts and washers provided with
the kit for the dash mount. If you haven’t checked this out yet… pull the lower shaft of
the column out about 2 inches, and then push it back rapidly with your hand. This will
make the column at its shortest point, and will give you the most possible clearance
while sliding through the firewall.
INSTALLATION:
Tip…
To do a professional job you
may want to put a layer of masking tape
on the steering column from the tabs
down. The next part of the installation
could scuff the finish on the column.
(Figure 6)
Now with one hand in the middle of the col-
umn and one at the top, slide the column be-
tween the pedals and threw the hole in the floor
mount. Set the column against the dash mount
studs and center the studs in the slot provided.
Loosely install the washers and nuts onto the
studs. You should note that the studs and the
slots allow for adjustment of the column from
left to right and front to back. Center the col-
umn from front to back and adjust left to right
until the column is centered in the plastic dash
housings as close as possible. Then lightly
tighten bolts. (See Figure 7)
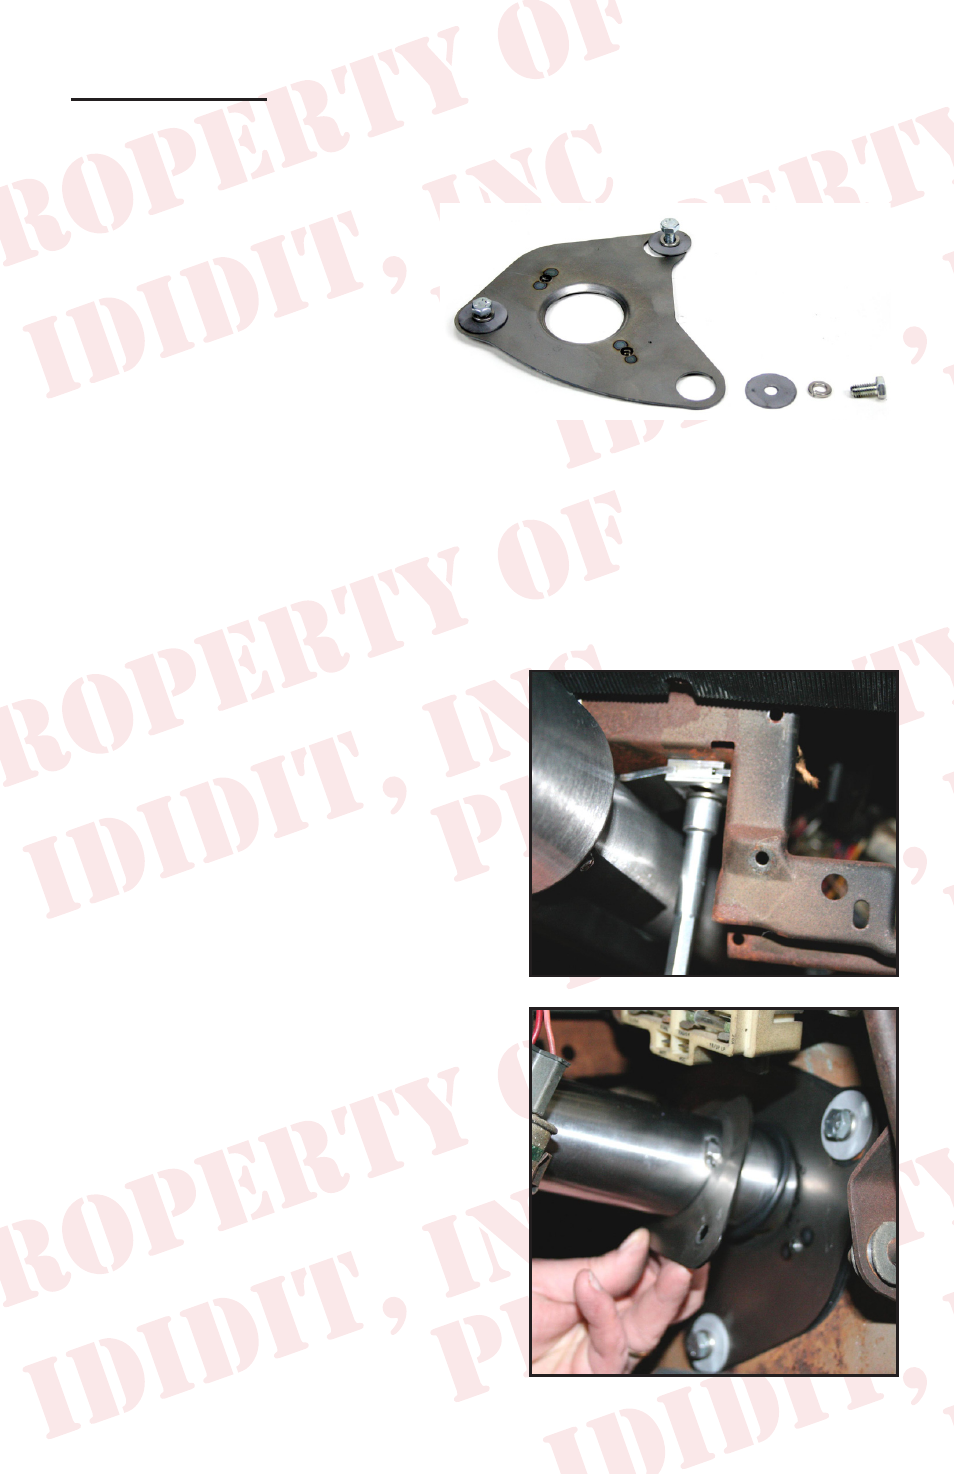
Next slide the load plate of the firewall mount
down the column till it is against the plate. In-
stall the two bolts and washers and tighten to
11 FT. LBS. (See Figure 8)
(Figure 7)
(Figure 8)
3