Flex-a-Lite 59274 Ford 03-07 6.0L Super Duty Diesel Radiator/Fan Combo Without VSC User Manual
Page 2
98275 Rev. 01-22-14
8
Reassemble And Test
1. Insert temp. probe near radiator inlet, leaving 1/4” of
the probe sticking out from the core. Be careful not to
damage radiator core.
2. Turn Ignition on. If the LED farthest from VSC power
wires does not turn on after 6 seconds, check 12V power
going to terminal #9.
3. With engine running, turn A/C on. The fan should be
running and 3 of the LEDs should be lit. If not, verify A/C
clutch is engaged and correct signal wire is triggered.
3. Turn A/C off. Let vehicle warm up to normal operating
temperature. Adjust screw terminal clockwise to increase
turn-on temperature and counter-clockwise to decrease
temperature. NOTE: THE SCREW TERMINAL ONLY
ROTATES 3/4 OF A TURN. IF TURNED BEYOND ITS
LIMITS THE TERMINAL WILL BREAK!
4. Once desired temperature is set, let the engine idle
and make sure the fan cycles to maintain desired
temperature. Make sure the fan is pulling air through
the radiator toward the engine.
5. Reassemble vehicle and top off coolant.
What’s Next?
Register your product for warranty at
http://automotive.flex-a-lite.com/warranty-registration/
Enjoy your Flex-a-lite performance cooling product!
If you need further assistance, please contact tech services
at 253-922-2700 M-F 8:00am-5:00pm PST.
9
The Flex-a-lite Limited Warranty
Flex-a-lite Consolidated, 7213-45th St. Ct. E. Fife, WA 98424,
Telephone No. 253-922-2700, warrants to the original purchasing user,
that all Flex-a-lite products to be free of defects in material and
workmanship for a period of 365 days (1 year) from date of purchase.
Flex-a-lite products failing within 365 days (1 year) from date of
purchase may be returned to the factory through the point of
purchase, transportation charges prepaid. If, on inspection, cause of
failure is determined to be defective material or workmanship and not
by misuse, accidental or improper installation, Flex-a-lite will replace
the fan free of charge, transportation prepaid. Flex-a-lite will not be
liable for incidental, progressive or consequential damages. Some
states do not allow the exclusion or limitation of incidental or
consequential damages, so the above limitation or exclusion may not
apply to you. This warranty gives you specific legal rights and you may
have other rights, which vary from state to state. The Flex-a-lite warranty
is in compliance with the Magnuson-Moss Warranty Act of 1975.
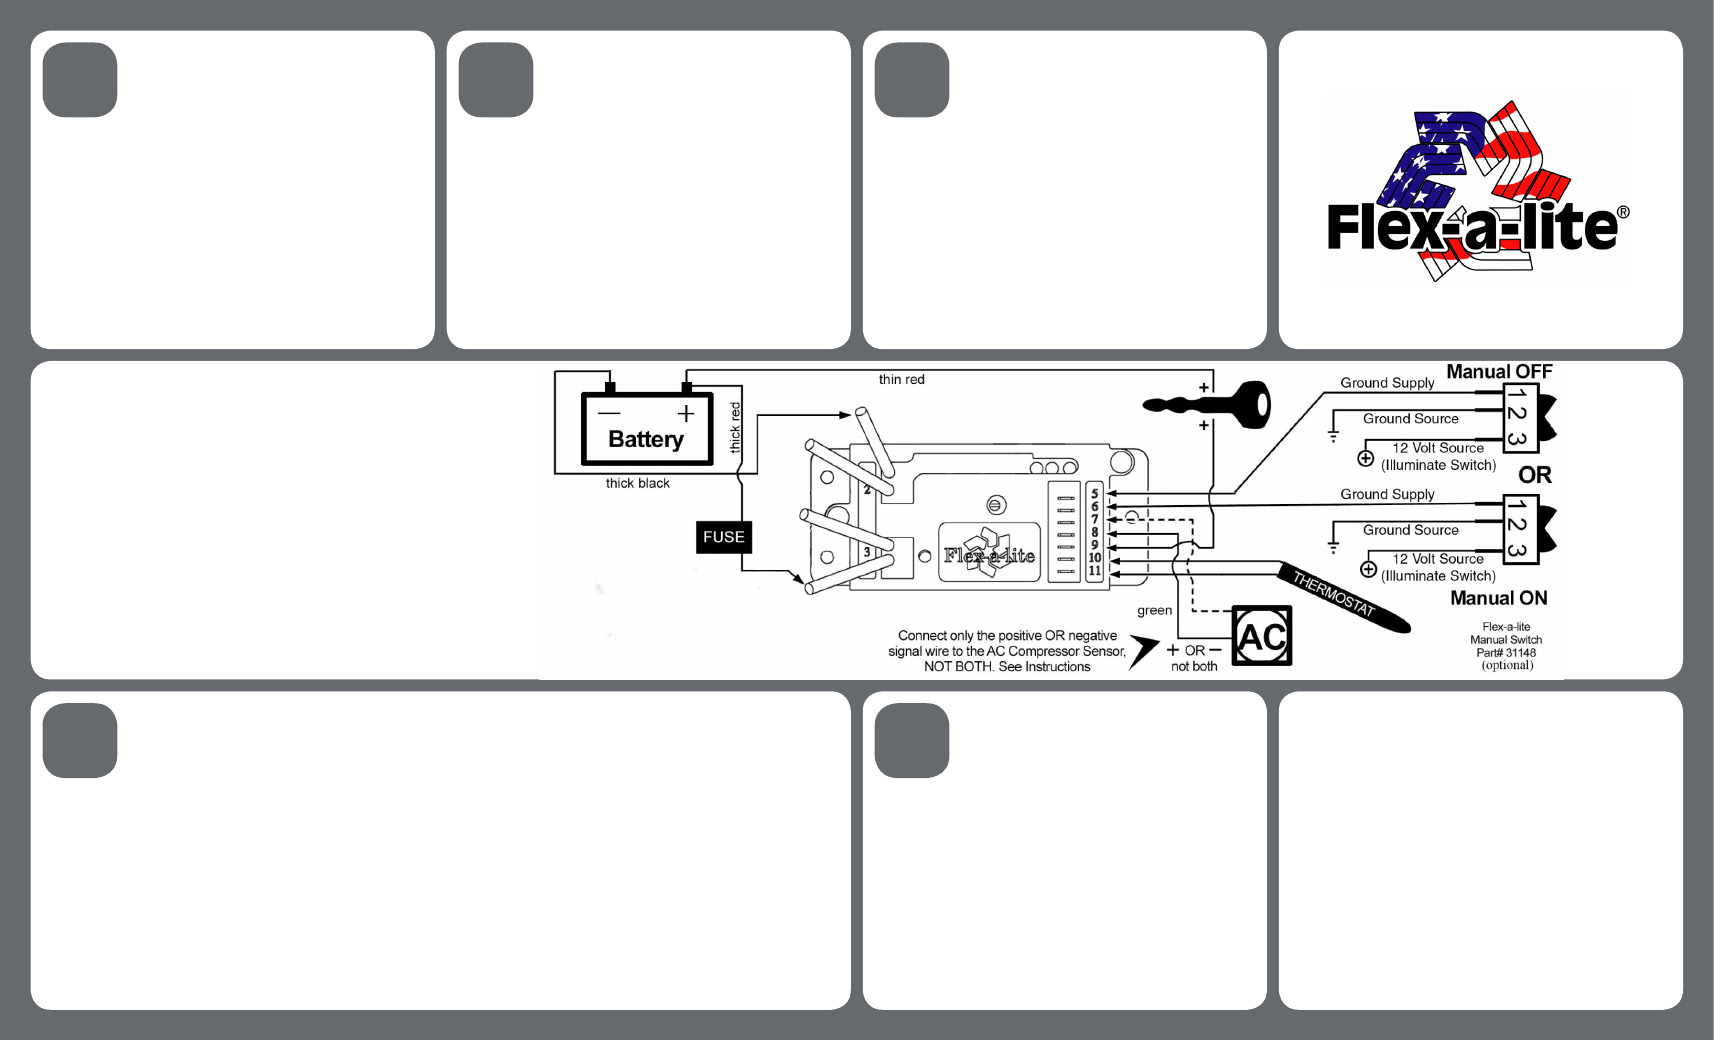
Controller Wiring
1. Using the large yellow butt connectors provided, attach
a length of the thick (10 AWG) red wire to the orange mo-
tor wires at the fan.
2. Attach a length of the thick (10 AWG) black wire to
the black motor wires at the fan. Once the fan is in place,
these will attach to the control unit.
5
Connect Power Leads
1. Determine the length needed to run thick red and black
wire from the VSC to the battery terminals and trim
appropriately.
2. Crimp a large yellow ring connector to one end of each
wire and connect the black wire to the negative (-) battery
terminal, but DO NOT connect the red wire yet!
3. Using butt connectors, connect the fuse holder provided
inline with the red wire.
6
Ignition-controlled Power Source
1. Locate the fuse box.
2. Find a circuit that is hot when the key is in the ON
position.
3. Attach the included fuse tap to the fuse. Attach a
female connector to the thin red wire included and
connect to the fuse tap.
4. Attach pink female connector to end of the wire and
connect to terminal #9 on VSC.
NOTE:DO NOT use the DRL or brake/taillight fuse!
7
NOTE: On Radiator/Fan Kit #59274 the
VSC is pre-wired to the fans for ease of
installation. Verify that the pre-wired
components are correctly hooked up,
then proceed to connect the remaining
wires necessary for your install.