Flex-a-Lite 56418 Camaro Radiator Only Kit Fits 2010-2011 Chevrolet Camaro User Manual
Page 4
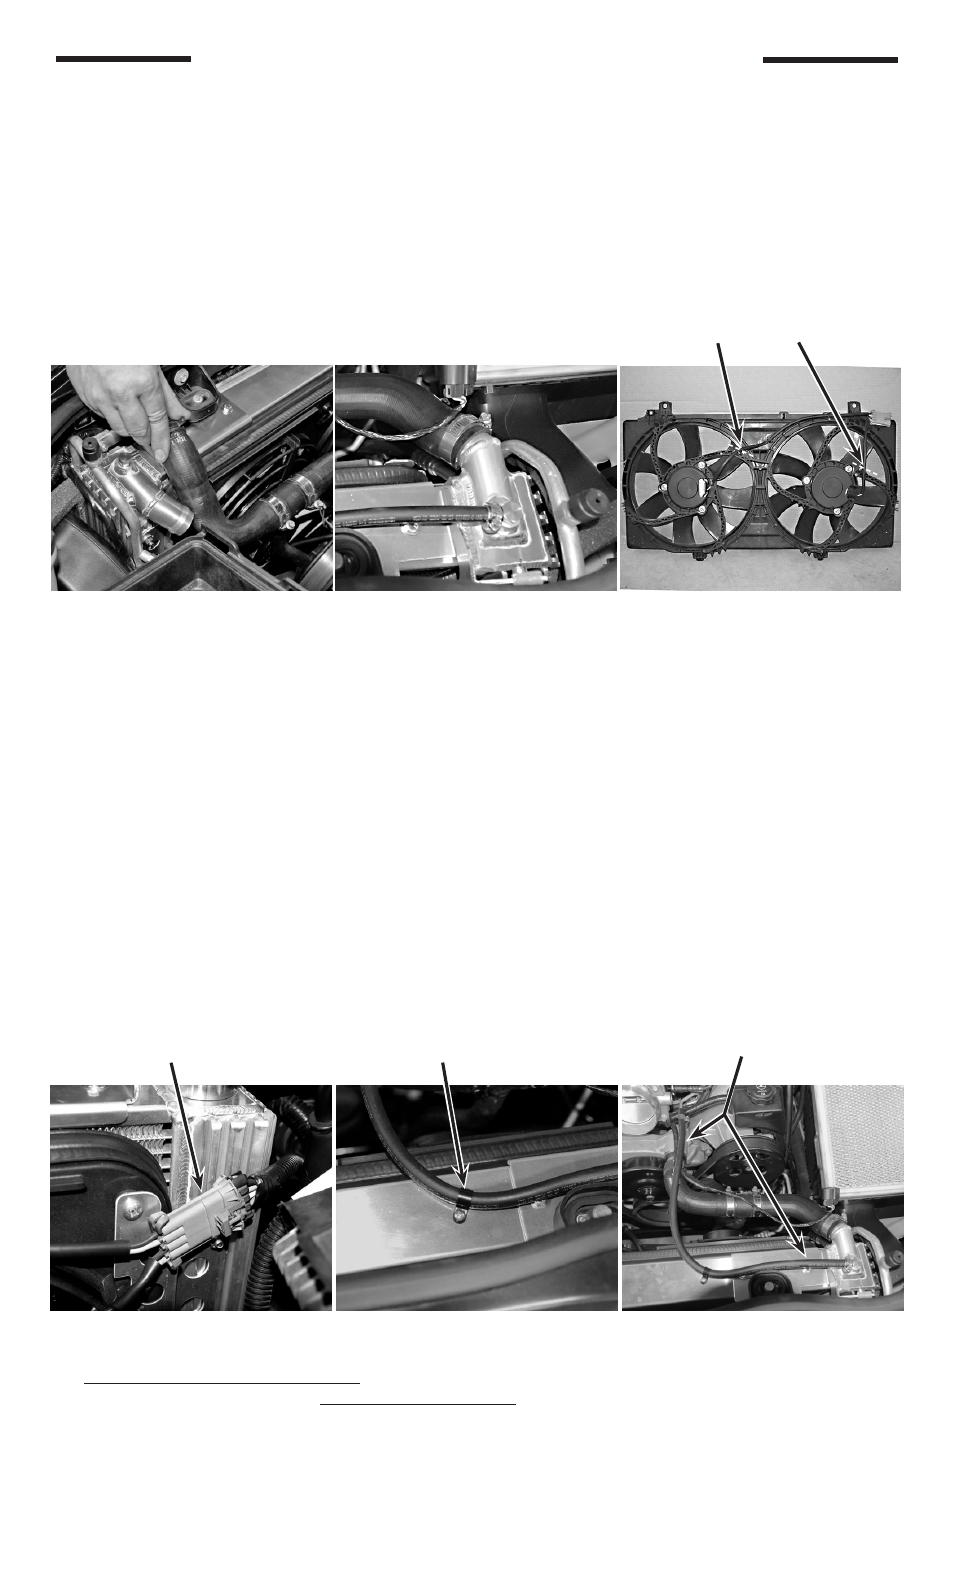
Refasten 10mm bolts (2ea) securing the A/C line to the frame and cross member located behind the
7.
passenger side radiator outlet tube. Refasten 10mm bolt (1ea), securing the power steering line, located
near drivers’ side frame / cross member merger point.
Due to inlet and outlet tube alignment differences on new radiator, you will need to trim both hoses to
8.
acquire proper fitment when securing. Carefully position the hoses next to the radiators’ inlet and outlet
tubes to determine how much of each needs to be removed. Mark a line and then trim to length. It’s better
to trim the hose a little long and need to re-trim than to cut it short and need to purchase another hose.
Secure the bottom return hoses only at this time to radiator outlet tube utilizing the provided hose
clamp.
(see Details L & M)
Installation instructions continued from previous page
To install the new Flex-a-lite® fan motors to the vehicles’ existing temperature regulating system you will
9.
need to remove the large grey electrical connector from the stock fan shroud. Cut the motor wires at the
locations shown.
(see Detail N) Use the stock fan shroud as a reference as to how the wires should be
routed to each of the motors from the grey electrical connector. The red & black wires from the stock shroud
motors on the driver & passenger sides will be replaced with the red & black wires on the new Flex-a-lite®
shroud motors. Re-connect the large gray electrical connector back onto it’s male mating connector.
(see Detail O) Trim the new Flex-a-lite motor wires to neatly meet up with the salvaged grey connector
wires. Use the provided yellow butt connectors to crimp / splice new motor wires and salvaged grey
connector wires together. Use the provided nylon tie straps to secure the wires to the outside of the shroud.
Attach the provided ¼” I.D. hose to the previous steam vent hose connection point on front of drivers’ side
10.
cylinder head with provided hose clamp. Route the hose directly toward top of radiator and attach with
provided 3/8” nylon clamp and screw to small hole.
(see Detail P) Continue by routing ¼” I.D. hose toward
barbed elbow fitting mounted on top of drivers’ side radiator inlet tube. Carefully position the hoses next to
the barbed elbow fitting to determine how much hose needs to be removed. Mark a line and then trim to
length. Secure ¼” I.D. hose to barbed elbow fitting with provided hose clamp.
(see detail M)
Install the provided pipe-nipple for the coolant overflow hose into filler neck of the radiator. Route and trim
11.
the previously tucked away stock overflow hose as needed.
Top & bottom hoses will need
trimmed. Picture below shows hose
needing to be trimmed.
Picture below shows hose length after
trimmed and attached.
Cut / remove wires at points shown.
(Detail L)
(Detail N)
(Detail M)
(Detail O)
(Detail P)
Large gray electrical connector with
mating connector.
Routed hose with
3/8” nylon clamp and screw.
Overview of routed steam vent hose.
Note regarding filling cooling system
12.
; When you attempt to fill the vehicle’s cooling system in the traditional
way, by only filling the radiator,
the vehicle will overheat. The V-8 Camaro thermostat is located in the
coolant return line. We suggest “Back filling” the engine first by pouring coolant in through the top radiator
hose, then filling the radiator. “Back filling” the engine block allows coolant to reach the back side of
the thermostat. When the engine has heated up the coolant, from the backside of the thermostat, the
thermostat will open allowing the cooling system to properly operate.
Note: Reference vehicle manufacture for proper recommended coolant.
Rev. 02-02-12 98488 Page 4 of 5