Flex-a-Lite 56484 Camaro Radiator and Fan Combo Fits 1982-1992 User Manual
Page 3
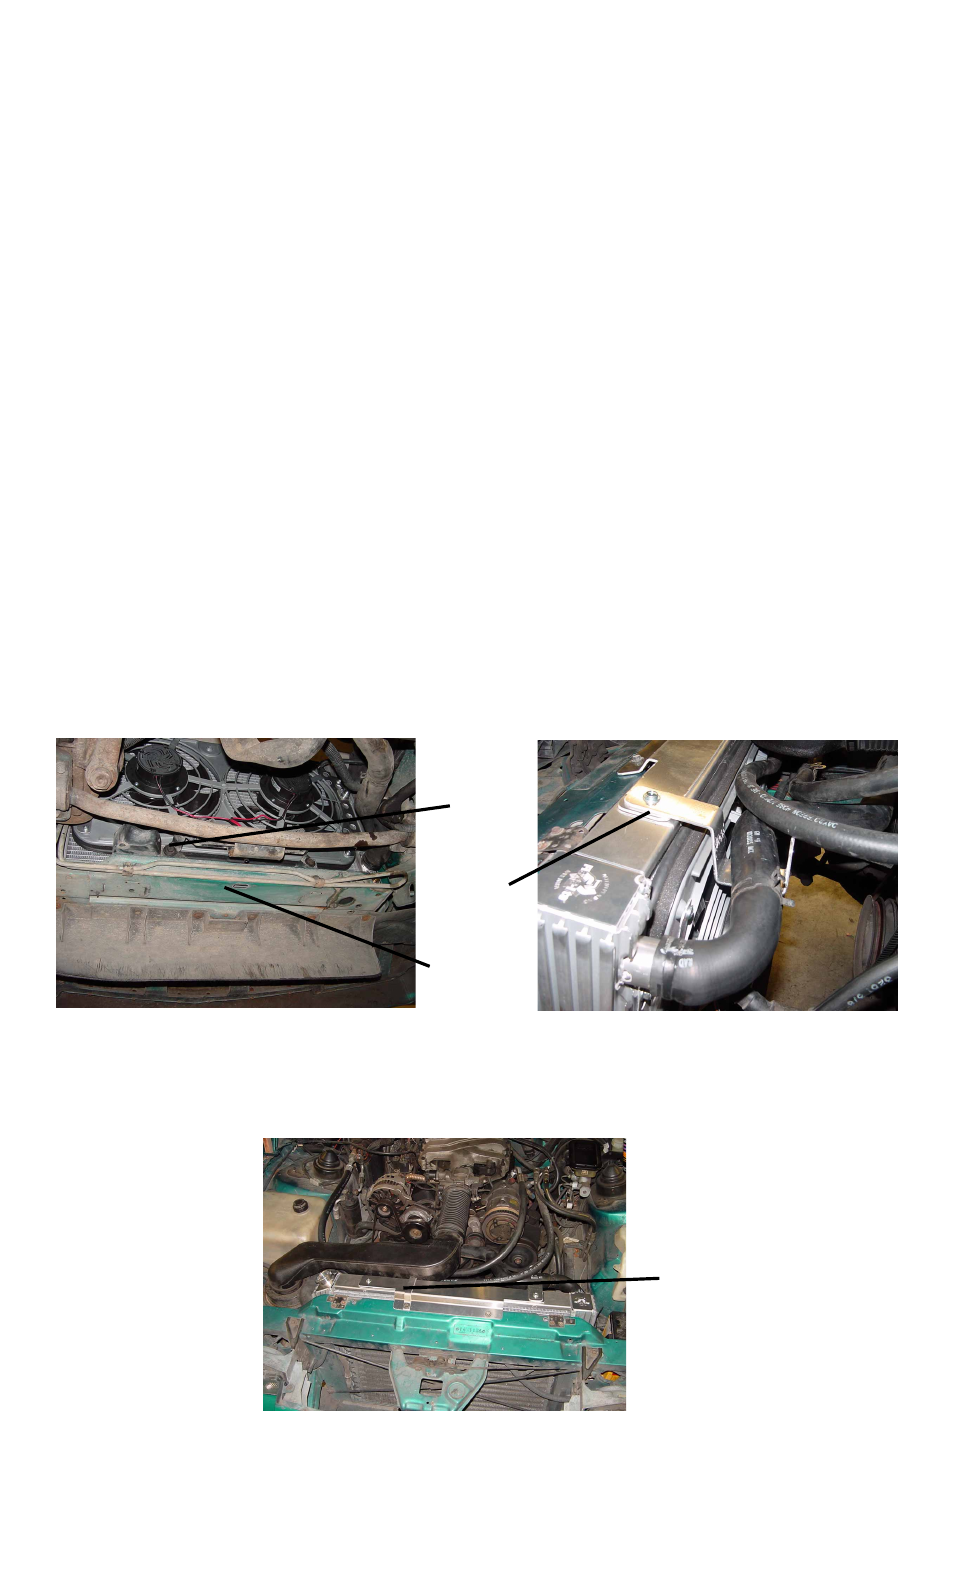
11. Attach bracket #56404, on top of bracket #56403, on driver’s side. You will need to remove,
and then reinstall, a bolt previously installed in step #3. The top radiator hose is to be sup-
ported by this bracket. Note: Disregard bracket installation if your upper radiator hose is routed
in a way that can’t take advantage of the bracket. (see detail 9 &10)
12.Attach bracket #56405 on top of bracket #56403 and into upper cross frame on passenger’s
side. You will need to remove, and then reinstall a bolt previously installed in step #4. The “Z”
shaped air ducting is to be supported by this bracket. Note: Disregard bracket installation if
your intake manifold’s air ducting is routed in a way that can’t take advantage of the bracket.
(see detail 10)
13.Suggestions for securing A/C hoses to radiator bracket #56405:
a. If your intake manifold has the “Z” shaped air ducting, secure to underside of bracket
#56405 with zip ties. (not included)
b. If your intake manifolds air ducting doesn’t take advantage of bracket #56405, route the
A/C hoses atop the bracket and secure with zip ties. (not included)
14.Reattach flexible air duct to intake manifold. Be sure to also reattach integrated tube leading to
passengers side valve cover.
15.Reattach “Z” shaped air ducting between air filter canister and flexible air duct. Note: If your
vehicle comes equipped with a strait forward or other air ducting configuration, reattach it
instead.
16.Reattach negative (-) battery cable to battery.
17.Fill radiator/ cooling system with vehicle manufacture recommended coolant. Remember to fill
reservoir to “cold fill level” if needed.
18.Locate the temperature sensor in the kit bag. Insert the temperature sensor into the radiator
fins near the inlet. Leave ¼” or less protruding from the surface of the radiator for opti-
mum performance. The wires will run out through the top corner of the fan shroud. These will
be used later when wiring the VSC.
Note: BE SURE that all moving parts of the engine and electrical fan assembly are clear of
each other before proceeding!
Rev. 0-14-09
#99484 Page 3 of 5
(Detail 10)
Bracket
#56405 shown
mounted
(Detail 8)
(Detail 9)
Plastic/metal
bracket
assembly
Lower cross
member
Bracket
#56404 shown
mounted