Flex-a-Lite 56400 Camaro Radiator Fits 1982-1992 User Manual
Page 2
INSTALLATION OF NEW RADIATOR:
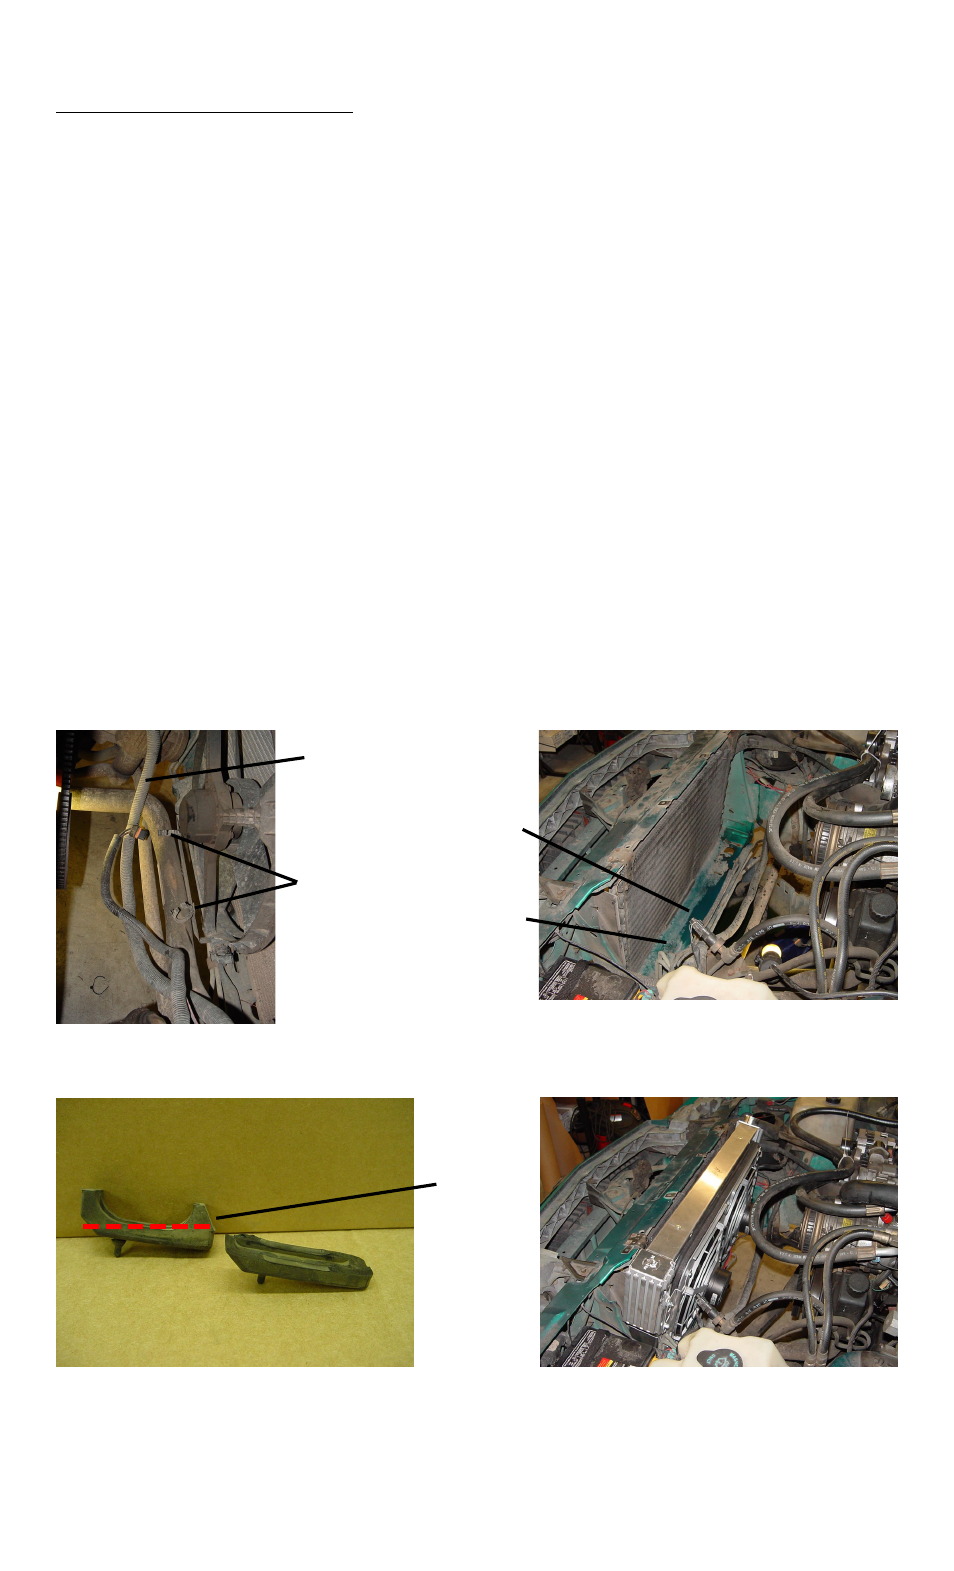
1. Start by removing the bottom rubber radiator mounts. Trim the rubber mounts flat across the top to
allow for the flat bottomed FAL radiator to sit flush on top of them.
(see detail 5) Reinstall rubber
mounts, located back to original positions.
2. Gently lower the fan mounted radiator into engine compartment and place the radiator on top of the
rubber mounts.
Note: Installing the radiator at this point will be complicated by power steering lines on
driver’s side. You may need to slightly modify location of lines to fit space with radiator side tank. Shift
radiator side to side until centered.
(see detail 6)
3. Attach bracket #56403 to radiator top, but do not tighten. Align bracket slots to brass inserts using 2ea.
5/8” long ¼-20 bolts and flat washers provided.
(see detail 7 page 3)
4. Attach lower half of bracket #56403 to upper cross member reusing the bolts (2) saved from step #12 of
the removal instructions but do not tighten yet.
5. Verify radiator base is nested inside lower cross member on top of rubber mounts then tighten all bolts
thru bracket #56403. The radiator should be secured at this point.
6. From below the vehicle, thru the lower frame cross member, reuse saved bolts (2) from step #9 of the
removal instructions and reinstall:
a. Power steering cooling lines.
b. Plastic bottom fan bracket and metal support bracket assembly.
(see detail 8&9 page 3)
7. Reattach bottom radiator hose and replace hose into metal support bracket.
8. Reattach wire loom to mounts on metal support bracket.
9. Remove barbed hose fitting with 1/8” NPT thread from hardware kit and screw into radiator filler neck.
Attach overflow hose leading to coolant reservoir.
10. Reattach top radiator hose.
11. Attach bracket #56404, on top of bracket #56403, on driver’s side. You will need to remove, and then
reinstall, a bolt previously installed in step #3. The top radiator hose is to be supported by this bracket.
Note: Disregard bracket installation if your upper radiator hose is routed in a way that can’t take advan-
tage of the bracket.
(see detail 10&11 page 3)
07-01-08 #99400 Page 2 of 3
(Detail 5)
Trim line
(Detail 6)
(Detail 3)
Wire loom
mounts
Wire loom
(Detail 4)
Showing lower
cross member w/
radiator removed
Clean debris
from this space