BMR Suspension BK002 User Manual
Page 3
Rear Cradle Bushings
BK002 (Continued)
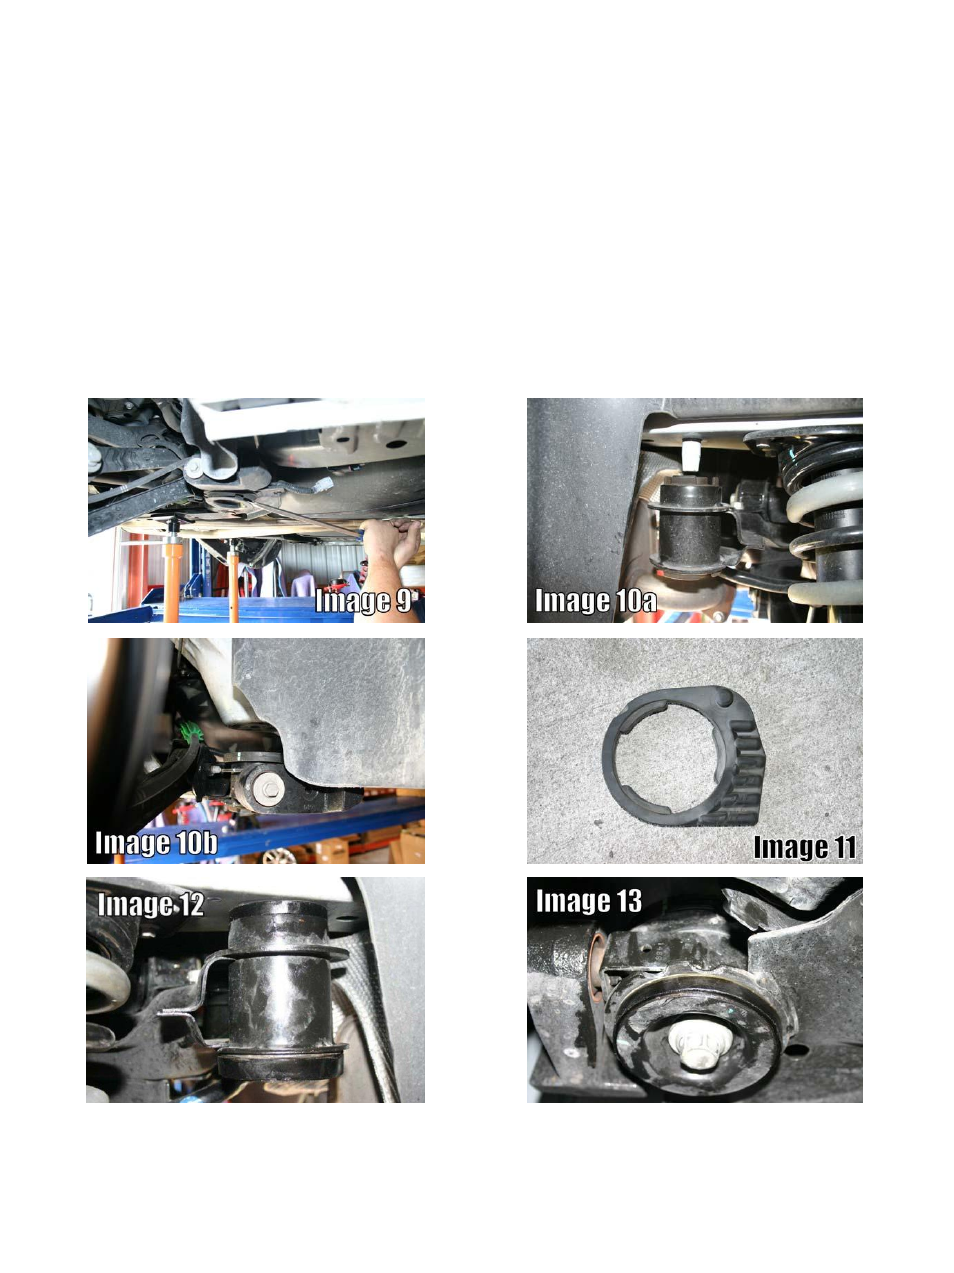
12. Using a pry-bar, remove the lower bushing cup washers. See Image 9.
13.
Lower the cradle to allow access to the upper portion of the cradle mounts. NOTE: The rear cradle
mounts have alignment dowels that extend through the mount. The cradle must be lowered far enough to
clear the dowels. See Images 10a and 10b below.
14.
Remove the isolator (Image 11) from the top of the front bushings to make work space and set aside.
The BMR bushings do not replace the factory bushings, they are designed to fit over the OE bushings and
take up the excess space in the OE bushing. Each BMR bushing is labeled with its own unique part number.
Lube the bushings using the supplied grease and insert them using the chart shown in Image 8 on the previous
page. The tabs on the BMR bushings should fit into the slots of the OE bushings. It may be helpful to insert
a screwdriver or socket extension into the center hole and pry the OE bushing around while applying pressure
to the BMR bushing to get it to seat properly. When installed properly, the bushings should look similar to
Image 12.
15.
Re-install the front rubber isolators.
3