System settings screen – HP UPS Network Module User Manual
Page 30
HP UPS Network Module web interface 30
•
Notified Applications ("
" on page
•
Email Notification ("
" on page
•
Firmware Upload ("
" on page
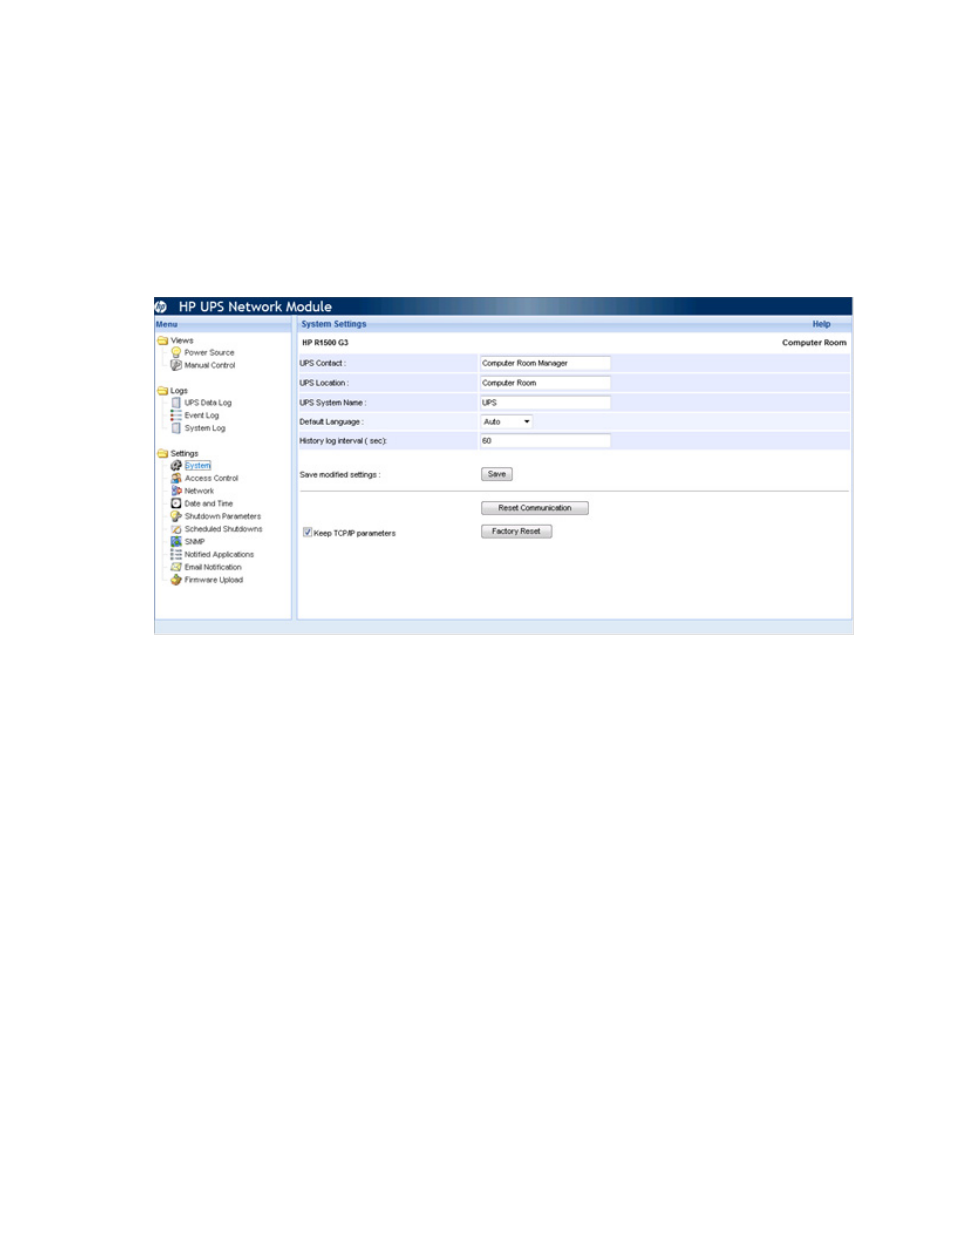
System Settings screen
Click System in the menu tree to display the System Settings screen. This screen allows an administrator to
enter contact information, reset communication, and restore factory default settings on the UPS Network
Module.
To enter the system information:
1.
Enter the name of the person responsible for UPS administration in the UPS Contact field. This text field
is limited to 49 characters.
2.
Enter a description of the physical location of the UPS in the UPS Location field. This text field is limited
to 31 characters. The UPS Location displays throughout the interface.
3.
Enter a custom name for the UPS in the System Name field. This name appears throughout the interface
and is included in SNMP traps. Use a unique name for each UPS.
4.
Select the display language of the web interface in the Default Language pull-down menu. Available
options are English, Japanese, or Auto. Select Auto to allow the interface to display the language
configured for the web browser. Refresh the browser window for changes to take effect.
5.
Enter the time interval for UPS data collection in the History log interval (sec) field. The interval can be
between 5 and 99999 seconds. By default, UPS data is collected every 60 seconds.
6.
Click Save.
To perform a remote reboot of the UPS Network Module without modifying the configuration, click Reset
Communication. This action is required to enable any changes made on the Network Settings screen (on
page
To restore all UPS Network Module parameters to the default configuration, click Factory Reset. The UPS
Network Module communication will be lost. To maintain communication, select the Keep TCP/IP parameters
checkbox, and then click Factory Reset. The configured IP address, subnet mask, gateway, and
BOOTP/DHCP parameters are not reset.