Step 1: attach local language labels if necessary, Step 2: install the tape drive – HP Surestore DLT 80 Tape Drive User Manual
Page 8
Installing Your Removable Drive in an HP SureStore H/A Tape Array 5500
Step 1: Attach Local Language Labels if Necessary
1-3
Step 1: Attach Local Language Labels if Necessary
A set of labels for the front panel in several different languages is provided
with the drive. Identify those with your local language, peel them from the
backing paper and stick them firmly to the front panel of the drive over the
English-language labels.
Step 2: Install the Tape Drive
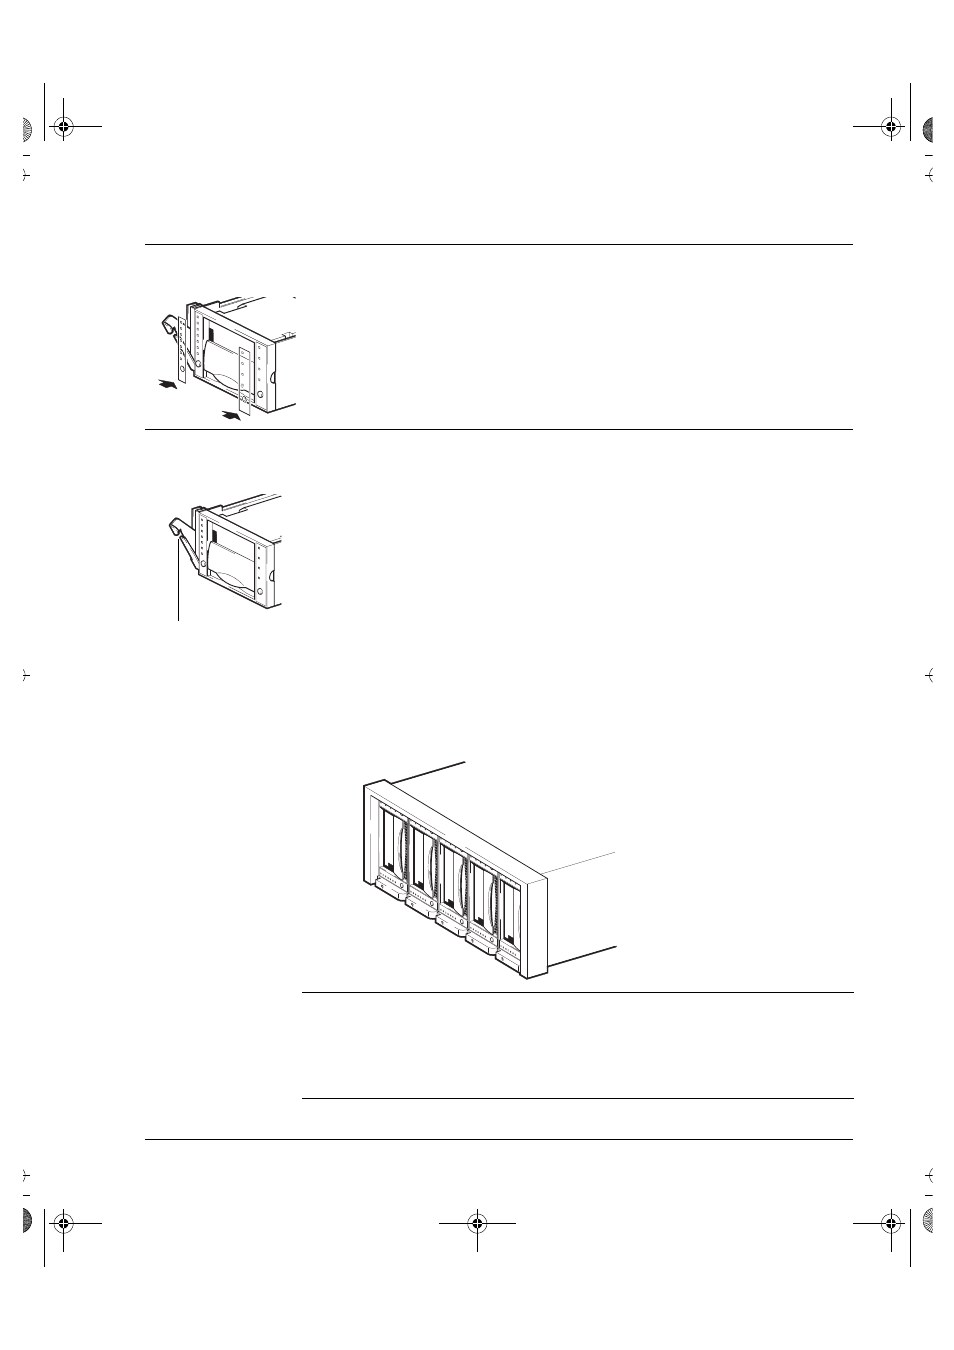
1
Ensure that the extractor lever on the drive is in the out position, as shown
in the picture.
2
Lift the drive carefully and turn it so that it is on its side with the extractor
lever at the bottom.
3
Align the rear of the drive with the guides on the bottom of the
HP SureStore H/A Tape Array 5500.
4
Slide the drive along the guides until the connectors on the back mate with
the connectors at the back of the enclosure.
1
P
ush the extractor lever in until it locks the drive in position.
Figure 1.1 HP SureStore H/A Tape Array 5500 showing five drives installed.
NOTE
• SCSI IDs for drives in the tape array are set on the back panel of the
array.
• If you are installing fewer than five drives in the tape array, you need to
use a blanking plate.
See the documentation with the tape array for details.
extractor lever
dlt-m.book Page 3 Thursday, May 4, 2000 3:52 PM