HP LD4730 47-inch Micro-Bezel Video Wall Display User Manual
Page 20
Mounting a single display on a stand (Sold Separately)
The stand kit is an optional accessory available from HP. It allows you to mount a single display in
landscape position. To mount the display on the stand:
1.
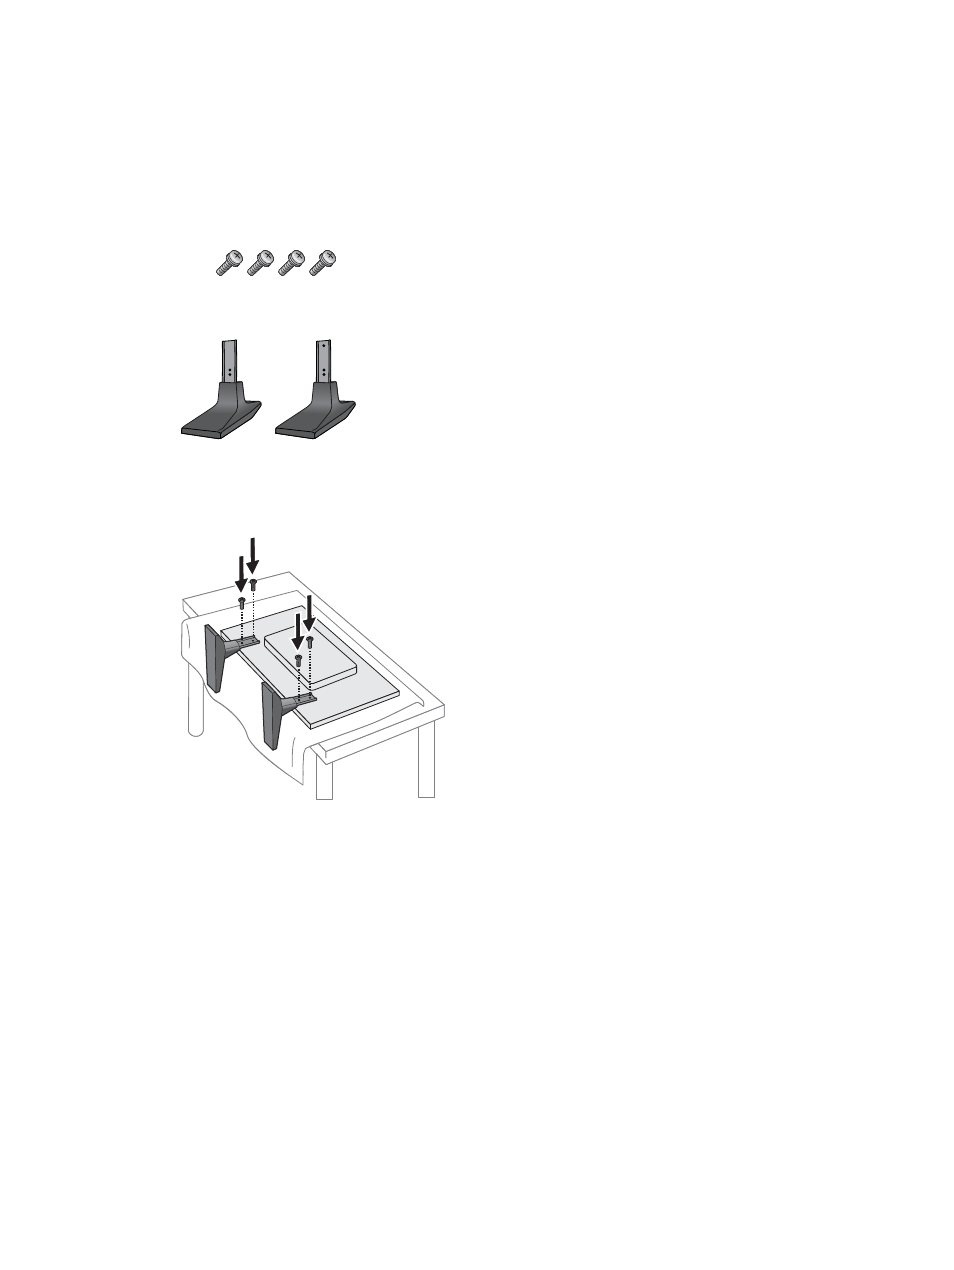
Remove the four M4 x 32 mm (1.26 in) screws and stand from the box.
Figure 3-8
Stand accessory contents
2.
Place a soft cloth on the table and place the display with the screen facing downward. Connect
the stand as shown in the following figure.
Figure 3-9
Securing the stand to the display
The long side of the foot should face forward when the screen is upright.
Installing the HP LD4730 Frame System (Sold Separately)
The frame system creates a 10 mm border around one or more LD4730 displays, giving the edge a
finished look. To frame a group of displays, you need as many kits as you have displays in a row or
column, whichever is greater. For example, three kits will frame a 3 x 3 group, a 3 x 1 group, or a 1 x
3 group.
The frame kit includes four rails, one each for top, bottom, left and right. It also contains four
interchangeable corner pieces and four interchangeable straight connectors.
The rails are labelled TOP for the top in landscape position, BOTTOM for the bottom in landscape
position, RIGHT for your right side as you face the front of the screen, and LEFT for your left side as
you face the front of the screen. All the screw holes match for the one rail that goes to each side; no
force is needed. Attempting to attach the wrong rail could damage the bezel.
When you frame a single array, the numbers on the rails match at each corner:
12
Chapter 3 Setting up the display
ENWW