Print using an lpr port in microsoft, Windows, 2000 pro – Brother PS-9000 User Manual
Page 39: 38 print using an lpr port in microsoft
38
Print using an LPR port in Microsoft
®
Windows
®
2000 Pro
1
Go to “Start” – “Settings” – “Control
Panel” – “Printers”, and then double-
click [Add Printer].
The Add Printer Wizard starts up.
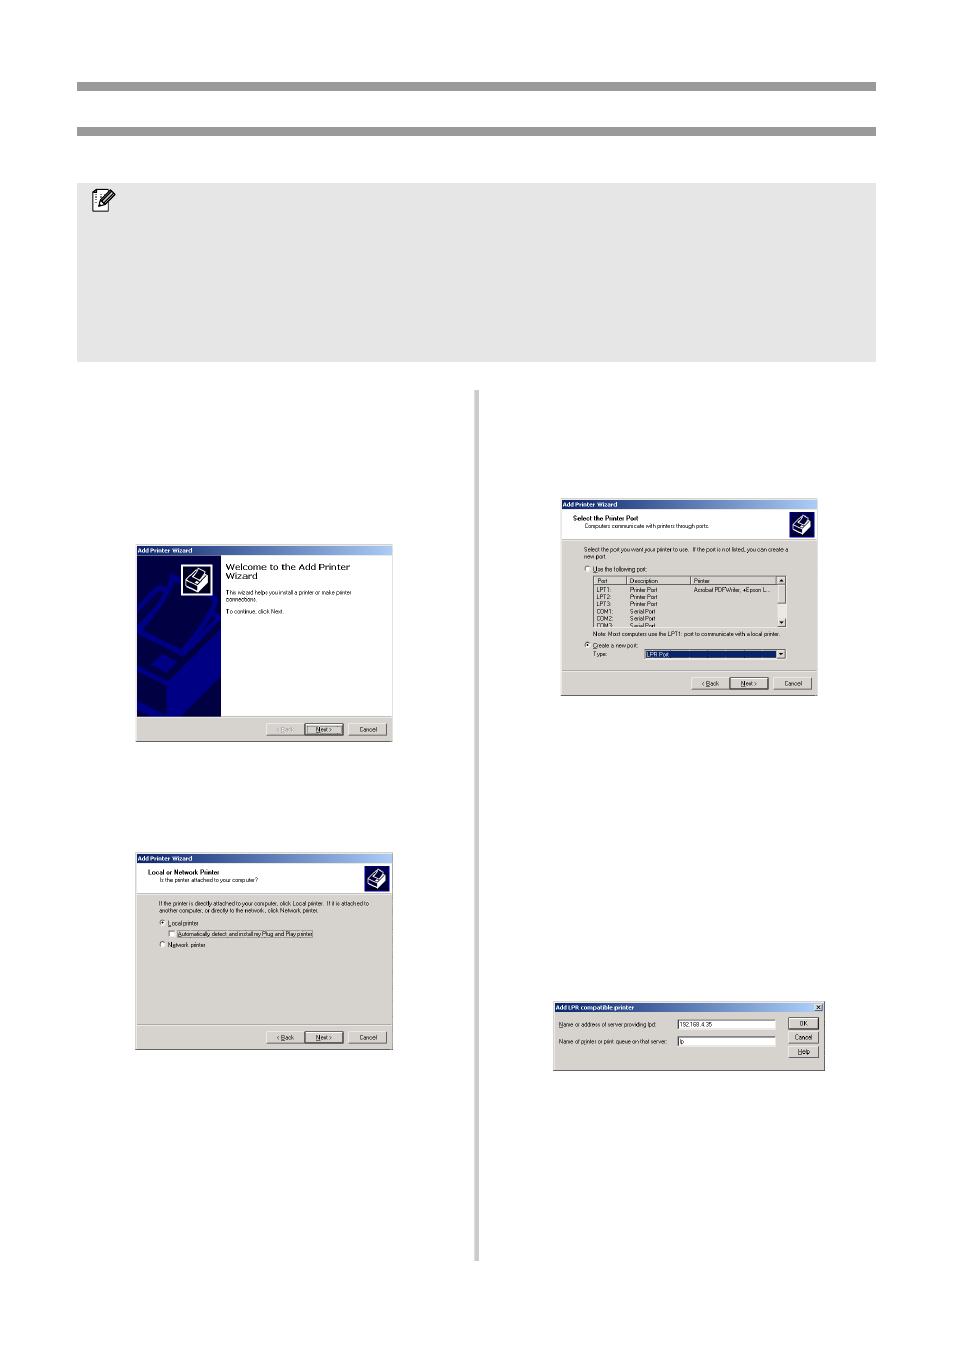
2
Click [Next].
3
Select “Local printer”. Be sure to clear
the “Automatically detect and install my
Plug and Play printer” check box.
4
In the Select the Printer Port dialog box,
select “Create a new port” to create a
new port. Select “LPR Port”, and then
click [Next].
• If the destination print port was created
when PS-9000 was installed, select the
port from the “Use the following port”
list, and then click [Next].
5
In the “Name or address of server
providing lpd” box of the Add LPR
compatible printer dialog box, type in the
IP address that was set for PS-9000. In
the “Name of printer or print queue on
that server” box, type in “lp”, and then
click [OK].
Note
●
In order to print using LPR, an LPR port must be added. Go to “Start”
–
“Settings”
–
“Control
Panel”
–
“Add/Remove Programs”
–
“Add/Remove Windows Components” to start up the
Windows Components Wizard. In the “Components” list, select “Other Network File and Print
Services,” click [Details], select “Print Services for Unix”, and then click [OK]. In the Windows
Component Wizard, click [Next]. After the component is added, click [Finish]. The LPR port is
added.