3 orp-mv calibration, 4 orp -% calibration, 3 orp – Thermo Fisher Scientific Alpha pH 2000D User Manual
Page 19: Alibration, 4 orp, C.1 c.2
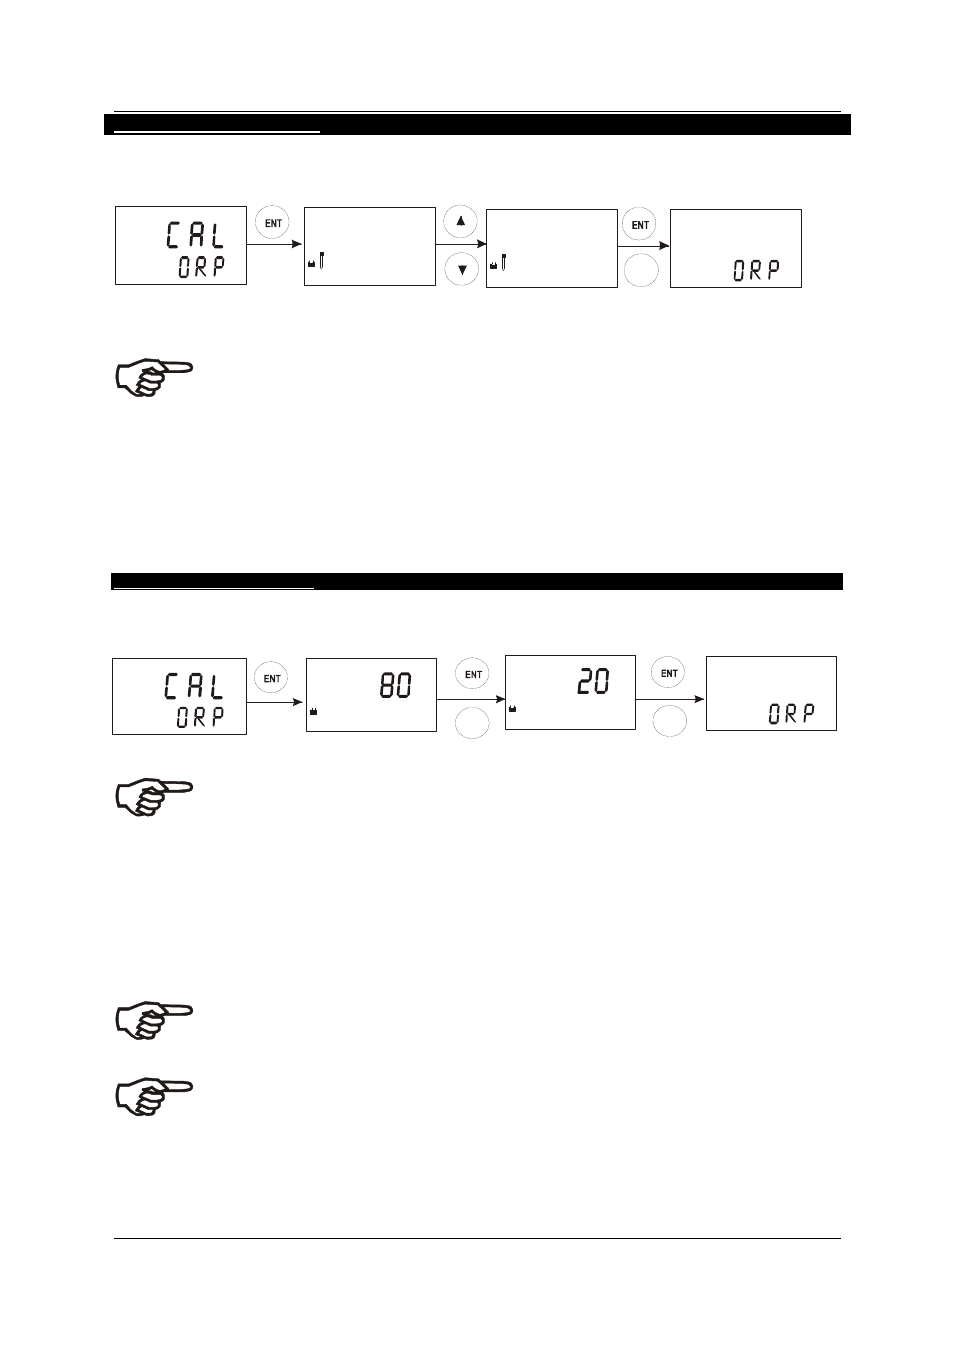
5.3 ORP-mV
Calibration
If controller is configured for ORP-mV measuring you can perform a one-point calibration
.
MEAS
CAL
CAL
HOLD
CAL
HOLD
mV
mV
R.mV
CAL
250
255
255
255
250
1. Enter Calibration mode as described in section 5.1. The display should read “CAL ORP”.
Note: If the display reads “CAL PH”, see section 6.9 for procedures on how to switch from pH
to ORP-mV readings.
2. Place sensor in the ORP solution.
3. Press the ENT key to start calibration. The “CAL”, buffer and electrode indicator appears on the display.
The upper and lower display shows the current mV output of the electrode without any offset adjustment.
4. Press the
▲ or ▼ key to adjust the upper display mV value to match your exact reading.
5. Press the ENT key (or CAL key) to confirm. The controller calculates the correction factor and returns to
the Measurement mode. The “R.mV” annunciator (Relative mV) will be shown on the display indicating
that the value displayed is the relative mV value of the default measurement.
5.4
ORP -% Calibration
If controller is configured for ORP-% measuring you can perform a calibration at two points using a low
concentration sample (20%) and a high concentrate sample (80%). To calibrate the controller for ORP
%:
CAL
CAL
MEAS
59.0
%
%
%
CAL
HOLD
CAL
CAL
HOLD
C.1
C.2
1. Enter Calibration mode as described in section 5.1. The display should read “CAL ORP”.
Note: If the display reads “CAL PH”, see section 6.9 for procedures on how to switch from pH
to ORP-mV readings.
2. Press the ENT key to start calibration. The display prompts you to place the sensor in the high
concentration sample (relative value of 80%).
3. Place sensor in high concentration sample, then press the ENT key (or CAL key). The electrode and
CAL indicators flash. The unit automatically adjusts its reading to match the solution value.
4. The display prompts you to place the sensor in the low concentration sample (relative value of 20%).
Remove the electrode from the first standard, wash it well and then immerse it in the 20% standard.
5. When the display stabilizes press the ENT key (or CAL key). The electrode and “CAL” indicator flashes
and the controller adjust its display to the 20% relative value and exits to the Measurement mode.
Note: If there is a calibration error, the controller displays “CAL ERR”. If this happens, push
both
▲ or ▼ keys (escape) to restart the calibration beginning from Step 1.
Note: If you stop calibration after entering the first value, or if calibration is defective, the
controller will use its original calibration data.
- 14 -