Drain facilities – Alliance Laundry Systems W446I User Manual
Page 20
© Copyright, Alliance Laundry Systems LLC – DO NOT COPY or TRANSMIT
Installation
38857
18
Drain Facilities
IMPORTANT: The drain hose installation is a very
important factor in the washer installation. If care
is not taken when the drain hose is installed, a
siphoning action can be started which will cause
water to be siphoned from the washer during the
cycle.
End of drain hose should never be in water as
siphoning action can be started that will cause
water to be siphoned back into the washer.
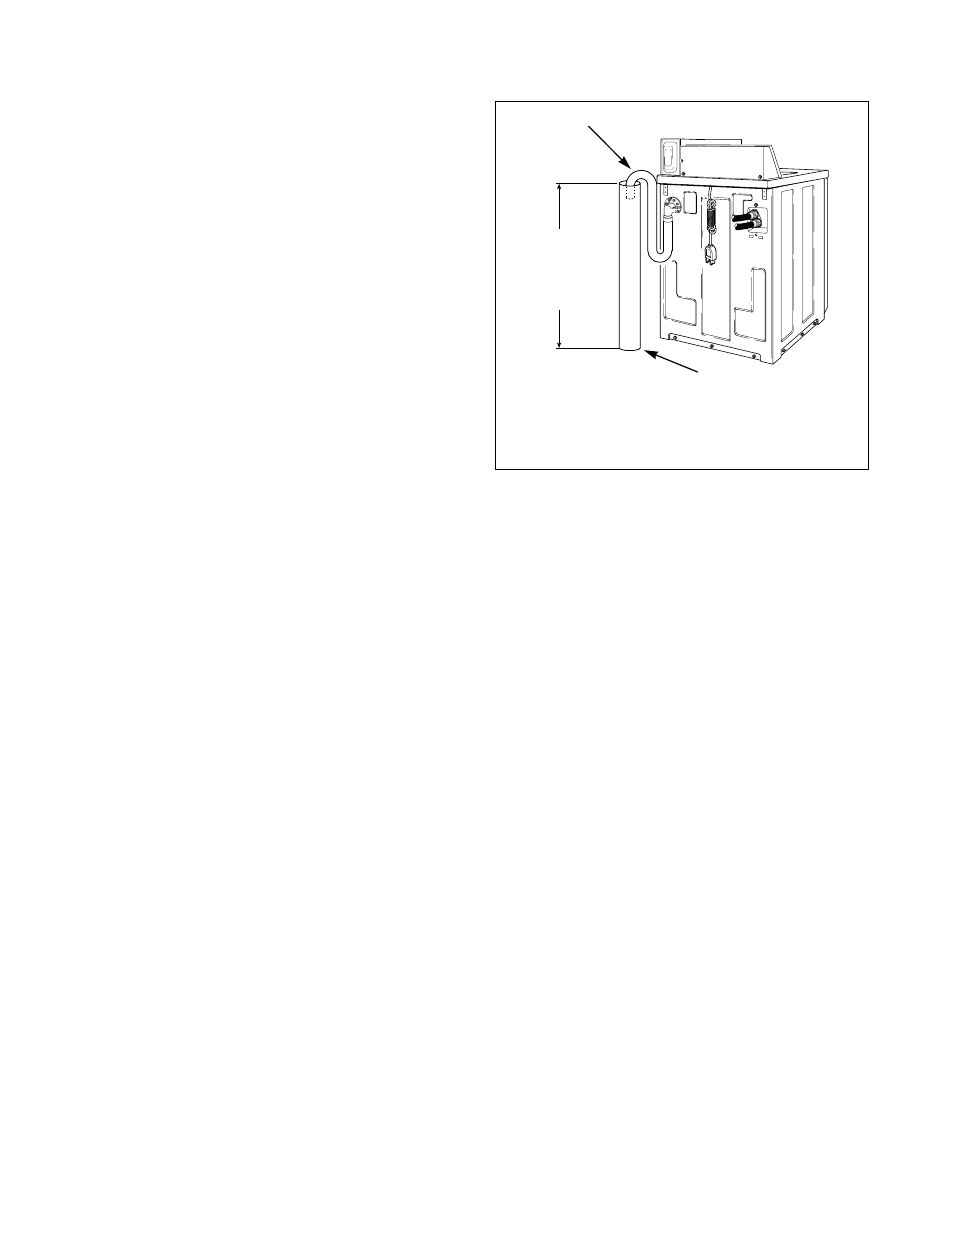
The curved end of drain hose MUST be installed
even with or above the height of the cabinet top of
the washer to prevent siphoning (refer to Figure 17).
If the drain facility is lower than the cabinet top, a
siphon break kit, Part No. 562P3, must be installed
in the drain hose to prevent this siphoning action
and drain hose MUST be cut to fit the washer
installation (refer to Figure 7). Use one No. 25863
Hose Coupling to splice hose. The No. 562P3 Siphon
Break Kit and No. 25863 Hose Coupling are
available as optional equipment at extra cost.
The standpipe or drain receptacle must be capable of
handling a minimum of 1-1/2 inches (3.8 cm) outside
diameter drain hose. The drain hose should fit loose
within the standpipe (it should not be snug fit). Never
install the drain hose into a “sealed” drain system as
air cannot escape and will restrict the water from being
drained from the washer. A sealed drain system may
also allow water to be pumped back into the washer
during agitation. Both of these conditions may result
in flooding of the washer.
Figure 17
W294I
1
Drain Hose
2
Standpipe
W294I
2
1
RECOMMENDED
STANDPIPE
HEIGHT
36 inches
MINIMUM
(92 cm)