HT instruments SOLAR I-V User Manual
Page 28
I-V400 - SOLAR I-V
EN - 26
17.
At any time it will be possible to analyze the current
recording status by pressing the MENU key. The following
information will be shown:
starting date and time of recording
the value set for the integration period
the number of periods elapsed from the beginning
of the recording
the remaining memory capacity for recording
Press the ESC key to exit the screen
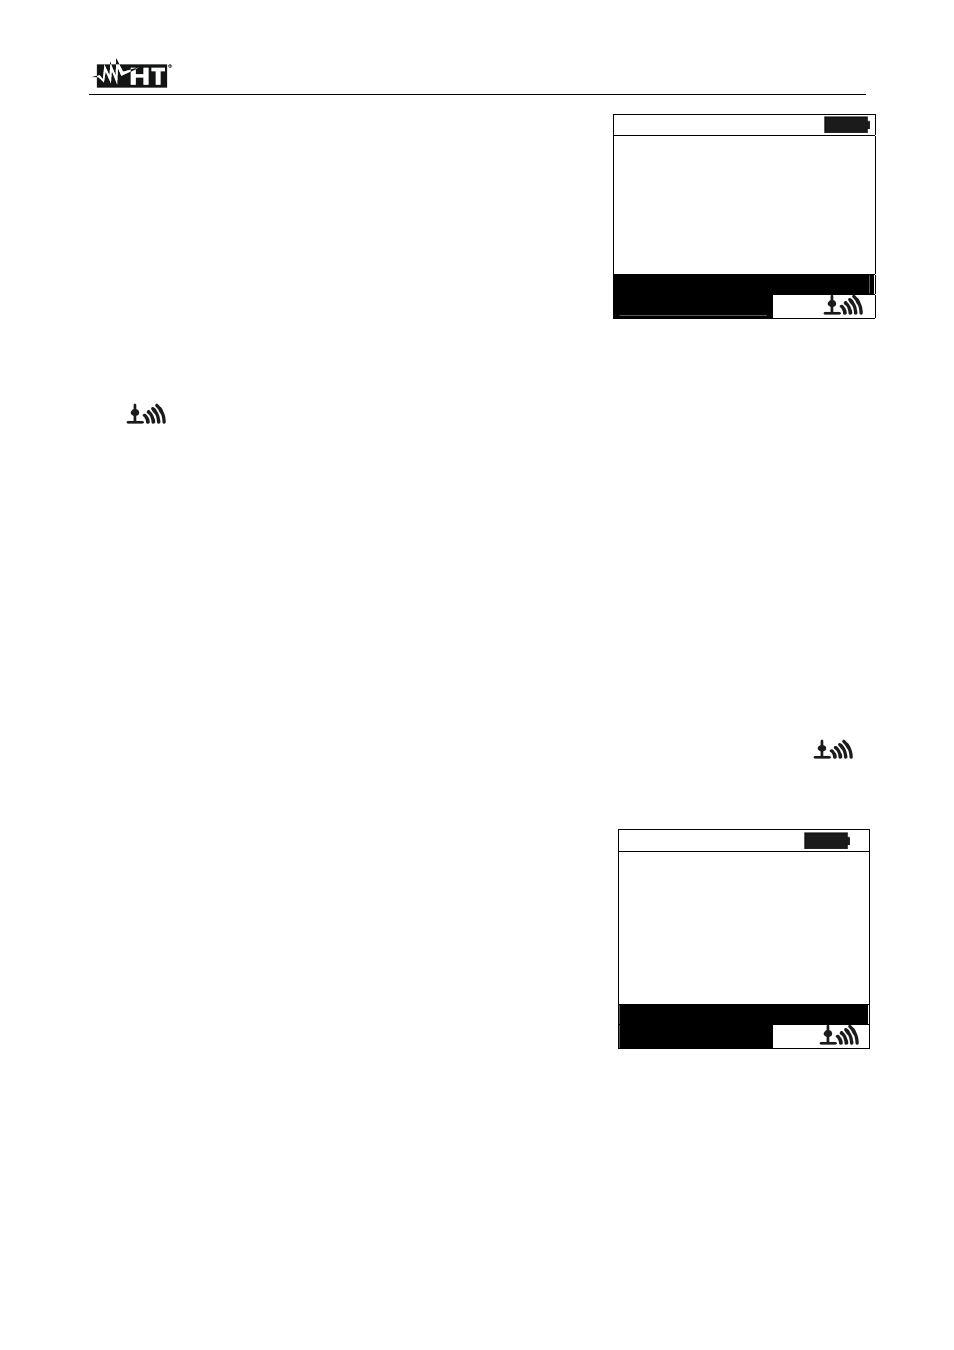
15/05/10 15:35:00
S t a r t
1 4 / 0 2 / 0 0 1 7 : 1 8 : 0 0
P e r i o d : 5 s
I P N u m b e r 6 1
R e c . T i m e
0 d 1 h
R e c . r u n n i n g
Select
M P P
18. Now it is possible to bring the unit SOLAR-02 near the PV strings to measure irradiation and
temperature by means of the relevant probes. When the distance between unit SOLAR-02
and SOLAR I-V does not allow the RF connection, on the display of SOLAR-02, the symbol
“
” flashes for approx. 30s and then disappears, while SOLAR I-V continues searching
for the connection for approx. 1 minute.
19. Position the reference cell onto the surface of the PV modules. Please refer to the relevant
User Manual for a correct assembly.
20. Put the temperature sensor in contact with the rear side of the module and fasten it with
some tape; prevent touching it with your fingers (as this could alter the measure).
21. Wait some seconds in order to permit a stable measure by probes and then connect the
irradiation and temperature probes respectively to the inputs PYRA/CELL and TEMP
of the SOLAR-02 unit.
22. Wait for “READY” message displayed on SOLAR-02. This event indicates that the
instrument has detected some data with solar irradiation > minimum limit threshold (see
§ 5.1.5)
23. Wait at least 1 minute in order to recording more valid samples
24. Disconnect the irradiation and temperature probes from unit SOLAR-02 and bring the unit
near SOLAR I-V (max distance 1m).
25. The main unit SOLAR I-V must be in EFF mode. If there is no flashing symbol “
”,
press key
to activate the RF connection search again.
26. Press the
key on SOLAR-02 to active the RF connection. On the main unit the message
“ RF connection active” is displayed
27. To stop testing, press the GO/STOP key on instrument
SOLAR I-V and confirm with ENTER that you want to stop
recording.
28.
The display of SOLAR I-V will show the message
“DOWNLOAD” to indicate that the data will be transferred to
the main unit during its various phases.
29. After the automatic data transfer phase, the instrument:
Do not show any results if do not exist on the PV
installation a “stable irradiance” condition more than the
minimum irradiance threshold.
15/05/10 15:35:00
I r r
9 7 1
W / m 2
P n o m 3 . 5 0 0
k W
T c
4 5 . 1
° C
T e
3 0 . 5
° C
P d c
3 . 1 2 5
k W
P a c
2 . 9 6 0
k W
n d c
0 . 8 6
n a c
0 . 9 5
A n a l y s i s R e s u l t
Select
E F F
Display the best performance values if during the recording, the Irradiance values
reached the “stable” condition and its values were higher than the minimum irradiance
threshold.
30. Press SAVE to save the results (see § 7.1) or ESC to exit the screen of the results and
go back to the initial screen