Caution, I-v400 - solar i-v – HT instruments SOLAR I-V User Manual
Page 22
I-V400 - SOLAR I-V
EN - 20
5.3.1. How to define a new PV module
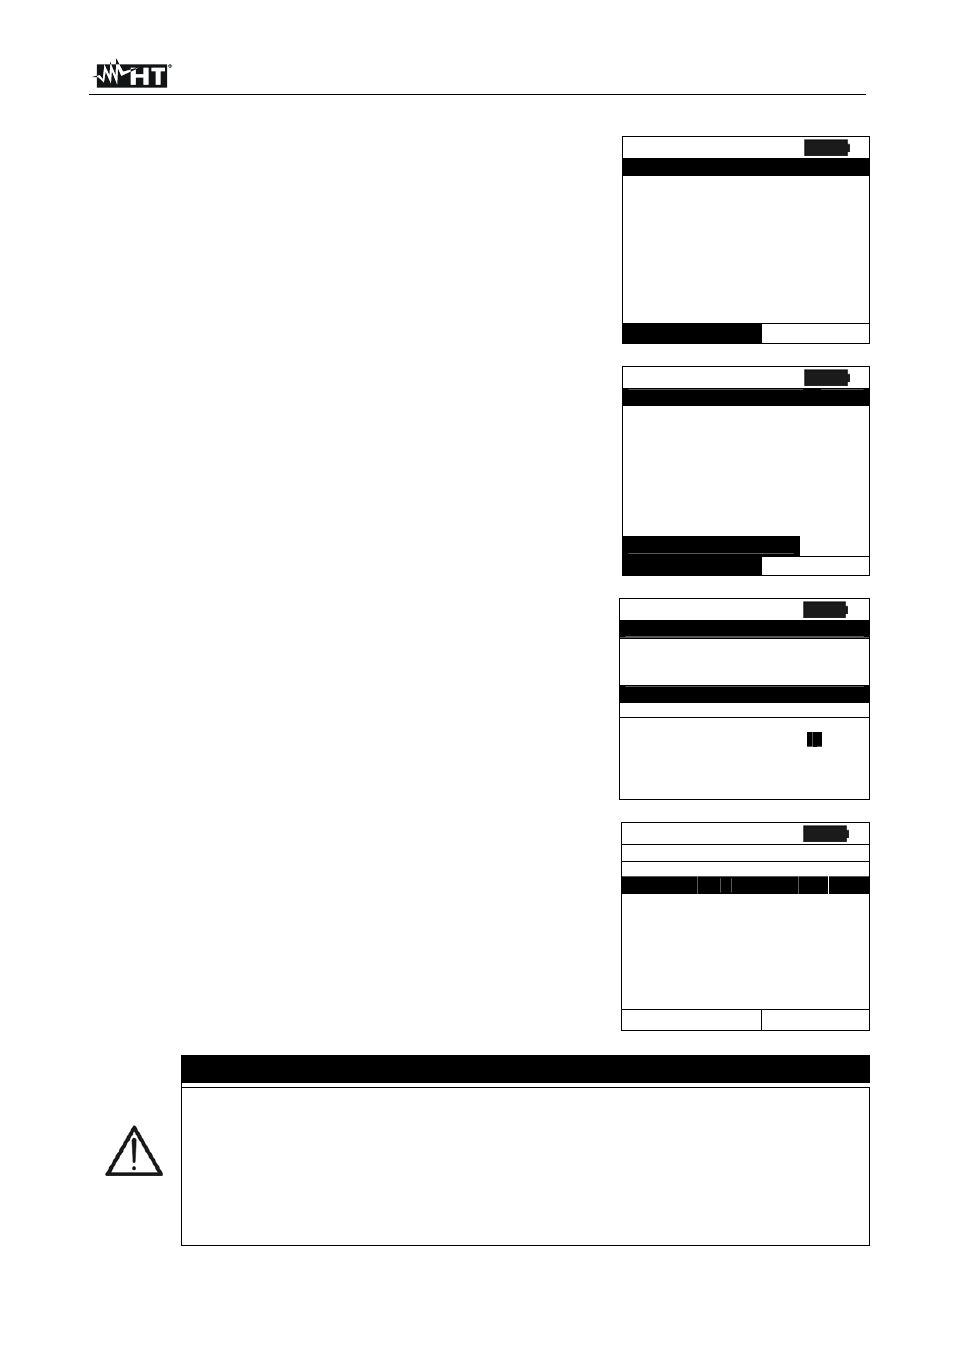
1. Move the cursor to “DB” by means of the arrow keys
(
,) and confirm with ENTER. The display shows the
screen with:
The type of selected module
The parameter associated to the module (see Table 1)
2. Select the “DEFAULT” module by means of the arrow
keys (
,) and confirm with ENTER.
15/05/10 15:34:26
T y p e : D E F A U L T
P m a x =
1 8 5
W
V o c =
4 4 . 5
V
V m p p =
3 7 . 5
V
I s c = 5 . 4 0
A
I m p p = 4 . 9 5
A
T o l l - =
0
%
Select
D B
3. Press ENTER, select the “New” command and confirm
again with ENTER. Use the arrow keys (
,) to scroll all
internal parameters.
15/05/10 15:34:26
T y p e : D E F A U L T
P m a x =
1 8 5
W
V o c =
4 4 . 5
V
V m p p =
3 7 . 5
V
I s c = 5 . 4 0
A
I m p p = 4 . 9 5
A
T o l l - =
0
%
N e w
Select
D B
4. By using the internal virtual keyboard it is possible to
define the name of the module (ex: SUNPOWER 210) by
means the arrow keys (
,,,). Press ENTER to digit
the characters of the desired name.
5. Press the SAVE key to save the inserted name of the
module as defined or ESC/MENU key to exit without
saving.
15/05/10 15:34:26
T y p e :
P m a x =
1 8 5
W
V o c =
4 4 . 5
V
K E Y B O A R D
S U N P O W E R 2 1 0
A B C D E F G H I J K L M N O P
Q R S T U V W X Y Z - +
0
1 2 3
4 5 6 7 8 9 S P A C E
D E L
6. Digit the value of each parameter of the defined module
(see Table 1) based on the manufacturer’s data sheet.
Move the cursor to the row of the parameter by means of
the arrow keys (
,) and set the value by means of the
arrow keys (
,). Press and hold (,) for a quick
setting of values.
7. Confirm with SAVE and the “Saved data” message is
displayed for a while. Press ESC/MENU key to exit
without saving and to go back to the previous screen.
15/05/10 15:34:26
T y p e : S U N P O W E R 2 1 0
P m a x
=
0
W
V o c =
0 . 0
V
V m p p =
0 . 0
V
I s c = 0 . 0 0
A
I m p p = 0 . 0 0
A
T o l l - =
0
%
D B
CAUTION
If the value of any parameter is unknown press and hold the HELP key for
some seconds to set the default values
After pressing the SAVE key, the meter checks all the conditions shown in
Table 1 and, if one or more of these conditions do not occur, some error
messages are shown by the display (§ 6.5) and the meter does not save
the configuration before any error is solved. Solve the error condition
before saving.