Triton RT2000 X2 User Manual User Manual
Page 31
27
G
ENERAL
M
AINTENANCE
4.
Grasp the handle below the printer feed slot and pull the
release pin located on the right side of the printer bracket.
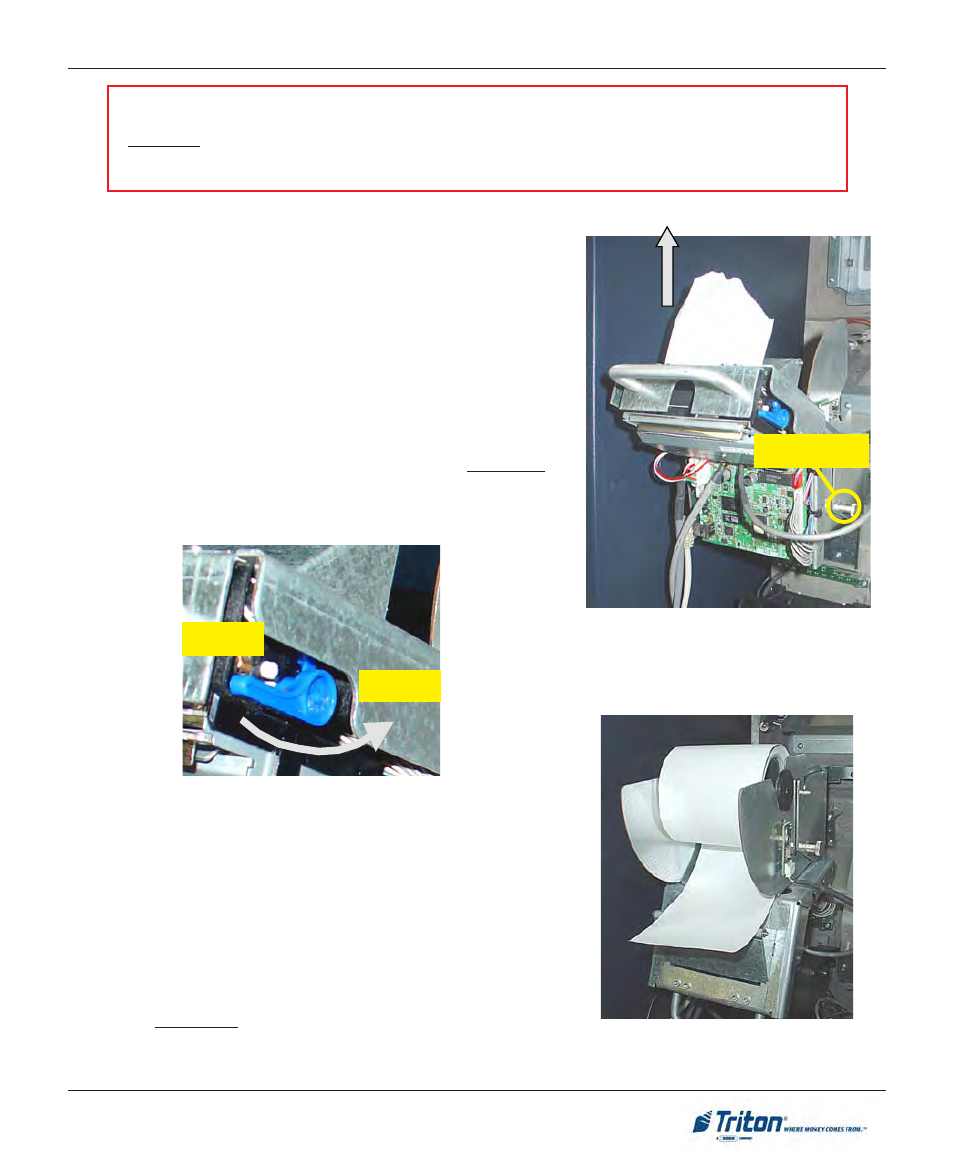
6.
Release (O
PEN
) the blue tension lever located on the printer/
cutter assembly. Remove any paper from the printer/cutter
assembly. Move the tension lever back to the CLOSED
position (blue lever facing towards the right). Rotate the
printer assembly down to the operate position.
** CAUTION **
DO NOT pull receipt paper backwards through the printer with the tension rollers closed!
This may leave paper fragments that can cause paper jams.
Grasp handle and lift up.
Pivot assembly up.
Tension lever on printer/cutter assembly.
7.
Install the new paper roll on the spindle. Unwind enough
paper to ensure the glued end that secured the paper roll is
removed.
Note: The spindle is inserted so that the paper will feed
from the BOTTOM of the roll when it is installed on the
paper bracket.
8.
Place the paper roll (w/spindle) on the paper support
bracket by sliding ends of spindle on to the bracket.
Paper roll installed in bracket.
Open
Closed
5.
Rotate the assembly up and release the pin until it locks in
place as shown at right. Note: This position also allows
receipt access for printing status if using the Rear
Operator Service Panel
Release pin