Star Water Systems SJ05SAT20H User Manual
Page 7
© 2014 Star Water Systems. All rights reserved. 12
© 2014 Star Water Systems. All rights reserved. 13
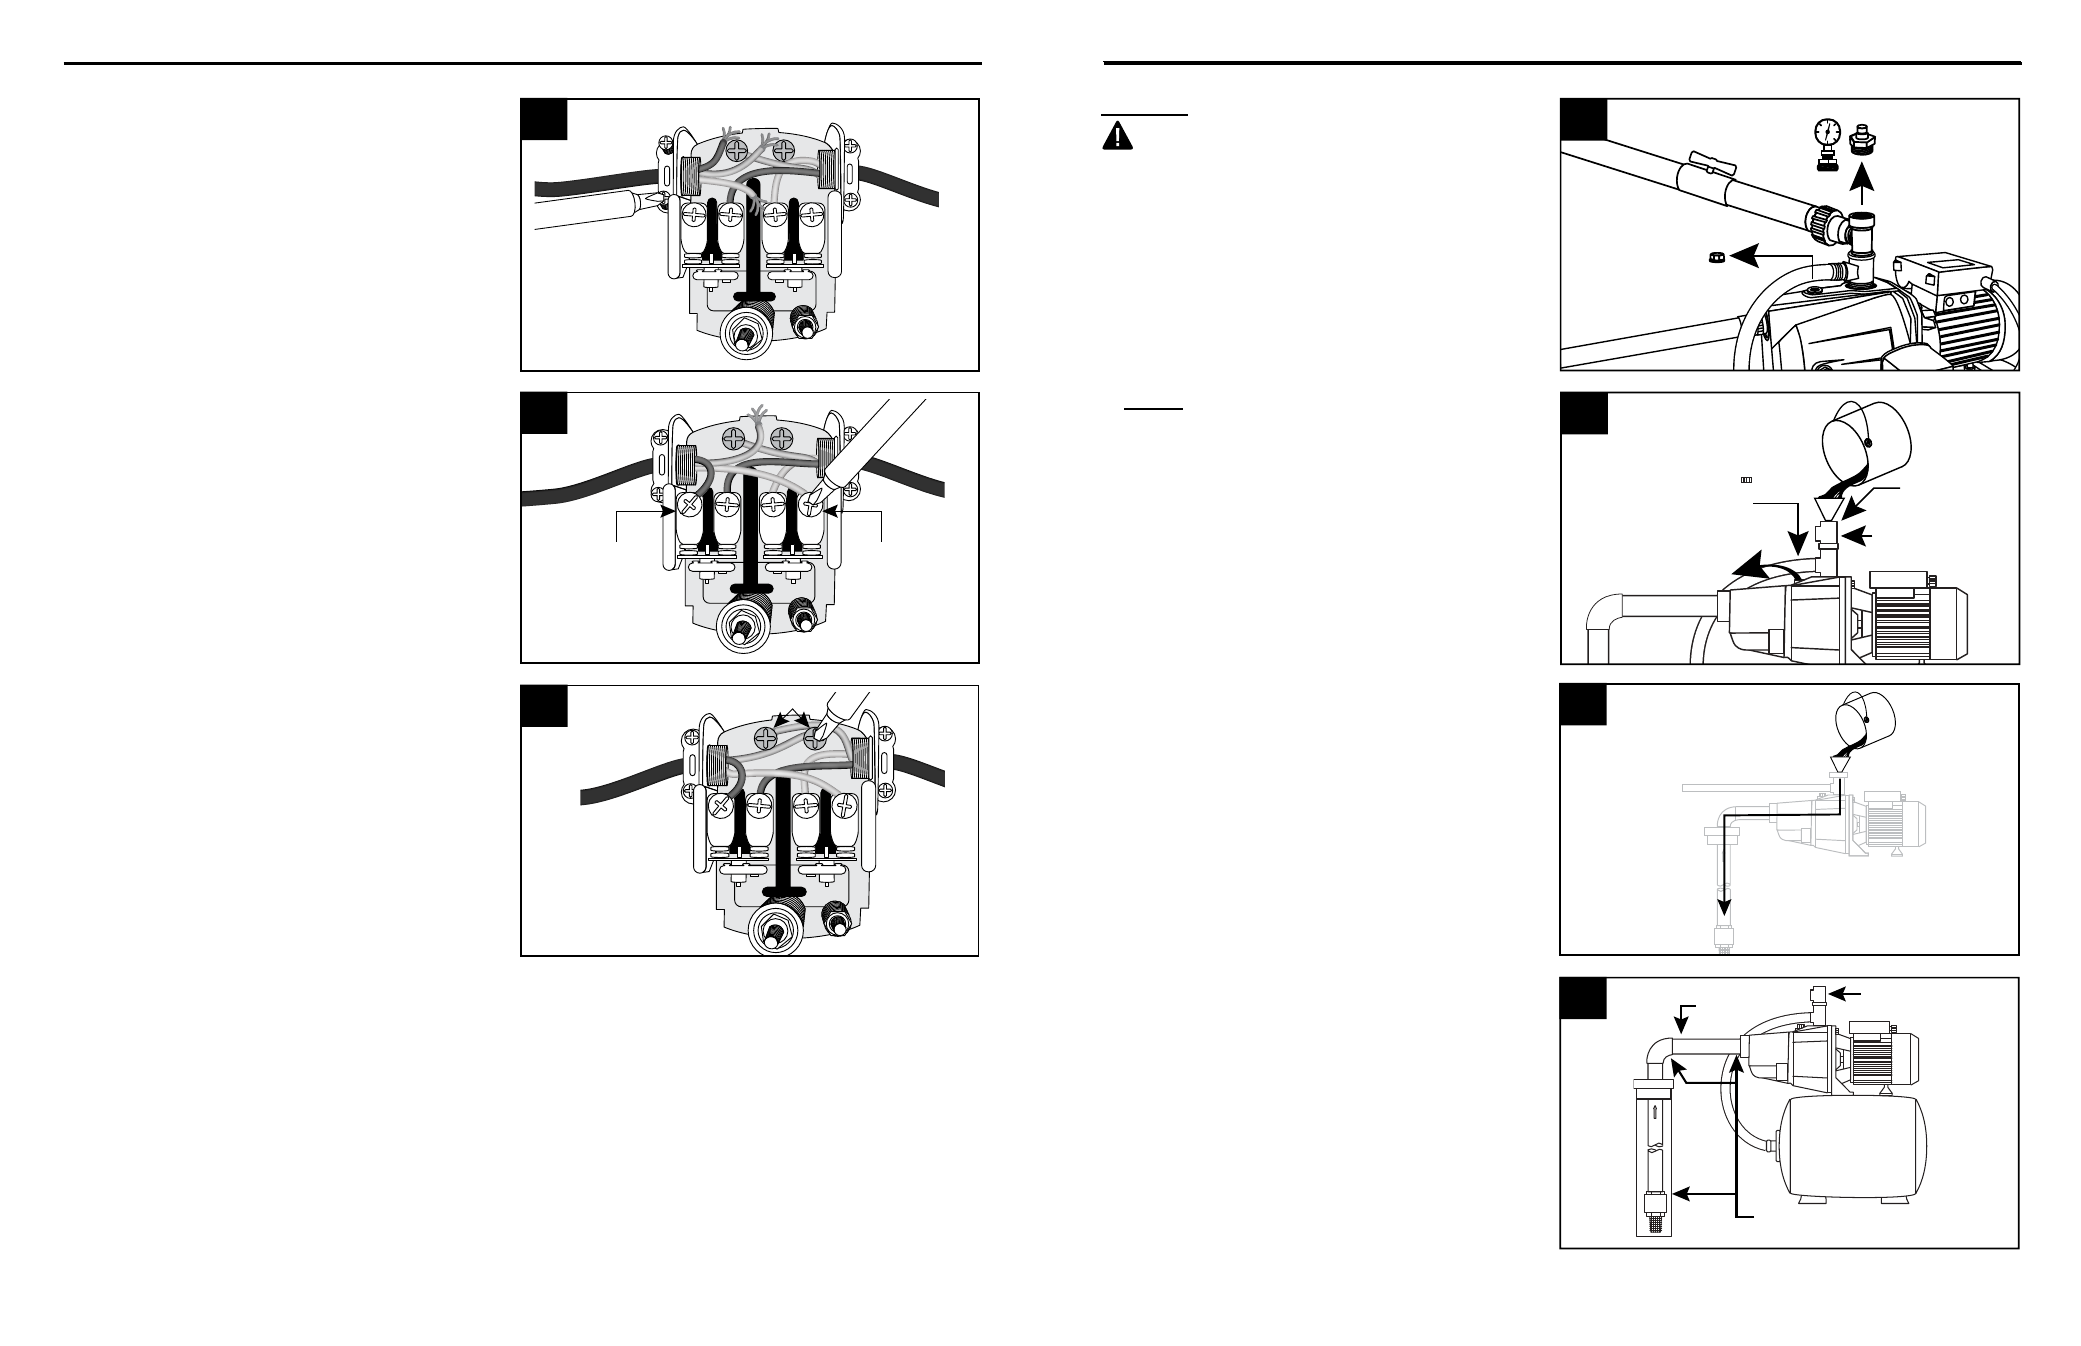
PUMP ELECTRICAL CONNECTIONS
Wire from
motor
Wire from
power
supply
3. Thread the electrical wire (not included) from
the power supply through the strain relief and
tighten both screws on the strain relief. Do
not crush wire.
3
Wire from
motor
Wire from
power
supply
Outside
terminal
Outside
terminal
4. Connect the two wires from the power supply
to the two outside terminals on the pressure
switch.
4
PUMP PRIMING AND STARTUP
Wire
from
motor
Wire from
power
supply
Ground Screws
5. Connect the green ground wire from the
power supply to the remaining green ground
screw in the pressure switch and re-attach
the pressure switch cover.
5
PRIMING
CAUTION: All pumps must be primed
(filling the cavity with water) before they are
first operated. This may take several gallons
of water, as the suction pipe will be filled in
addition to the cavity of pump/tank.
1. Remove pipe plug or pressure gauge (not
included) at the top of the discharge tee and
the vent plug in front of the discharge tee.
Vent Plug
Pressure
Gauge or
Pipe Plug
Suction Pipe
1
2. Slowly fill the discharge tee with water until
water overflows the vent plug opening.
Replace the vent plug loosely.
NOTE: It will take several minutes to fill pump/
tank and suction pipe completely.
Vent plug
Vent plug
opening
Discharge Tee
Priming plug
opening
2
3. Be sure entire suction pipe is filled when
priming. Depending on the length of suction
pipe, many gallons will be needed to fill the
entire system.
Suction
Pipe
3
4. Check to be sure water in the cavity of pump/
tank stays constant. If water level goes
down, it could indicate a leak in the foot
valve, check valve or suction pipe.
Suction
Pipe
Water
Level
Check for
Leaks
4