Step 1 site selection for drain basin – Star Water Systems S1108 User Manual
Page 3
3
© Copyright 2002. All rights reserved.
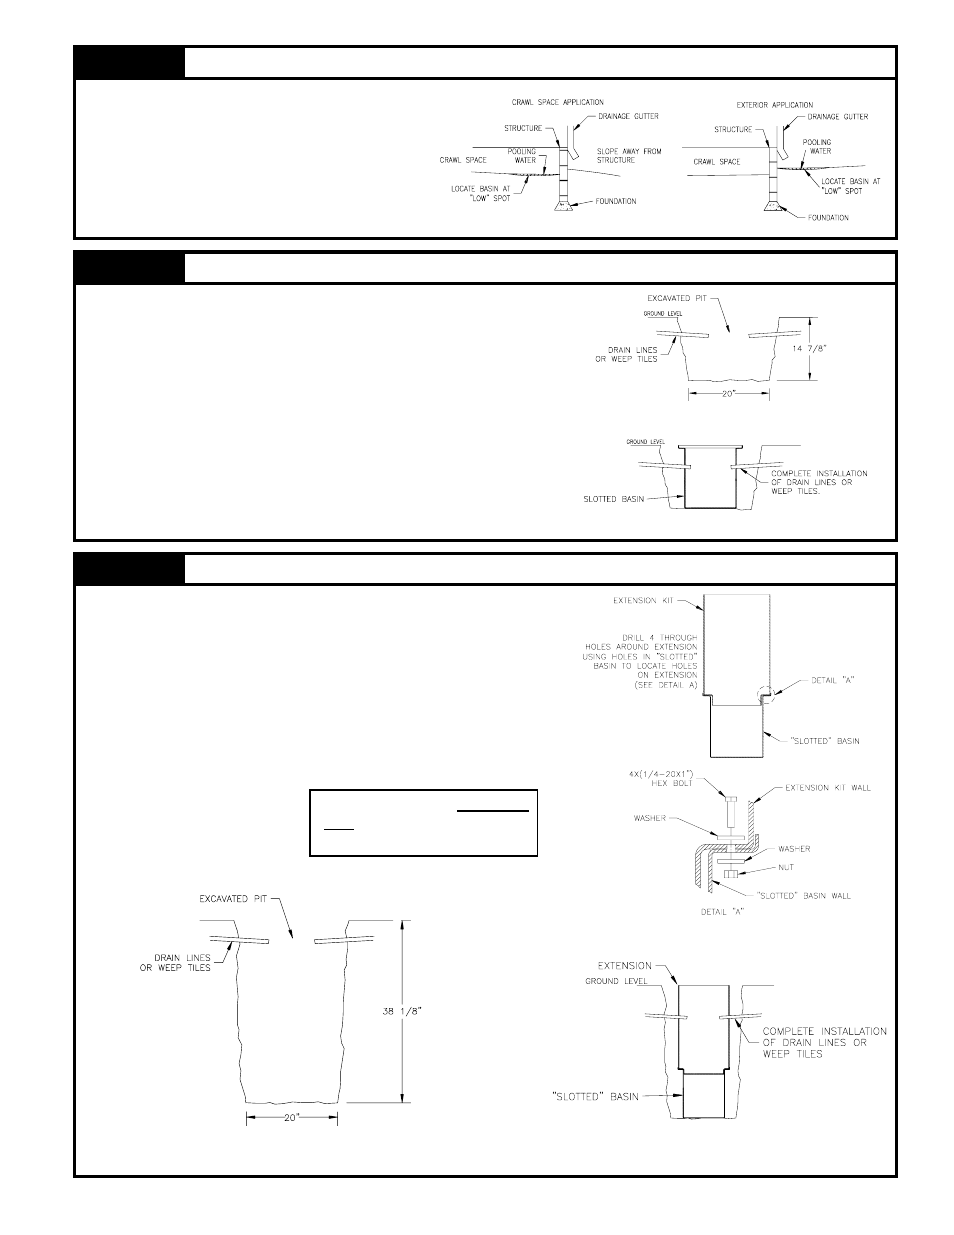
STEP 1
Site Selection for Drain Basin
Note: If freezing of the discharge line is possible, refer to Step 6.
1.1)
Select a location that is a low spot or an area that naturally
collects water. Refer to Figure 1.1. Grade crawl space so
water will drain toward pit. Place plastic sheeting on
ground.
Note: If weep tiles or drain lines are to be used, then select a basin
location that will provide the most efficient drainage.
Figure 1.1
STEP 2
Installation of Basin (Typical Crawl Space Application)
Note: Proceed to STEP 2A if installing Slotted basin with extension kit.
2.1)
Excavate the site to the dimension shown in Figure 2.1.
Note: If weep tiles or drain lines are to be used, rough-in plumbing should be completed at
this time.
2.2)
Lower basin into pit (Refer to Figure 2.2). Complete installation of weep or drain lines.
Figure 2.1
Figure 2.2
STEP 2A
Installation of Slotted Basin with Optional Extension Kit
2A.1) Excavate the site to the dimensions shown in Figure 2A.1.
Note: If weep tiles or drain lines are to be used, rough-in plumbing should be completed
at this time.
2A.2) Attach the extension to the basin with the four bolts provided in the extension kit.
Refer to Figure 2A.2.
2A.3) Lower basin into pit and complete the installation of weep tiles or drain lines. Refer
to Figure 2A.3.
Note: If concrete is to be poured around the top of the extension, then make the pit depth
34½ to provide for access.
Figure 2A.1
SK1798
SK1800
Figure 2A.3
Figure 2A.2
SK1801
SK1803
SK1802
Extension Kit is an Accessory
Item and must be purchased
separately.