Hired-Hand PowerTrak Jr User Manual
Page 12
Part No. 4801-0172 Rev 10/05
PowerTrak Jr.
Page 12 of 18
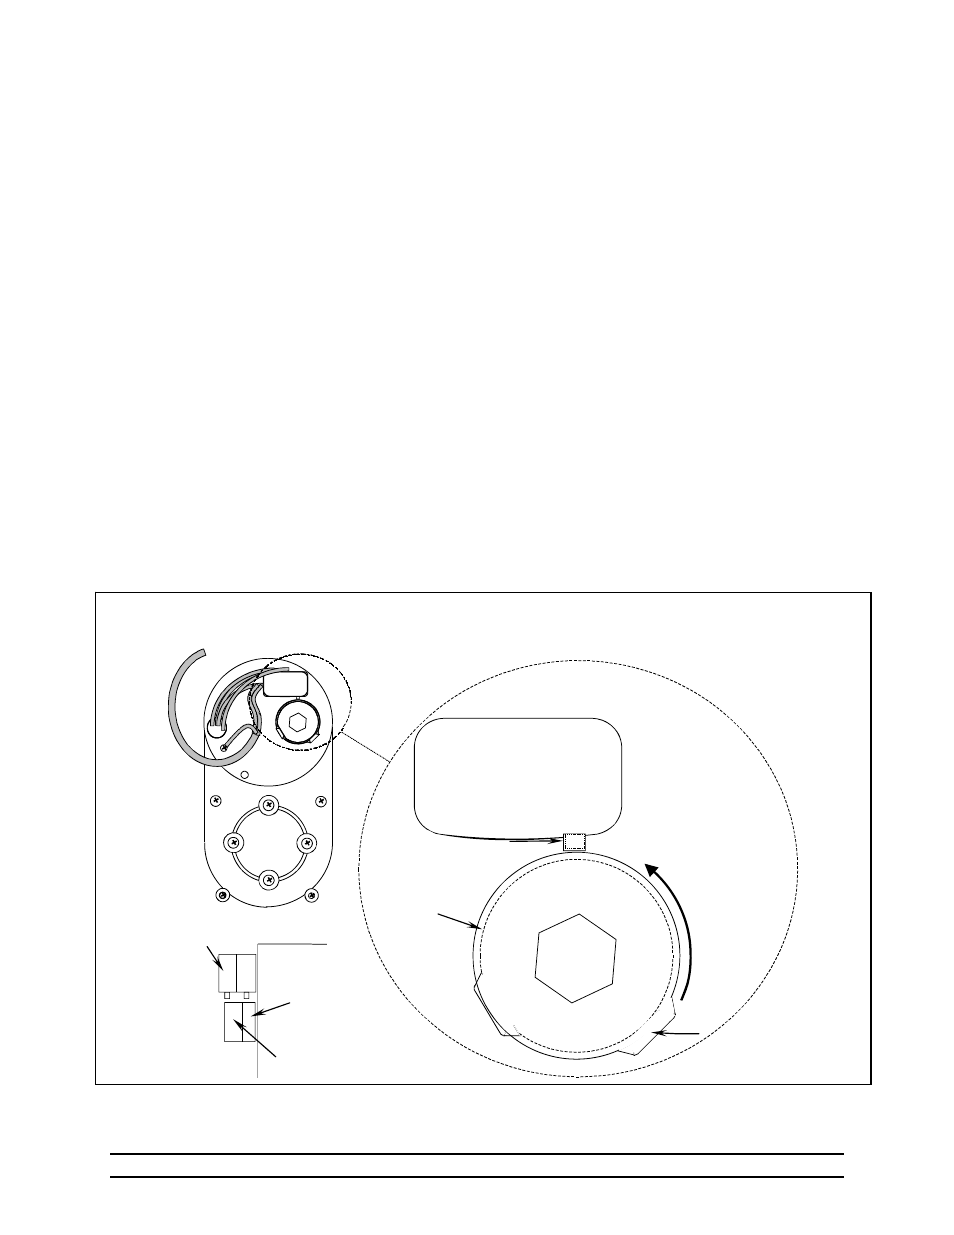
8. Run the load block downward until the vents
reach their fully closed position. Note: If the
motor stops before the vents are fully
closed, turn off power and rotate the
lower limit knob counterclockwise (Fig.
6). Then turn on power and continue
closing vents
9. Turn off electrical power to machine.
10. See Fig. 6 to identify lower limit knob.
Carefully rotate the lower limit knob
clockwise until the cam (raised edge) of the
knob just depresses micro-switch. This
action sets the lower limit of travel of the
load block. Note: The lower limit knob
may be stiff and will require a firm grip to
turn. Caution! Do not allow the upper
limit knob to rotate during this
procedure.
11. Test - Turn on electrical power and run the
load block upward about one inch, then
downward to test that the lower limit switch
is set correctly. If adjustment is required,
turn off electrical power, rotate the lower
limit knob as required, and repeat test.
Repeat this procedure until the lower limit
knob is set at the desired position.
12. Operate machine to test limit settings. Make
any required adjustments.
13. Replace end cap.
14. Close access door and replace cabinet
cover.
15. This completes limit settings.
Figure 6
View of Motor With End Cap Removed
(115/230 VAC)
Limit switch
Micro-switch buttons
Upper limit knob
(adjacent to motor)
Lower limit knob
(knob farthest
from motor)
Micro- switch
End View
Side
View
Non-adjustable
upper limit knob
Adjustable lower limit knob
Motor