Hired-Hand Tunnel Doors User Manual
Page 8
Part No. 4801-3500 Rev 2/08
Installing Tunnel Door
Page 8 of 16
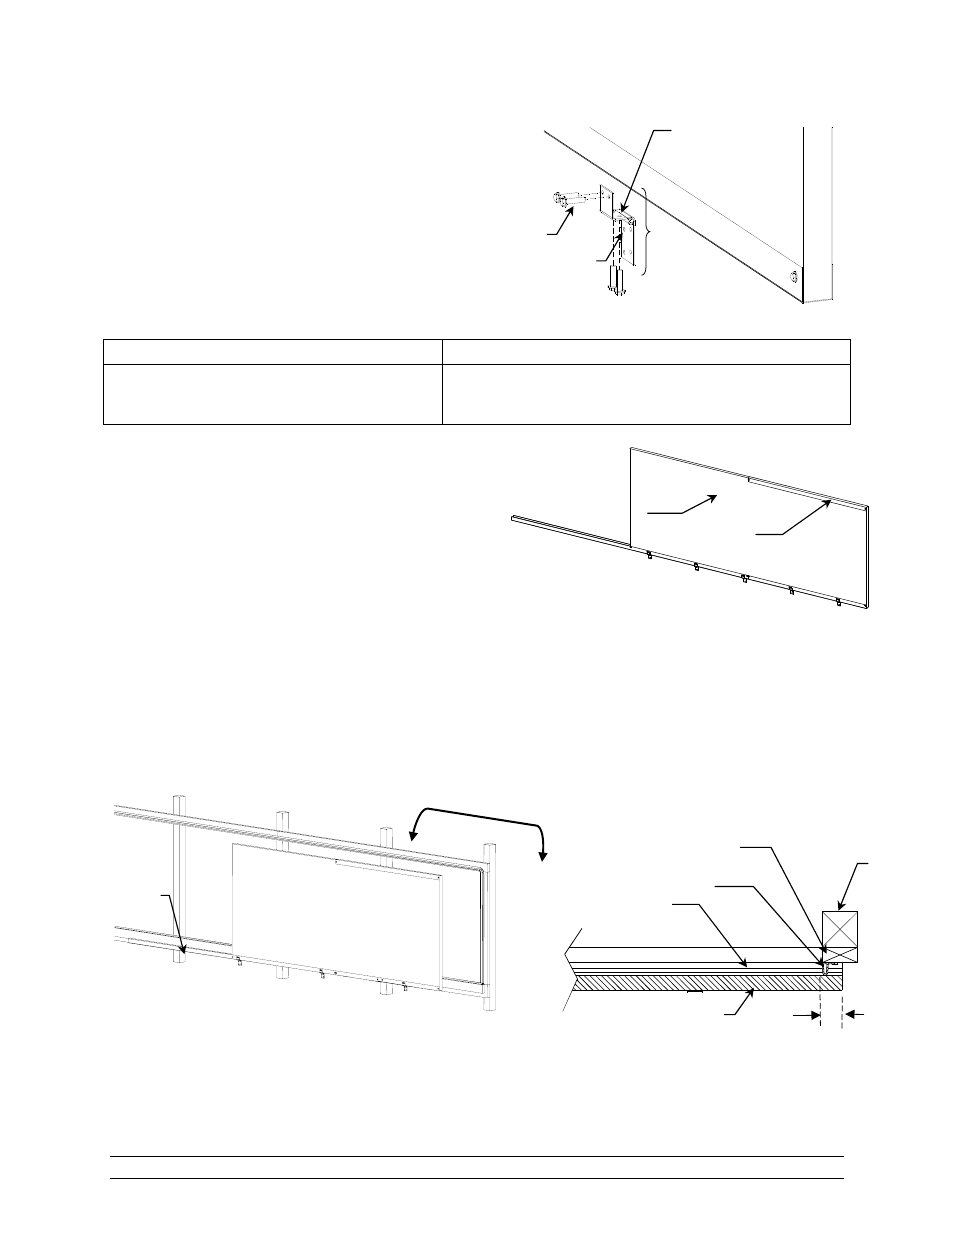
Figure 14 – Top Channel Assembly
Figure 15 – Attach First Door panel Offset
Panel
Top
Channel
Section A-A
P-Seal
Section A-A Top View
Post
Side/Top Seal
Bottom Seal
Door Panel
2"
2 x 4 Framing
NOTE: Always attach the bottom bend of the
hinge to the bottom face of the channel first.
Attaching the hinge to the face of the panel first will
cause the bottom bend to tilt at an angle and the
hinge will not be parallel with the panel surfaces or
the face of the Hinge Board. See Figure 13.
5.4
Install Top Channel
Start to assemble Top Channel:
4 Foot Door Top Channel
5 Foot Door Top Channel
Cut a 10 foot Channel in half making two 5 foot
pieces. Set one piece aside to be used on the
opposite end of the door assembly.
Cut one foot from a 10 foot channel. Save 9 foot channel to
be used on the opposite end of the door assembly.
Slide the shortened Top Channel onto the panel until the
end of the channel is flush with the outside end of the panel.
Start the first screw approximately 3/8" from the end of the
panel and centered on the side of the channel. The next
screw to be approximately 3/8" from opposite end of channel
and centered on side of channel. See Figure 14.
5.5
Install First Door Assembly
Lift the first door assembly and rest the bottom channel on the Bottom P-Seal. With hinges flipped
down, place the door assembly flush with the outside of the bulb of the Side/Top seal. See Figure 15.
NOTE: While it is normal for the Bottom P-Seal to deform under the
weight of the door, do not let the Bottom P-Seal roll over. If it is necessary to
slide the door assembly on the Bottom P-Seal do so carefully so it will not tear
or roll.
Figure 13 – Attach Hinge
Hinge
Self Tapping Screw
Attach this surface
first