Hired-Hand Tunnel Doors User Manual
Page 6
Part No. 4801-3500 Rev 2/08
Installing Tunnel Door
Page 6 of 16
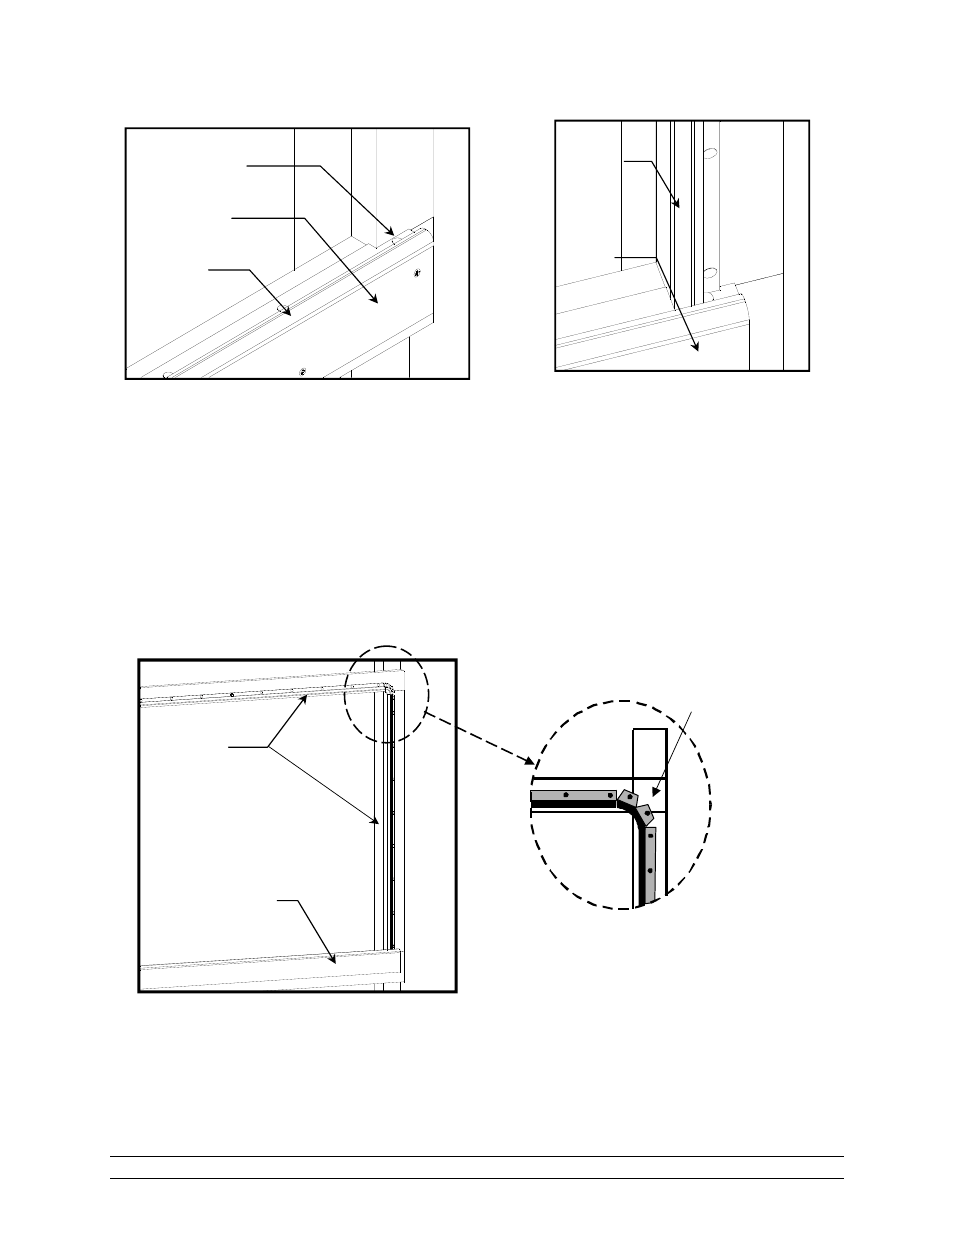
NOTE: At each corner cut
slits in the flat portion of the
seal to allow it to bend
around the corner as
shown.
Figure 8 – Side and Top Seal
Figure 9 – Install the Foam Seal
P-Seal
Hinge Board
Notch
Side/Top
P-Seal
Hinge
Board
Do not drive the head of the screw through the surface of the seal. Stretch the seal tight up the side of the tunnel
opening, keeping the bulb flush with the opening, and apply a screw about 4" from the top of the tunnel opening
through the flat of the seal. See Figure 8.
Finish screwing the rest of that length of the Side/Top seal at about 6" intervals. At the corner cut slits in the
flat portion of the seal to allow it to bend around the corner. Drive a screw through each flap created by the cuts.
See Figure 9.
Stretch the Side/Top seal across the top of the tunnel opening, screwing the flat of the seal about every 6". Do
not let the seal sag. At the opposite corner cut the slits again and continue to screw the seal tightly down the other
side. Be sure to have some extra seal at the end to allow material to be cut off for a flush fit as at the start.
P-Seal
Hinge
Board
Figure 6 – P-Seal Assembly
Figure 7 – Side Seal Corner