Reference junction compensation accuracy, Display, Reference junction compensation accuracy -12 – Yokogawa µR20000 User Manual
Page 25: Display -12

3-12
SM 04P01B01-01E
Reference Junction Compensation Accuracy
● Procedures
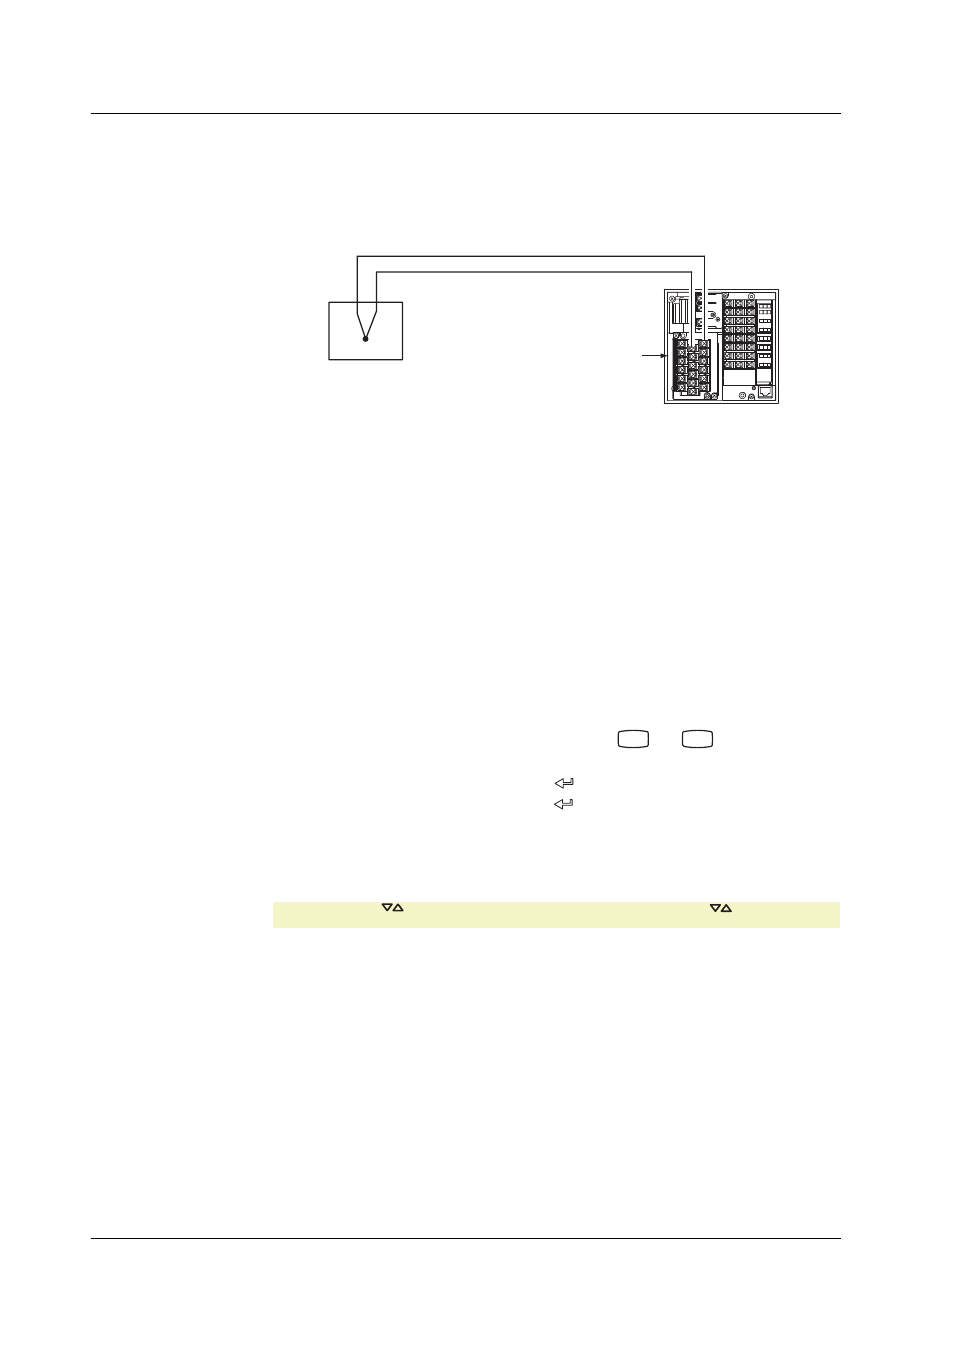
Set all channels to thermocouple type T. Measure 0°C on one of the channels and
check that the display is within the criteria below.
Criterion: ±0.5°C
Calibrated thermocouple wires
0°C standard temperature device
(Model: ZC114 from Coper Electronics Co., Ltd. or equivalent)
+/A
–/B
Input terminals
• Use a calibrated thermocouple, and wires of 0.5 diameter or less without a terminal
chip. Also, pay attention to the measurement accuracy.
• Monitor the 0°C standardized temperature bath at all times, and confirm that it is
within 0°C ±0.01°C.
• When using a 0°C standard temperature device, the tip of the thermocouple floats
10 mm off the bottom.
• Perform the test in a stable environment. If drafts are present and may influence
the results, position the equipment to avoid them.
• After connecting the thermocouple, allow a warm-up time of 30 minutes or more
before beginning measurement.
• Always use terminal covers.
• When measuring, filters may be applied.
Display
● Procedures
1.
Turn ON the power switch while pressing the
MENU
and
CH UP
keys. Menu = A/D
Adjust is displayed.
2.
Select Menu = Test, and press the
key.
3.
Choose Test = Disp and press the
key.
The test pattern is displayed. Each time you press the DISP key the display
pattern changes. For each pattern, check that there are no missing parts,
abnormalities, or other defects. Press the
ESC/?
key to return to the Test = Disp
screen.
* Select using the key. You can hold down the SHIFT key while pressing key to reverse the
key’s action.
● Displayed Pattern
• All pixels lit: status display also lit
• All pixels not lit
• Horizontal stripes: 2 pixels each lit/not lit
• Vertical stripes: 2 pixels each lit/not lit
3.4 Test Procedures
