AVerMedia Technologies AVERDIGI EB5416DVD User Manual
Page 42
36
OSD MENU
Description
0080
5005
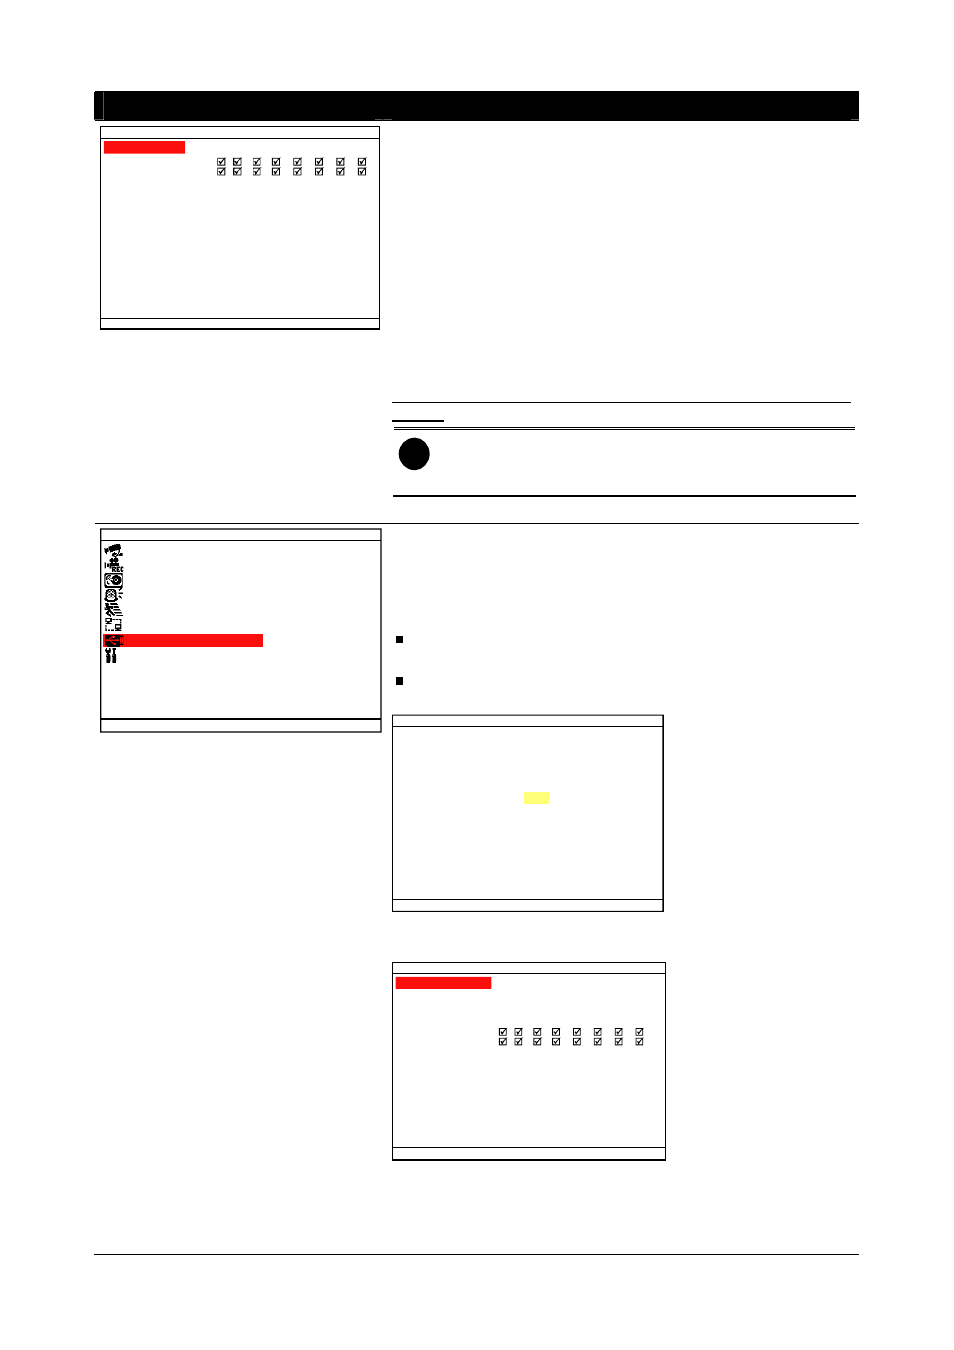
NETWORK SETUP
IP MODE
NW ENABLE
VIDEO PORT
UPGARDE PORT
1
2
3
4
9
10 11
12
5
13
6
14
7
15
8
16
NW ENABLE:
Allow internet remote user to playback or monitor the channels.
Without enabling the network function, the channels cannot be
playback or monitor from remote site.
VIDEO PORT:
A port for the remote connection. Any port can be assigned as a
video port, except the ports already used by the network
services. The default video port is 80.
UPGRADE PORT:
A port for the remote update DVR system firmware. Any port can
be assigned as an upgrade port, except the ports are already
used by the network services. The default upgrade port is 5005.
For Upgrading DVR firmware, please contact your local
dealer.
i
Please DO NOT cut off the power of the DVR system
while the firmware is upgrading. Power failure will cause
the permanent damage of the DVR system.
MAIN MENU
CAMERA
RECORD
HARD DRIVE
SENSOR / ALARM
MOTION
NETWORK
BACKUP
SYSTEM
BACKUP SETTING
Select the backup mode – USB or DVR+RW. A player
application will be included in the backup folder. Before starting
backup process, plug in the USB storage device or place the
DVR+RW disk into DVD-ROM drive.
USB: Using USB device (ex. Pen drive or External Hard
disk) to backup partial recorded video and playback on PC.
DVD+RW: backup partial recorded video on DVR+RW disk
and playback on PC.
BACK U P SETTING
BACKUP SELECT USB
After select the backup mode, user need to select the backup
period and hard disk.
BAKCUP SETTING
HARD DISK : HDD 1
START TIME
END TIME
: 2001 / 01 / 05
13 : 08 : 13
: 2008 / 01 / 04
10 : 00 : 01
CHANNEL
CALCULATE SIZE
BACKUP EXECUTE
89MB
1
2
3
4
9
10 11
12
5
13
6
14
7
15
8
16
1.
Select the START TIME and END TIME.
2.
Select the channels which user wants to backup.
3.
Select the CALCULATE SIZE to calculate the size of
selected backup file.