Steelcraft Automotive 180310 RUNNING BOARD User Manual
Page 3
ALUMINUM VIEWPOINT RUNNING BOARDS
2014 SORENTO
Page 3 of 8
12/4/13 Rev1 (DP)
14. Remove the front Support Bracket from the front Bracket. Bolt the Support Bracket to the back of the
pinch weld with (1) 6mm x 25mm Hex Bolt, (2) 6mm x 18mm Small Flat Washers and (1) 6mm Nylon
Lock Nut, (Figure 17). Leave hardware loose at this time.
15. Move to the center location and reinstall the Center Bracket. Bolt the mounting tab on the Bracket to the
pinch weld with (2) 6mm x 25mm Hex Bolts, (4) 6mm x 18mm Small Flat Washers and (2) 6mm Nylon
Lock Nuts, (Figure 17). Leave hardware loose at this time.
16. Move to the rear Bracket location. Reinstall the Bracket and repeat Step 15 to attach the rear support
tab on the Bracket, (Figure 17).
17. Reattach the lower rocker cover with the factory screws, (see Step 12). NOTE: Trim the edge of the
rocker cover around the 6mm Hex Bolts in pinch weld as required for proper fit and wrench access.
18. Temporarily attach the front Bracket to the front Support Bracket and Bolt Plate. Hold the large plastic
cover removed in Step 1 up against the bottom of the front Bracket. Mark the location of the Bracket
onto the inside of the cover, (Figure 18A). Remove the front Bracket. Cut a slot in the cover with a
sharp knife or hacksaw blade, (Figure 18B). IMPORTANT: Only remove material necessary to clear
the front Bracket. Do not cut through the inner or outer edge of the cover.
19. Next, locate the hole in the cover for the center Bracket mounting location. Trace the Bracket outline
onto the cover. Cut a section out of the cover to clear the mounting tab on the Bracket, (Figure 18B).
IMPORTANT: Be very careful and do not cut complete through the outer edge. Remove the center
Bracket and reinstall the plastic cover with the factory hardware.
20. Reinstall the front and center Brackets.
21. Reinstall the Running Board. Align, adjust and fully tighten all hardware at this time.
22. Repeat Steps 1 - 21 for the driver side Running Board installation.
23. Do periodic inspections of the installation to make sure that all hardware is secure and tight.
To protect your investment, wax this product after installing. Regular waxing is recommended to add a
protective layer over the finish. Do not use any type of polish or wax that may contain abrasives that could
damage the finish.
Aluminum polish may be used to polish small scratches and scuffs on the finish. Mild soap may be used also to
clean the Running Board.
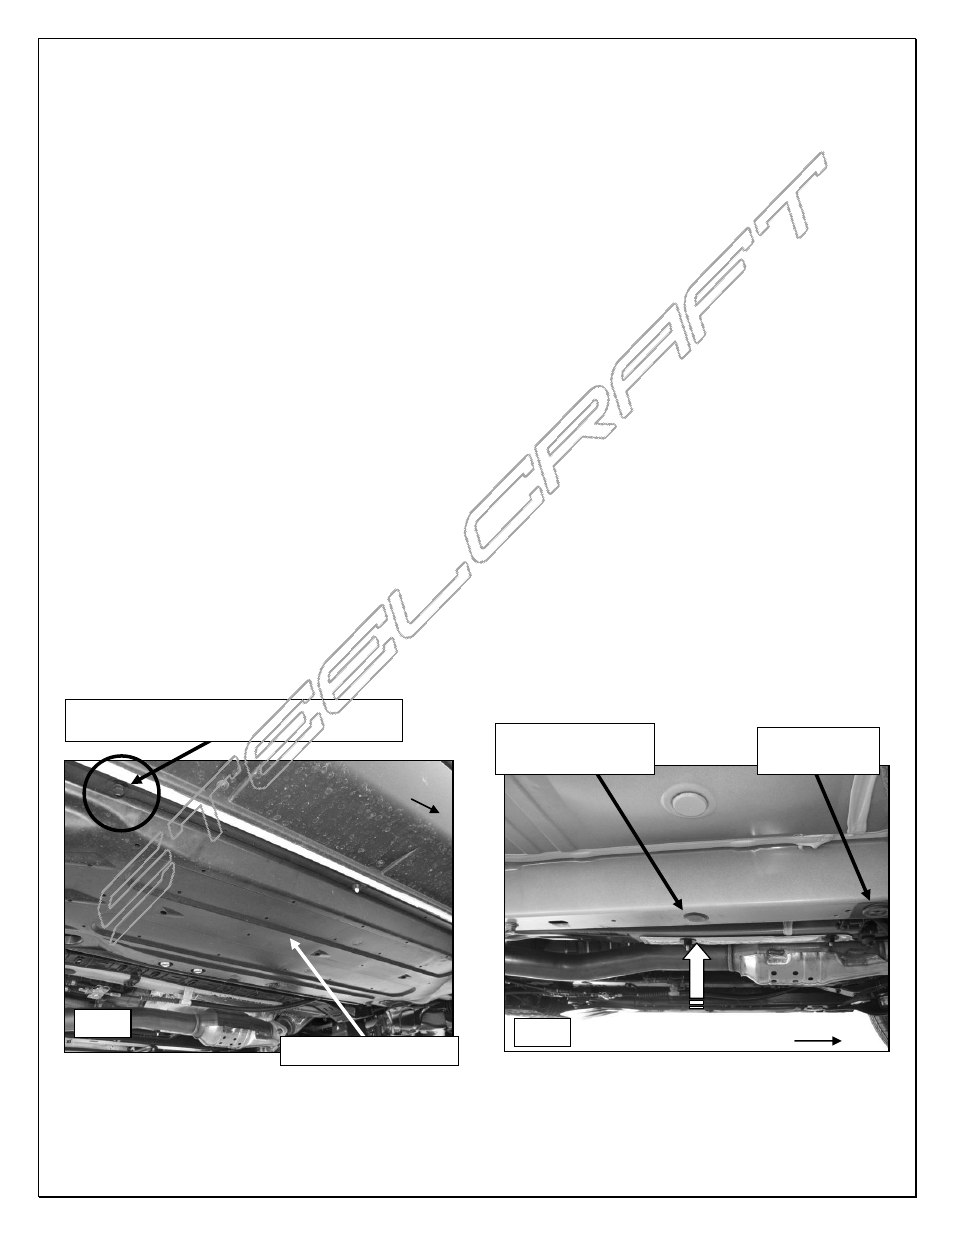
Passenger Side Installation Pictured
Fig 1
Fig 2
Do not remove
this plug
Front
Remove plastic cover
Front
Remove this rubber
plug only
Center Bracket will attach to this threaded
hole for the plastic cover (see Step 5)