Filters and maintenance, Cleaning and care, Replacing the light bulb – Bosch DHI645H grau-metallic Flachschirmhaube 60 cm User Manual
Page 12
12
Filters and maintenance
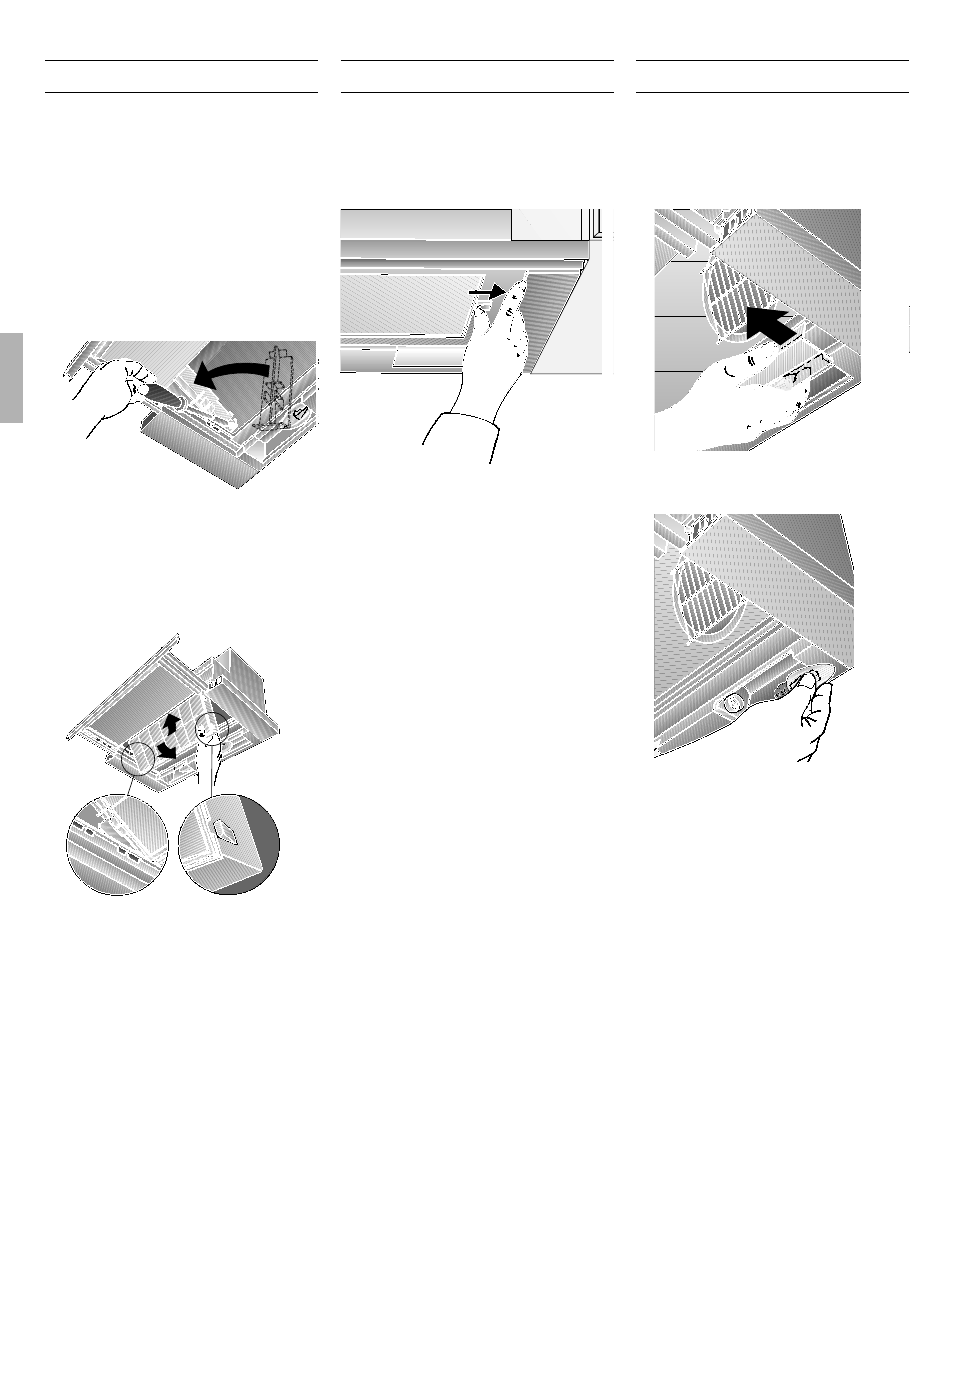
3. Insert the activated carbon filter from
below into the extractor-hood housing
and lock into position on both sides.
Ensure that the edge of the
activated carbon filter is underneath.
4. Re-install the grease filter (see Filters and
maintenance).
Activated carbon filter:
For filtering odours during circulating-air
mode.
The activated carbon filter is installed above
the grease filter(s) in the extractor hood.
1. Remove the grease filter(s) (see Filters
and maintenance).
2. Insert the two enclosed plastic holders
into the right and left sides of the
extractor-hood housing and attach each
holder with a screw (required only if
installing an activated carbon filter for the
first time).
1.
2.
3.
Removal:
The activated carbon filter is removed in
reverse sequence.
Press the locking hooks outwards.
Replacing the activated carbon filter:
During normal operation (1 to 2 hours daily),
the activated carbon filter should be
replaced approx. 1 x year. The activated
carbon filter can be obtained from
specialist retailers (see Optional
accessories).
❑ To ensure the best possible results,
use only original filters.
Disposal of the old activated carbon
filter:
❑ Activated carbon filters do NOT contain
any pollutants, i.e. they can be disposed
of as household rubbish.
Cleaning and care
For appliances with a glass plate in the
pull-out vapour extractor:
❑ The glass plate is easily removed and
can be cleaned in a dishwasher.
❑ To remove the lugs, push outwards.
Disconnect the extractor hood from the
electricity supply by pulling out the mains
plug or switching it off at the fuse box.
❑ At the same time as you clean the
grease filters, clean off any grease from
all accessible parts of the housing. This
significantly reduces the fire hazard and
ensures that the extractor hood
performs as effectively as possible.
❑ Use a hot detergent solution or a mild
window cleaner to clean the canopy of
the extractor hood.
❑ Do not scrape off any dirt that has dried
on but loosen it up with a damp cloth.
❑ Do not use abrasive cleaning agents or
sponges that could cause scratches.
❑ Note: Do not use alcohol (spirit) on pla-
stic parts, otherwise the surface may
become matt in appearance.
Caution: Ensure that the kitchen is ade-
quately ventilated. Avoid naked flames!
Clean the operating buttons with a mild
soapy solution and a soft, damp cloth only.
Do not use stainless-steel cleaner to clean
the operating buttons.
Stainless steel surfaces:
❑ Use a mild non-abrasive stainless steel
cleaner.
❑ Clean the surface in the same direction
as it has been ground and polished.
Do not use any of the following to clean
stainless steel surfaces: abrasive sponges,
cleaning agents containing sand, soda,
acid or chloride!
Aluminium, painted and plastic surfaces:
❑ Use a soft, non-linting window cloth or
micro-fibre cloth.
❑ Do not use dry cloths.
❑ Use a mild window cleaning agent.
❑ Do not use aggressive, acidic or caustic
cleaners.
❑ Do not use abrasive agents.
Replacing the light bulb
1. Switch off the extractor hood and pull
out the mains plug or switch off the
electricity supply at the fuse box.
2. Pull out the filter drawer all the way.
3. Pull the lamp cover forwards.
4. Replace the bulb (standard filament bulb,
max 40 W, E14 bulb holder).
5. Re-insert the lamp cover.
6. Plug appliance into mains again or
switch on at the fuse box.