General operation of the projectile launcher, Parts, Ready – PASCO ME-6831 Ballistic Pendulum_Projectile Launcher User Manual
Page 8
B a l l i s t i c P e n d u l u m / P r o j e c t i l e L a u n c h e r
G e n e r a l O p e r a t i o n o f t h e P r o j e c t i l e L a u n c h e r
®
4
012-05375C
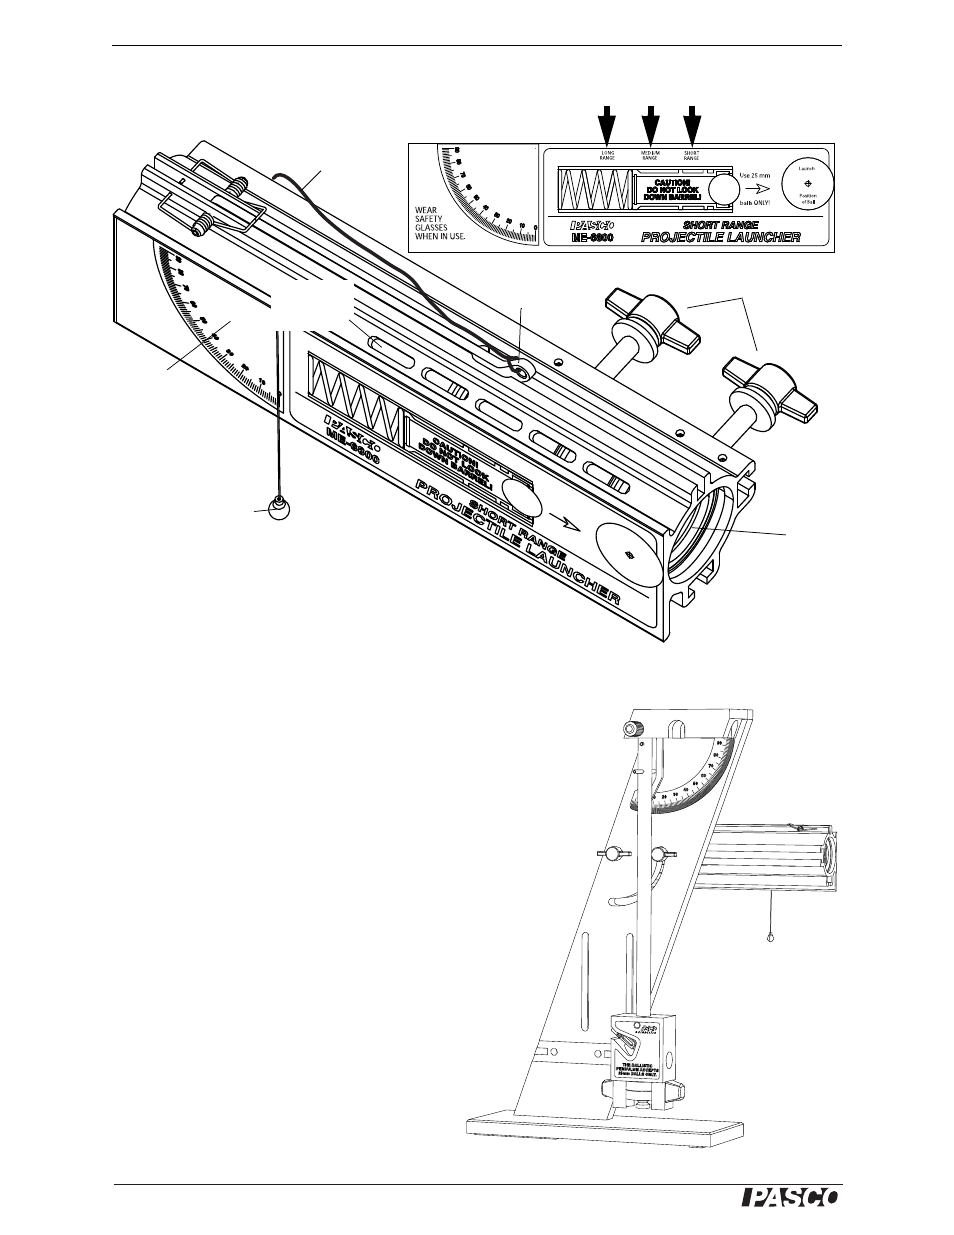
General Operation of the Projectile Launcher
Parts
Ready
•
Attach the included Trigger String to the hole
in the Trigger. (For example, loop the string
through the hole and tie the ends together.)
•
Always wear safety goggles when you are in a
room where a Projectile Launcher is being
used.
•
Firmly clamp the base of the Ballistic Pendu-
lum to a sturdy table or other surface.
•
Mount the Projectile Launcher on the Ballistic
Pendulum base. Mount the Launcher to the
lower two holes in the base if you intend to
shoot horizontally at the ball catcher of the
Ballistic Pendulum.
•
Use the hole and curved slot near the top of the
base when you want to adjust the Launcher’s
launch angle. Note: For this configuration, the
Launcher should be mounted on the ‘back
side’ of the Ballistic Pendulum base.
Trigger
String
Trigger
Protractor
Plumb Bob
Muzzle
Thumbscrews
Range
setting slots
(1 of 5)
Launcher Parts
Label details
Yellow Band in Window
Indicates Range
Launcher
on high
position