Replacing the blade drive belts, Engine/motor, Cleaning the engine/motor – Diamond Products CC1300XL User Manual
Page 30: Storing
26
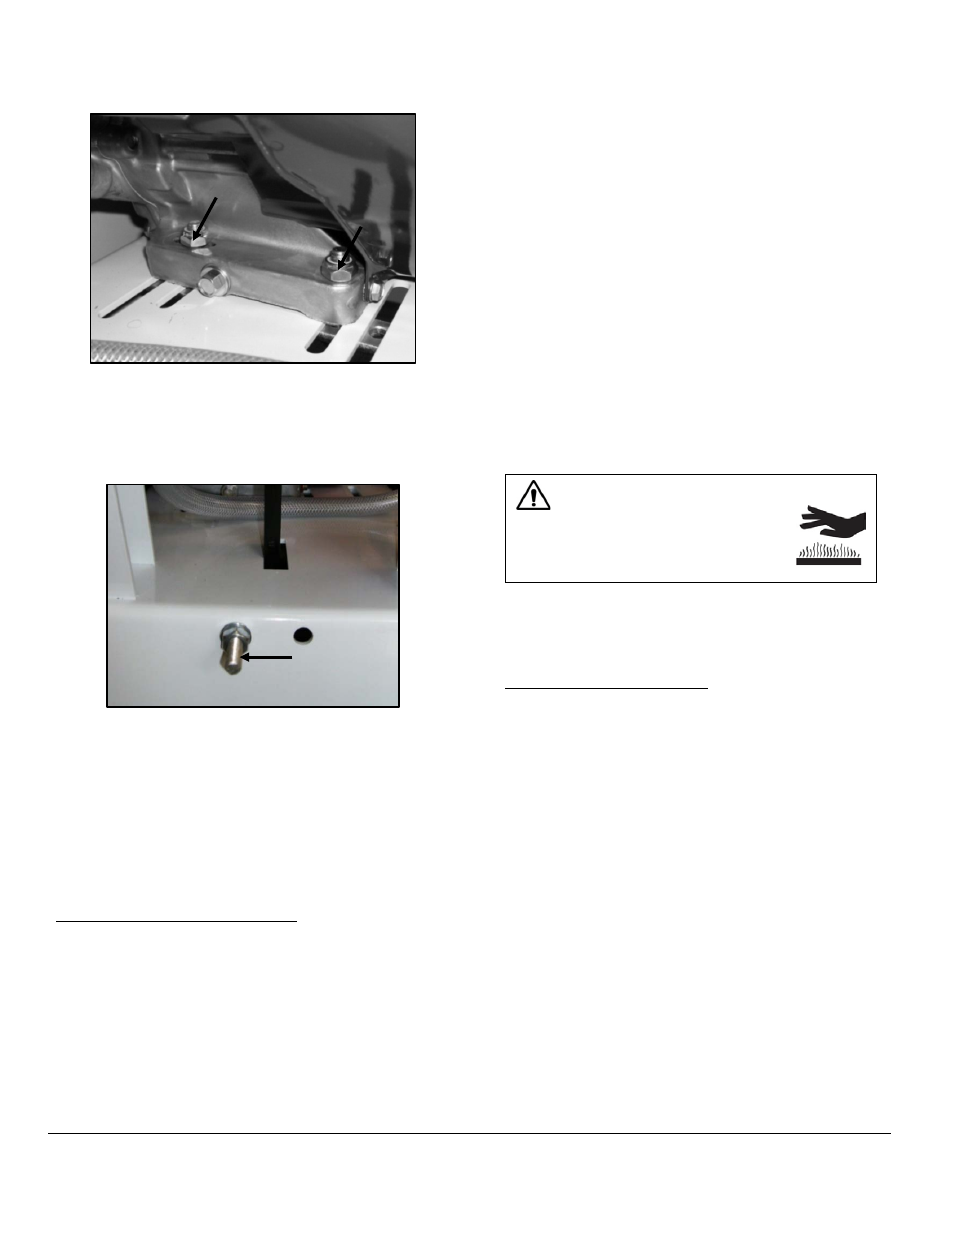
Figure 26: Engine without Adapter Plate/Mounts
5. Turn the belt adjustment shaft nut clockwise to
tighten the belts.
Figure 27: Adjustment Shaft and Nut
6. Readjust the nut as necessary to reach the
required tension setting. Refer to the Index for
the belt tension settings. DO NOT exceed the
manufacturer’s tension setting.
7. Retighten the four nuts to secure the
engine/motor, adapter plate, or adapter mounts.
Replacing the Blade Drive Belts
1. For engines without the adapter plate or
adapter mounts; there are four screw/nut
assemblies securing the engine/motor to the
frame through the frame slots. Loosen the nut
on each screw.
2. For engines with the adapter plate or adapter
mounts; there are four screw/nut assemblies
securing the adapter plate or adapter mounts to
the frame through the frame slots. Loosen the
nut on each screw.
3. Turn the belt adjustment shaft nut
counterclockwise to loosen the belts.
4. Remove the belts from the crankshaft sheave
and from the blade shaft sheave.
5. Loop and align the new belts around the blade
shaft sheave, and then pull them up and loop
and align them around the crankshaft sheave.
6. Turn the belt adjustment shaft nut clockwise to
tighten the belts. Readjust the nut as necessary
to reach the required tension setting. Refer to
the Index for the belt tension settings. DO NOT
exceed the manufacturer’s tension setting.
7. Retighten the four nuts to secure the
engine/motor, adapter plate, or adapter mounts.
Engine/Motor
WARNING
• Let the engine/motor cool
down prior to performing
maintenance.
Refer to the engine/motor manual and
manufacturer for a full maintenance schedule and
additional maintenance information.
Cleaning the Engine/Motor
Wipe down the engine/motor exterior and guards
daily or regularly to prevent high operating
temperatures. DO NOT spray the engine/motor with
water to prevent engine damage.
Storing
Complete the tasks listed below prior to storing the
saw for longer time frames:
• Lower the saw completely to remove any strain
on the lifting mechanism.
• Turn off all switches and controls.
• Disconnect the water supply hose from the
blade guard and open the water valve to drain
water from the water lines/hoses.
• Clean the blade guard water tubes using a wire
brush and rinse with a hose.
• Clean and wipe down the saw.
• Store the saw in a cool, dry area out of reach
from children.