Setup, 3 - field setup – Liquid Controls EZConnect Office User Manual
Page 22
22
USB (F3) activates the USB memory device
Done (F5) opens Fueler Logon or Fill Vehicles screen, or DMS
Application List screen
USB Flash Memory Device
#3 - field setup
6. aTTaCh rfId buTTons To vehICles
After mapping the RFID buttons and identifying the
vehicle each is mapped to, using the vehicle directory
stickers, you can attach the RFID buttons to their
respective buttons. When attaching the RFID buttons,
find a smooth, flat surface above or the the side of the
fuel spout where residual fuel will not be splashed on
the button. Carefully clean the area of any dirt, grime, or
oils. Stick the RFID button to the vehicle using one of the
double-sided adhesive pads provided with the buttons.
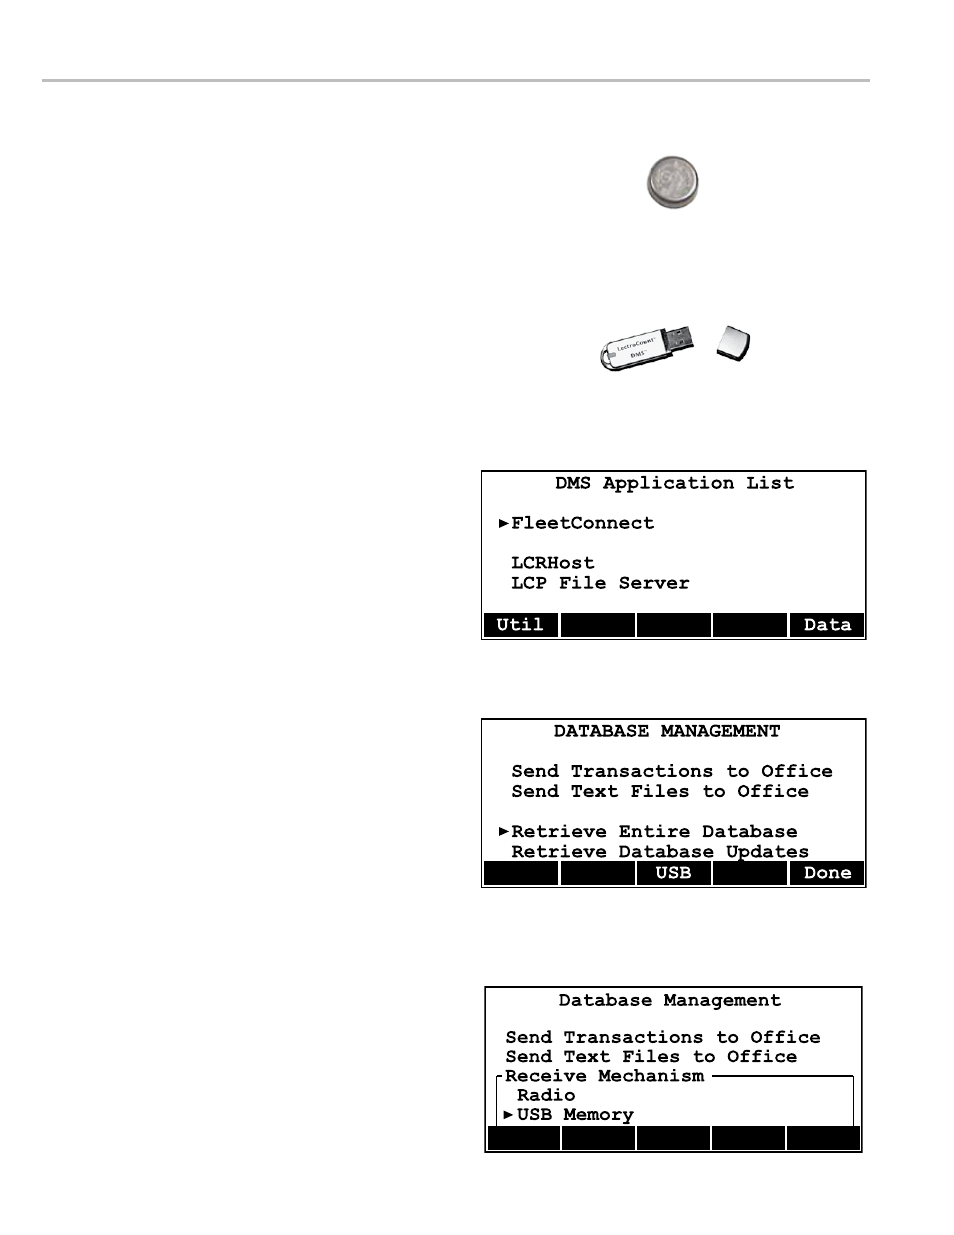
7. Transfer fleeTConneCT daTabase To dMs
i1000s
The next step is to transfer the database from the office
PC to the DMS i1000s. Liquid Controls recommends
using a USB memory device for the initial loading of the
FleetConnect database. Transmitting a large amount of
data wirelessly can be time consuming and, for cellular
transmissions, costly.
To transfer the entire fleetConnect database to
the dMs i1000 via usb device:
1. From the office PC, name the USB memory device
DMS_USB and create a folder named DMS in it. (USB
memory devices from Liquid Controls are pre-configured
to these settings.)
2. Copy the .502 and .slf files from the C:\DMS folder into
the DMS folder on the USB memory device. (Example
D:/DMS)
3. Remove the USB memory device from the office
computer and plug it into a DMS i1000.
4. On the DMS i1000 lap pad, push
ALT and ESC
simultaneously to open
Data Application List.
5. Press
F5 (Data) to open Database Management.
6. Press
F3 (USB) to boot the USB Drive.
7. Select
Retrieve Entire Database and press ENTER.
8. Select
USB Memory Device as the Receive Mechanism
and press
ENTER. The Retrieving Database screen will
appear while the database loads onto the DMS i1000.
9. Press
ENTER upon successful retrieval of the database
files.
10. Repeat steps 3-9 until all DMS i1000s are loaded with the
FleetConnect database.
Util (F1) opens System Utilities (1/3) See pg. 12 EM200-11
Data (F5) opens Send/Receive Transactions screen
seTup
Receive Mechanism
—
USB Memory Device
RFID Button