Burkert Type 2051 User Manual
Page 23
23
Maintenance, Troubleshooting
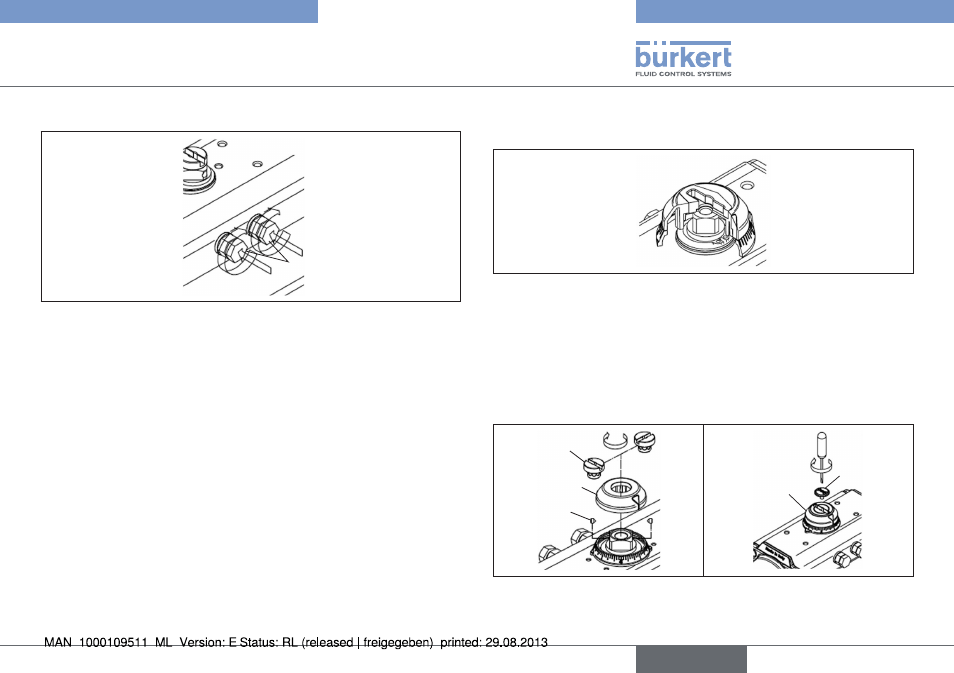
installing the adjusting screws (pos. 02):
02
Installing the adjusting screws
Fig. 17:
Insert the adjusting screws (Pos. 02), the nuts (Pos. 04), the
→
washers (Pos. 03) and the O-rings,
Screw the adjusting screws (Pos. 02) into the housing.
→
end position setting for the standard actuator (closing
clockwise):
0° (closing) end position setting, for actuator in closed position
→
unscrew the right adjusting screw until the required end position
is reached. Secure by tightening the nut (Pos. 04).
90° (opening) end position setting, unscrew the left adjusting screw
→
until the required end position is reached. Secure by tightening
the nut (Pos. 04).
installing the graduated collar and the position indicator (pos.
19, 19.0, 19.1):
Placing graduated collar on the housing
Fig. 18:
Place the graduated collar (Pos. 19.0) on the housing,
→
Align adapter (Pos. 19.5) and secure with suitable screws (Pos.
→
19.6),
Insert position indicator (Pos. 19 or 19.1),
→
Screw in the screw (Pos.39) for the position indicator.
→
19.5
19.6
19.1
39
19
Installing the graduated collar and the position indicator
Fig. 19:
english
Type 2051