CHIEF PXR User Manual
Page 17
Installation Instructions
PXR
17
Installing IR Sensor
1.
Plug IR receiver (AA) into PXR. (See Figure 3) and (See
Figure 26)
2.
Route IR receiver to desired location. The IR receiver
operates best in open, unobstructed areas.
NOTE:
The final location of the sensor won’t be made until after
installation of the display.
Figure 26
Set-Up and Testing Configuration
WARNING:
PINCH HAZARD! FINGER OR HANDS
BETWEEN MOVING PARTS CAN LEAD TO SEVERE
PERSONAL INJURY! Keep fingers and hands away from
PXR arms when in operation.
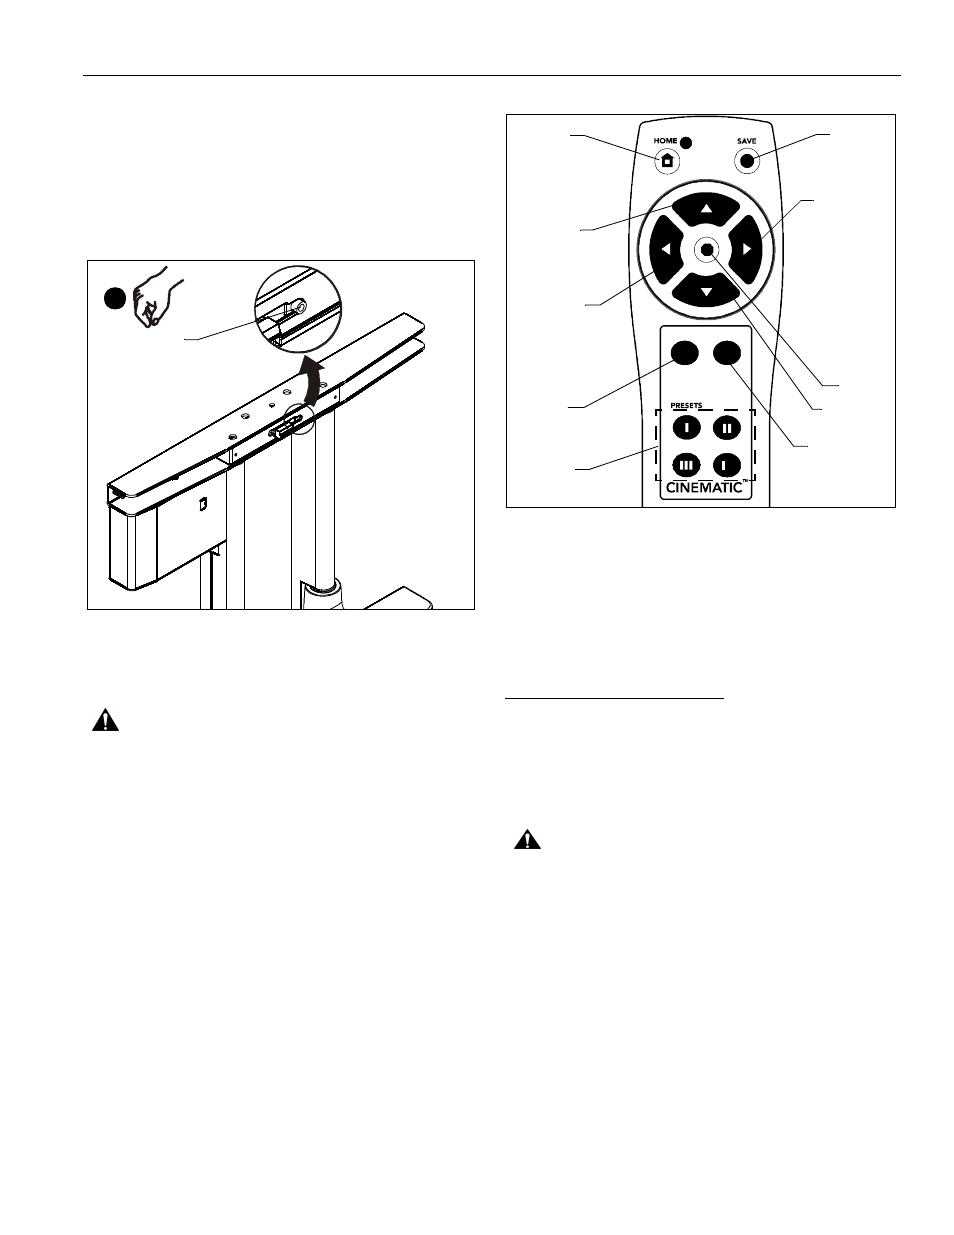
Setting or changing the configuration of the PXR is done
through the remote control provided with the mount.
The remote control has a maximum range of 20-30 ft (6-9m),
and is powered by 2 AAA batteries that are accessed from the
back of the remote.
1.
Place batteries into remote control (BB). (See Figure 27)
Figure 27
NOTE:
The PXR is shipped with a HOME position already
installed. This HOME consists of:
•
Arms collapsed completely against mount
•
No pan left or right
•
Display tilted in the vertical position.
Running LEARN MODE (Test)
1.
Plug power cord (Z) into PXR and into the nearest power
source.
NOTE:
Once power is applied to the unit, the indicator lights
will flash 5 times. This indicates the unit needs to be
calibrated.
CAUTION:
PXR SHOULD ONLY BE MOVED USING
REMOTE CONTROL!! After the PXR arms have been
engaged, do NOT move PXR by hand!
NOTE:
The LEARN MODE is used to calibrate the PXR.
•
If the process is cancelled at any point during
Phase A or B it will need to begin again from
Phase A.
•
To exit LEARN MODE at any time, press and
hold [STOP] for 7 seconds. If no other errors are
found, the unit will flash 5 times indicating it must
go through the LEARN MODE.
Plug in IR
1
Receiver (AA)
+
+
_
V
RETRACT
EXTEND
PAN LEFT
PAN RIGHT
TILT TOP
BACK
TILT TOP
FORWARD
PRESETS
SAVE
HOME
STOP