Installing in an in-wall box – CHIEF PXR User Manual
Page 14
PXR
Installation Instructions
14
The following procedure assumes that a Chief Listed Model
PAC502 In-Wall accessory (not included) has previously been
installed following the installation instructions provided with the
PAC502. If a PAC502 is not installed or there are any other
questions regarding the installation of this accessory,
immediately contact a Chief Customer Service representative.
WARNING:
IMPROPER INSTALLATION CAN LEAD TO
MOUNT FALLING CAUSING SEVERE PERSONAL INJURY
OR DAMAGE TO EQUIPMENT! DO NOT deviate from
installation instructions provided. DO NOT substitute
hardware.
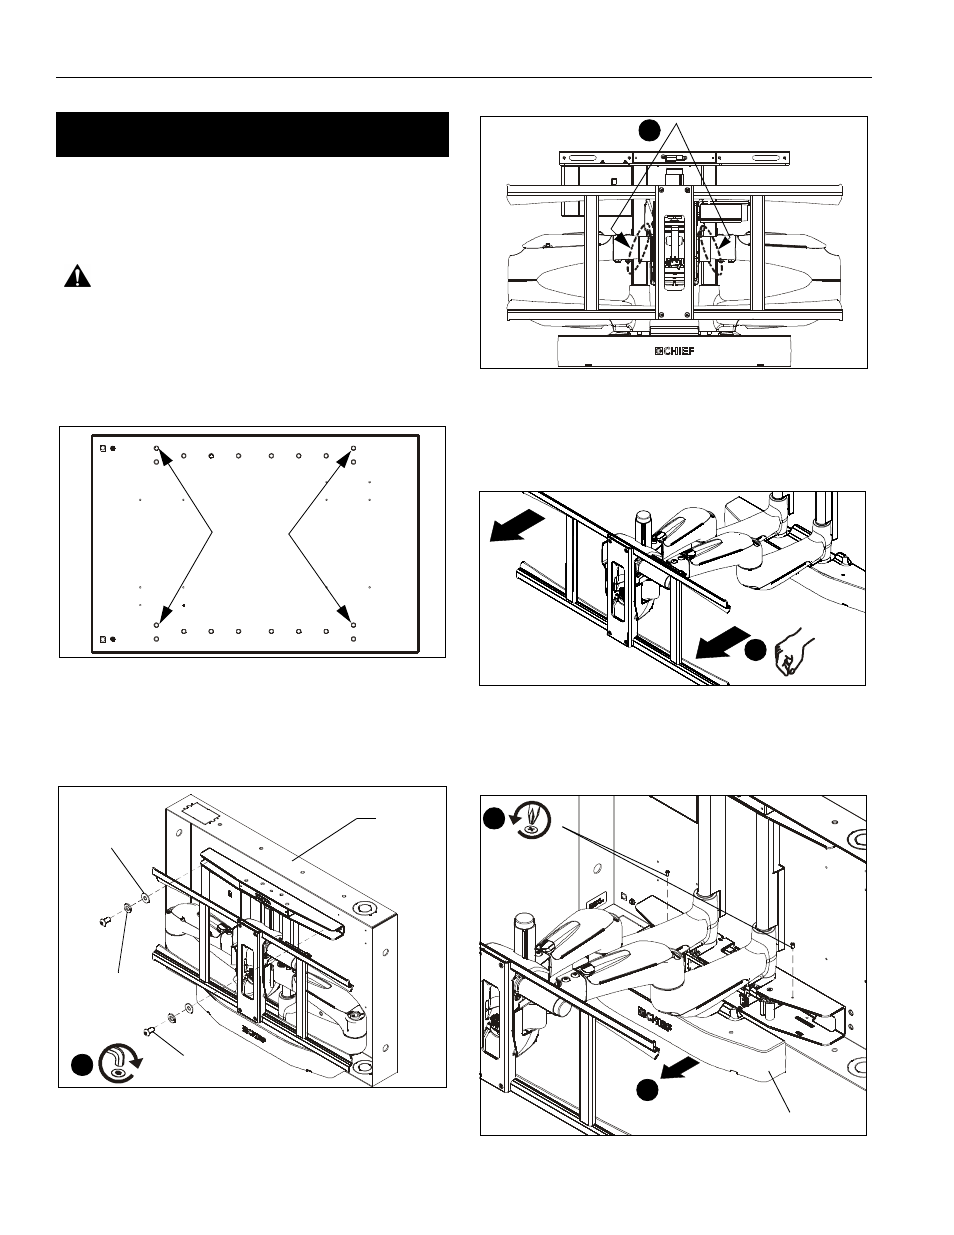
1.
Align mounting holes at top of PXR with two mounting holes
in PAC502. (See Figure 16)
Figure 16
2.
Using two 5/16-18 x 5/8" button head cap screws (CC), two
5/16" split lock washers (EE), and two 1/4" flat washers
(DD) loosely secure top of PXR in PAC502. Secure screws
at least three turns into PAC502. (See Figure 17)
Figure 17
3.
Remove two orange Velcro® straps holding PXR arms in
place. (See Figure 18)
Figure 18
NOTE:
The arms are not engaged in the PXR at this time.
4.
Carefully pull PXR arms out from PAC502. (See Figure 19)
Figure 19
5.
Remove and save two screws from lower cover. (See
Figure 20)
6.
Remove and save lower cover. (See Figure 20)
Figure 20
INSTALLING IN AN IN-WALL BOX
Attachment
Points
PAC502
PXR
2
PAC502
(CC) x 2
(DD) x 2
(EE) x 2
Strap locations
3
4
5
x 2
6
Lower cover