CHIEF PXR User Manual
Page 15
Installation Instructions
PXR
15
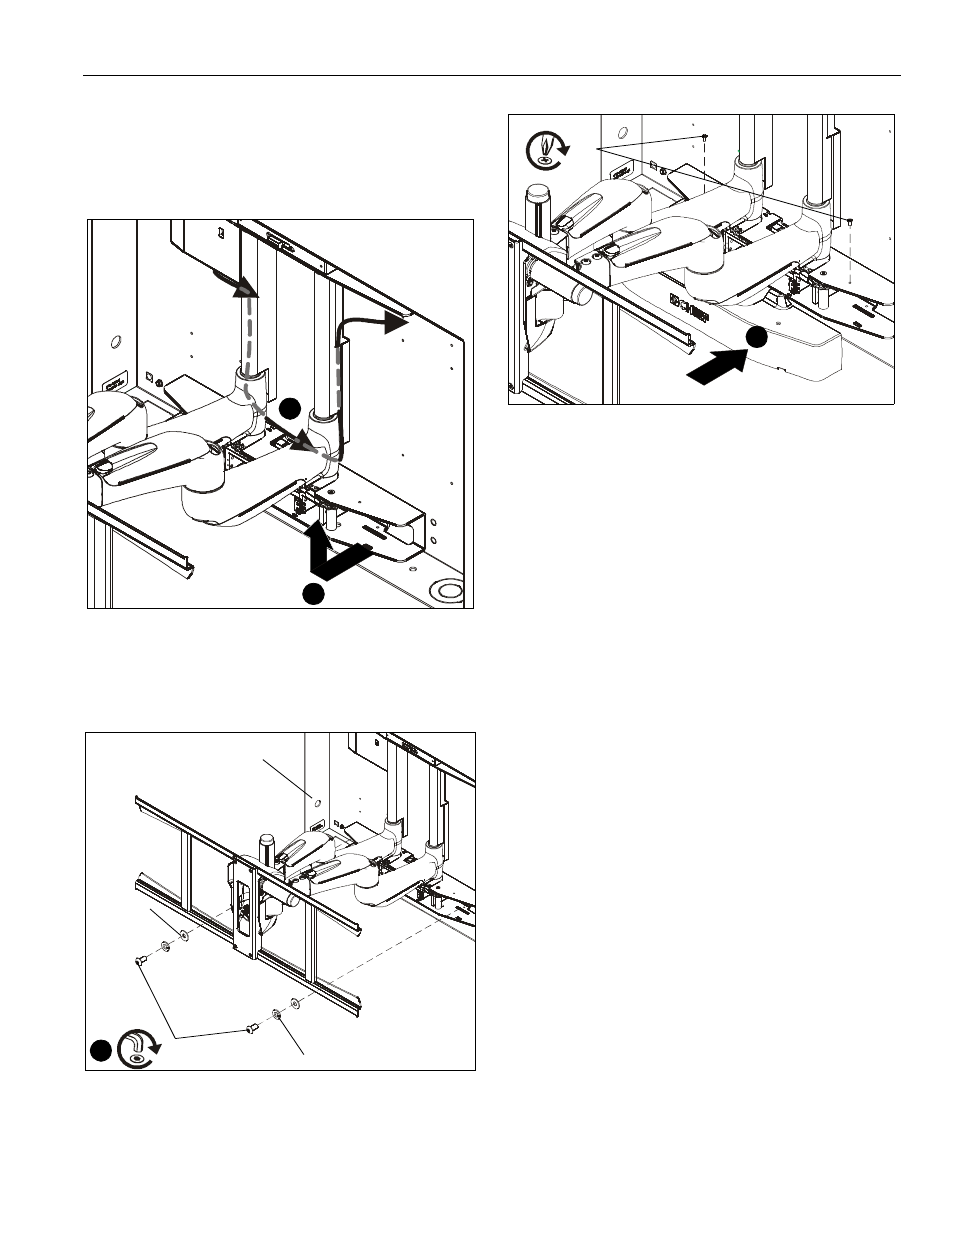
7.
Carefully lift up and out slightly on bottom of PXR. (See
Figure 21)
8.
Route power cord and cables through cable management
areas as noted. (See Figure 21)
9.
Tighten fasteners to secure top of PXR into PAC502.
Figure 21
10. Secure bottom of PXR in PAC502 using two 5/16-18 x 5/8"
button head cap screws (CC), two 5/16" split lock washers
(EE), and two 1/4" flat washers (DD). (See Figure 22)
Figure 22
11. Replace lower cover and secure with two Phillips head
screws removed in Step 5. (See Figure 23)
Figure 23
12. OPTIONAL: Install PAC502 trim following the instructions
included with the PAC502 kit.
7
8
10
PAC502
(CC) x 2
(DD) x 2
(EE) x 2
x 2
11
See also other documents in the category CHIEF Televisions:
- MSMVPU (12 pages)
- K-Series (16 pages)
- FDP Series (8 pages)
- FSP Series (8 pages)
- JPP Series (8 pages)
- TPP Series (12 pages)
- TPM-2000 Series (8 pages)
- TPS Series (12 pages)
- PSS Series (8 pages)
- FSB018BLK (2 pages)
- PTS Series (8 pages)
- STS1 (8 pages)
- STLU (12 pages)
- MSS6000 (12 pages)
- CM2L40 (76 pages)
- CM2C40 (76 pages)
- FWDIW Series (8 pages)
- JWDIW Series (8 pages)
- MWRIW Series (12 pages)
- PWRIW Series (12 pages)
- PNRIW Series (12 pages)
- TS525TU (16 pages)
- TS325TU (20 pages)
- TS218SU (16 pages)
- TS118SU (12 pages)
- MCD Series (8 pages)
- PDC Series (8 pages)
- MCS Series (8 pages)
- PCM Series (8 pages)
- PCS Series (8 pages)
- FHP110, FHPV (8 pages)
- JHS Series (8 pages)
- FHS Series (8 pages)
- MCB1U (12 pages)
- MCM1U (12 pages)
- MWC Series (8 pages)
- PWC-2000 (12 pages)
- RMT2 (12 pages)
- MTTU (12 pages)
- LTTU (12 pages)
- FTR Series (8 pages)
- MTMPU (12 pages)
- LTMPU (12 pages)
- XSM Series (12 pages)