CHIEF PXR User Manual
Page 11
Installation Instructions
PXR
11
8.
Mark the pilot holes through PXR upper bracket. (See
Figure 7)
9.
Carefully remove the PXR from the mounting bracket.
10. Drill two 7/32" x 2-3/4" (5.5mm x 69.9mm) pilot holes at
locations marked in Step 9.
11. Return PXR to mounting bracket and fasten to wall using
two 5/16 x 2-1/2" lag screws (RC) and two 5/16" flat
washers (RB). (See Figure 7)
Figure 7
12. Remove two orange Velcro® straps holding PXR arms in
place. (See Figure 8)
Figure 8
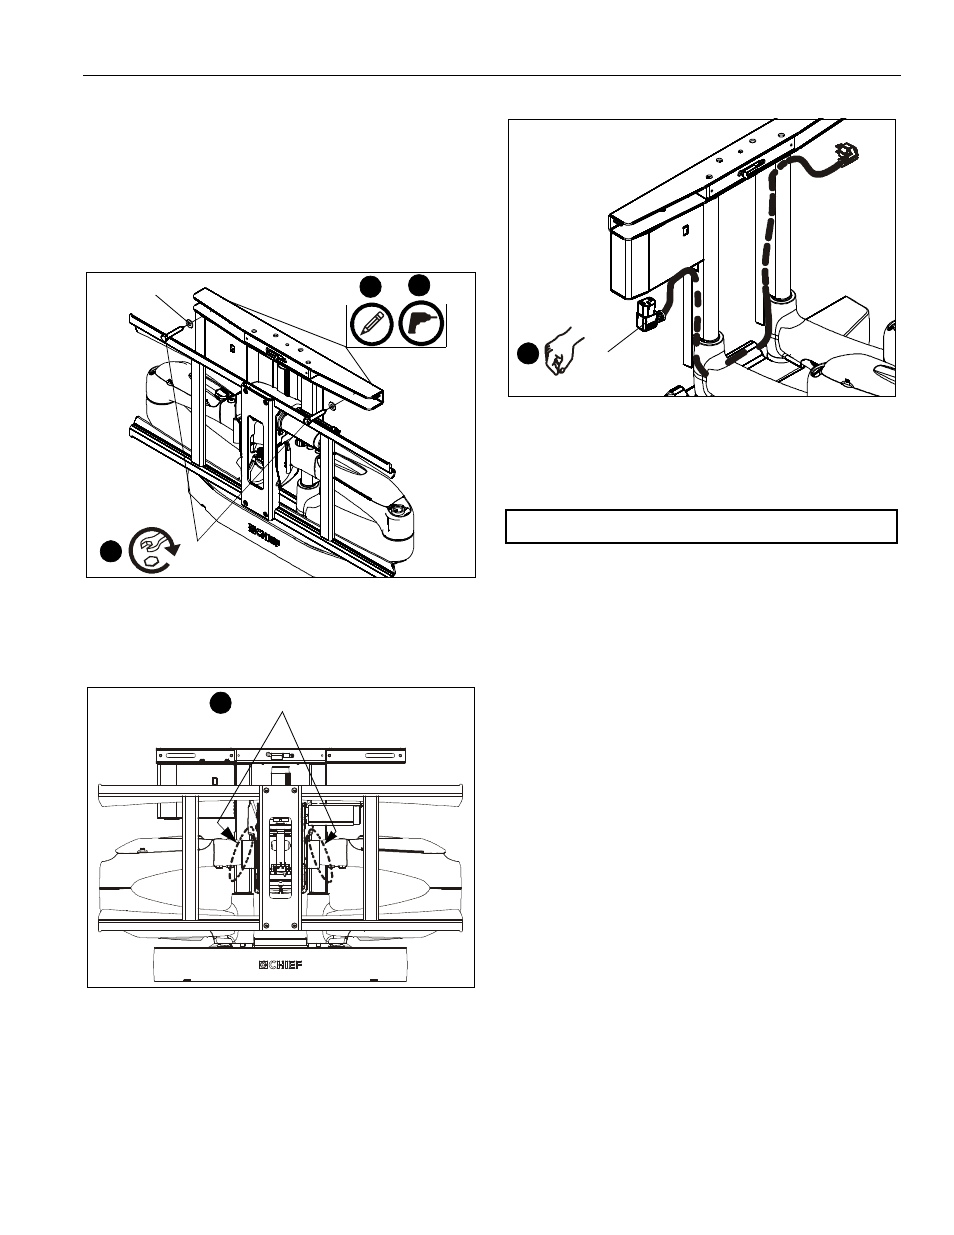
13. Connect and route power cord (Z) through PXR cable
management areas. (See Figure 9)
Figure 9
IMPORTANT ! : Do not power the PXR until it is ready to
be tested.
8
x 2
10
11
(RC) x 2
(RB) x 2
Strap locations
12
13
(Z)
NOTE:
Proceed to Arm Engagement section.
See also other documents in the category CHIEF Televisions:
- MSMVPU (12 pages)
- K-Series (16 pages)
- FDP Series (8 pages)
- FSP Series (8 pages)
- JPP Series (8 pages)
- TPP Series (12 pages)
- TPM-2000 Series (8 pages)
- TPS Series (12 pages)
- PSS Series (8 pages)
- FSB018BLK (2 pages)
- PTS Series (8 pages)
- STS1 (8 pages)
- STLU (12 pages)
- MSS6000 (12 pages)
- CM2L40 (76 pages)
- CM2C40 (76 pages)
- FWDIW Series (8 pages)
- JWDIW Series (8 pages)
- MWRIW Series (12 pages)
- PWRIW Series (12 pages)
- PNRIW Series (12 pages)
- TS525TU (16 pages)
- TS325TU (20 pages)
- TS218SU (16 pages)
- TS118SU (12 pages)
- MCD Series (8 pages)
- PDC Series (8 pages)
- MCS Series (8 pages)
- PCM Series (8 pages)
- PCS Series (8 pages)
- FHP110, FHPV (8 pages)
- JHS Series (8 pages)
- FHS Series (8 pages)
- MCB1U (12 pages)
- MCM1U (12 pages)
- MWC Series (8 pages)
- PWC-2000 (12 pages)
- RMT2 (12 pages)
- MTTU (12 pages)
- LTTU (12 pages)
- FTR Series (8 pages)
- MTMPU (12 pages)
- LTMPU (12 pages)
- XSM Series (12 pages)