Introduction, Product description, Specifications – Franklin Fueling Systems S940 User Manual
Page 5: Installation, Relay connections
2
Introduction
This manual contains installation instructions for the
INCON S940 Alarm Console.
Please carefully read this entire manual. Failure to
follow the instructions in this manual may result in faulty
operation, equipment damage, injury or death.
This equipment should only be serviced by an INCON-
certified technician.
Product Description
The 4-channel Alarm console is a stand-alone unit that
monitors 4 intrinsically safe sensor contact closures and
provides a visual and audible alarm should one of the
normally closed contacts become open.
The unit also provides 2 SPDT dry relay contacts that can
be set to activate upon an alarm condition.
The S940 is typically used to monitor sumps, overfill or
spill-containment areas.
Specifications
Console Specifications
Input Line Voltage:
100-240 VAC + / - 10%, 50 / 60 Hz, 15W max
Input power fuse
rating
1A, 250 VAC, time delay
Operating
temperature
-25º C (-13º F) to +60º C (+140º F)
Enclosure
NEMA 4, indoor / outdoor *
(Non-hazardous locations only)
Dimensions
6" X 6" x 4" (15.2 cm x 15.2 cm x 10.2 cm)
Relay contact rating 10A, 240VAC maximum (non-fused)
Conduits
Two NPT, ½"
Intrinsic safety
Class I, Div 1, Group D
* For outdoor use application, listed Type 4X conduit hubs
must be used.
Note: For power supply connection, use wires rated at
least 90 ºC (194 ºF).
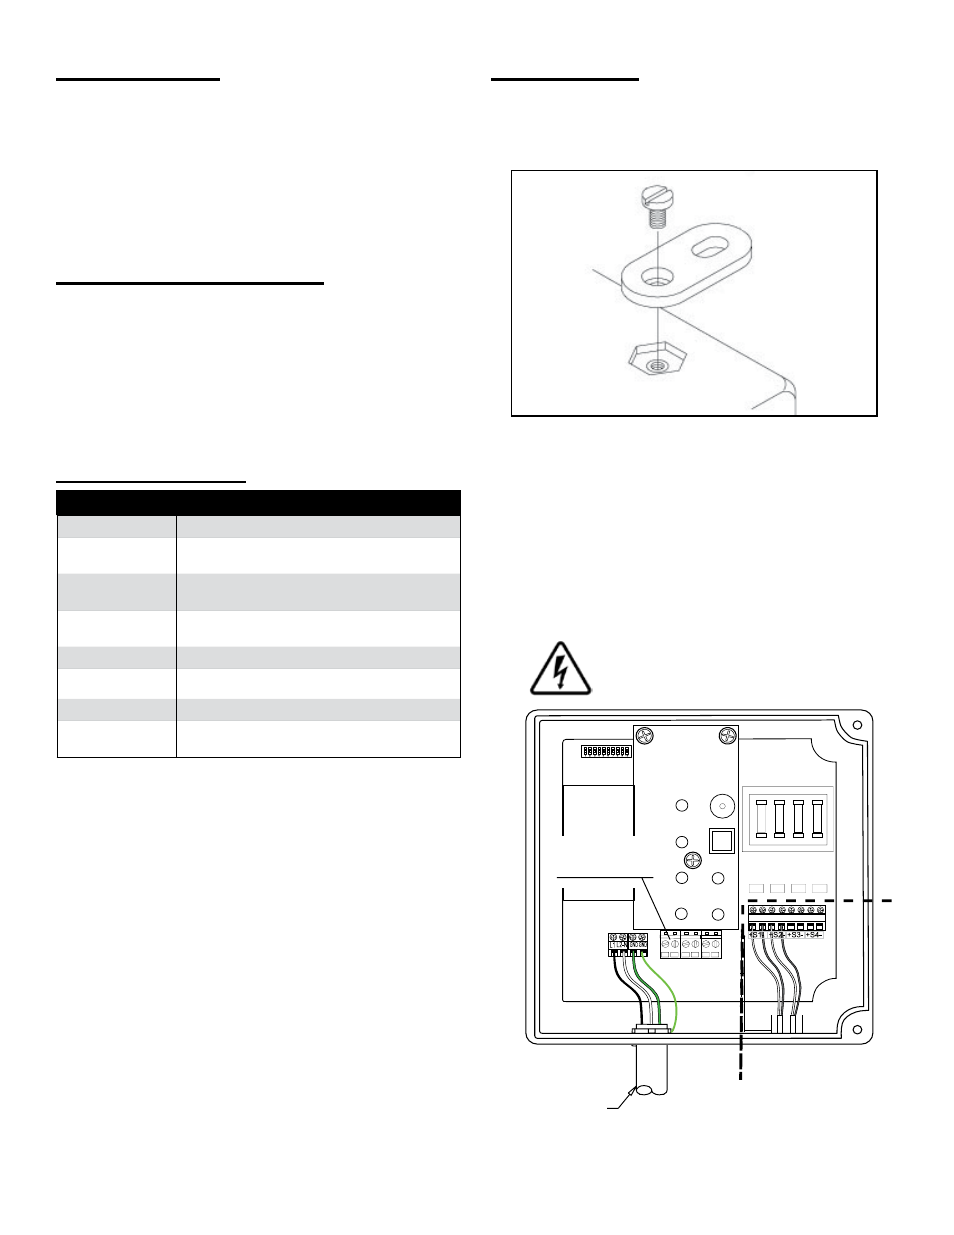
Installation
Mounting
To mount the unit to the wall, first attach the included
mounting tabs to the box (figure 1) and then attach it to
the wall.
Figure 1: Box Mounting Tab
Power Supply Wiring
NOTE: The S940 Alarm Console is set to operate with
between 100 to 240 VAC, 50 / 60 Hz. No setup is required.
The Alarm Console must be connected to a dedicated
circuit breaker, at the service panel, not exceeding 15
Amps.
To access wiring and programming, remove the 4 corner
phillips-head screws on the faceplate and pull the
faceplate straight out by holding the two faceplate knobs.
Electrical Hazard! Disconnect main
power to the console before removing
the faceplate.
INTRINSICALLY
Rigid Conduit
Shown with wiring
shield cover removed
110/220 VAC
AC power
INTRINSICALL
Y
SAFE WIRING ON
LY
SAFE AREA
Relay
Connections
Figure 2: Installation Wiring