Installation, cont’d, Cabling the switcher – Extron Electronics SW 2_4 ARxi User Guide User Manual
Page 11
SW Switchers • Installation
SW Switchers • Installation
Installation, cont’d
2.
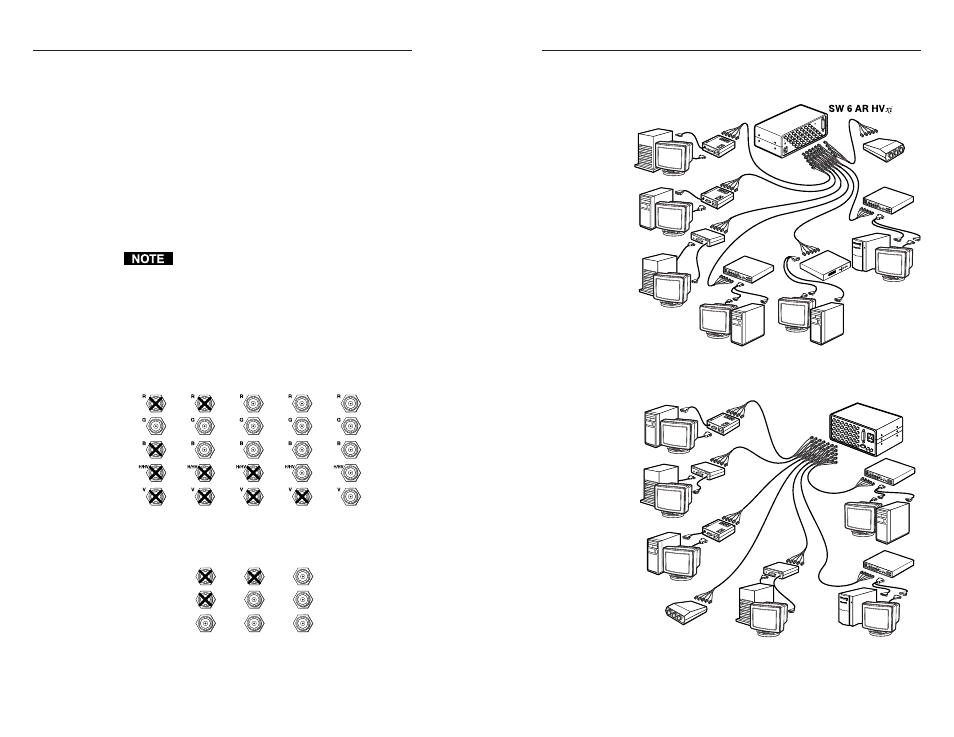
Use BNC connectors to connect the switcher to the
output device.
Figure 19 — SW 6 AR HVxi
xi
xi
xi
xi cabling
Figure 20 — SW 6 AR MX HV cabling
3.
Secure the switcher to the rack panel by reinstalling the
four corner screws and beveled (dress) washers
through the panel. To avoid shifting, ensure that the
switcher is placed firmly against the panel.
4.
Secure the rack panel to the rack with the hardware
provided.
Cabling the switcher
The switcher can connect to two, four, or six input devices,
depending on the model, and to one output device
(SW ARxi and SW AR HVxi switchers) or more than one
output device (SW AR MX, SW AR MX HV, and
SW 6 Component switchers).
If auto-switching is required, see “Input cabling for
auto-switching” on page 2-10. If audio follow is
required, see “Input cabling for audio follow” on
page 2-10.
To cable the switcher, do the following:
1.
Use BNC connectors to connect each input device to the
input connectors (figure 18). MBC cables or MBC
buffers may be required for computer/monitor/
switcher connections, as shown in figures 19 and 20.
Component
or RGsB
Composite
S-video
Component
Composite
S-video
RGBS
SW AR
xi
/ SW AR HV
xi
/ SW AR MX / SW AR MX HV
SW 6 Component
RGBHV
R-Y
B-Y
Y
R-Y
B-Y
Y
R-Y
B-Y
Y
Figure 18 — Connecting the switcher
2-9
Large Screen
Projector
Extron
Interfaces
SUN Workstation
PC Computer
SGI Workstation
Extron Interfaces
PC Computer
PC Computer
MAC Computer
IN
IN
Large Screen
Projector
Extron
Interfaces
Extron
Interfaces
PC Computer
IN
MAC Computer
IN
SUN Workstation
SGI Workstation
PC Computer
PC Computer
SW 6 AR MX HV
2-8