12 mounting a camera/ camcorder to the n-14, 13 universal camera adapter application – Armasight NSMN140001F6DA1 N-14 FLAG Multi-Purpose Night Vision Monocular User Manual
Page 25
25
NOTE:
The unit may be badly damaged if the tripod collapses or overturns. Remove the unit from the
tripod if it is not within your reach.
3.1.11 MOUNTING THE N-14 TO A WEAPON WITH AN AIM ADVANCE AIM-
ING MOUNT
The clamping system of the AIM advance aiming mount (AIM) is the same as is seen on the QRM. To
mount the N-14 to a weapon with an AIM, see Part 3.1.5 of this Manual. This section details mounting
instructions and procedures for the QRM.
For more information on the use of an AIM, see the AIM User’s Manual.
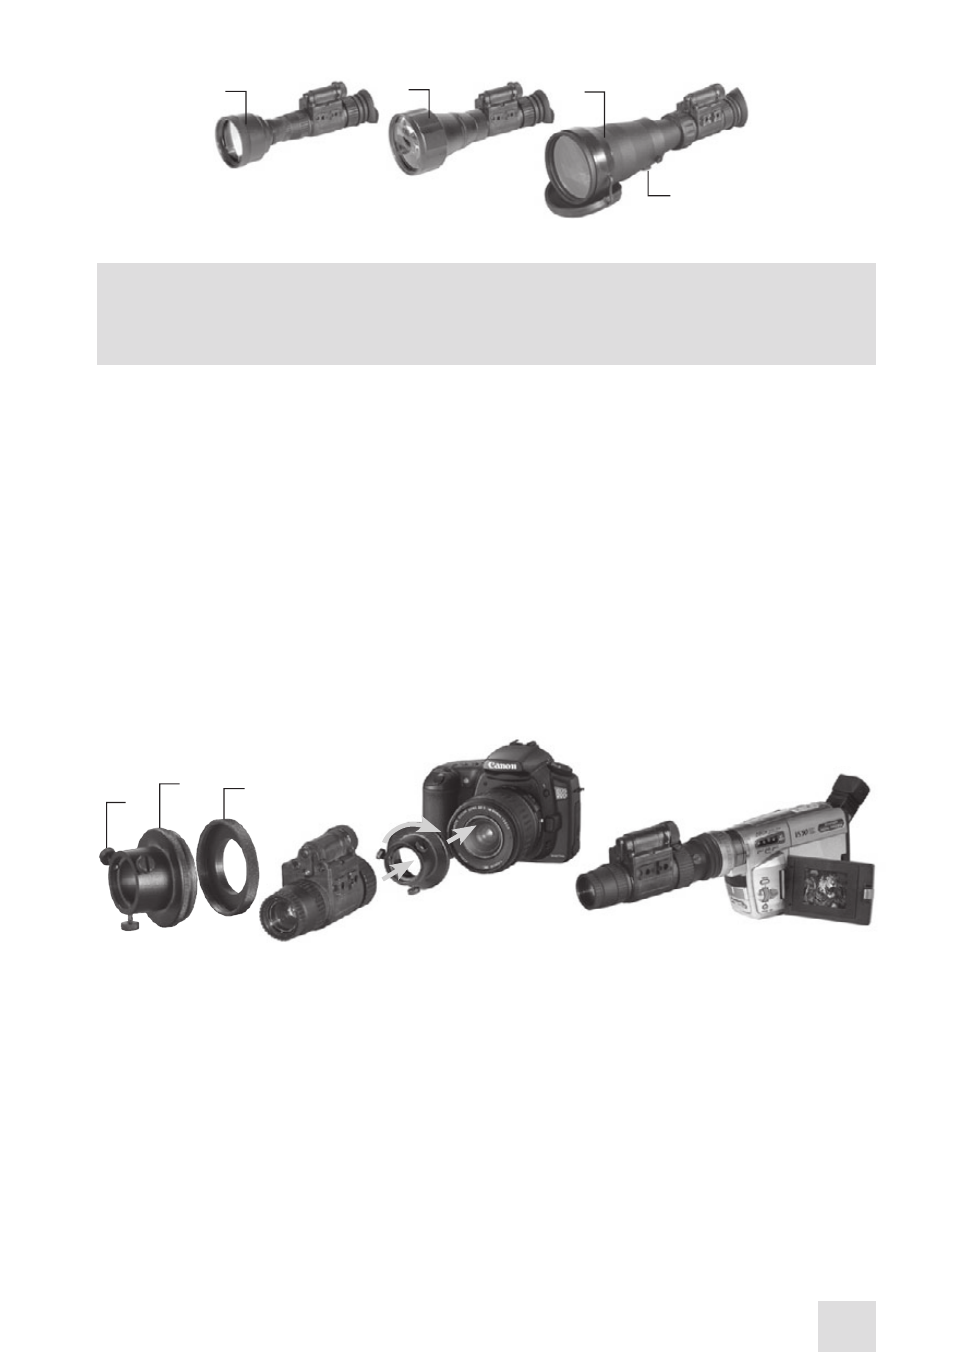
3.1.12 MOUNTING A CAMERA/ CAMCORDER TO THE N-14
To mount any 35mm SLR photographic camera or 8mm camcorder to the N-14, use the optional camera
adapter and perform the following:
1. Using the (M37x0.75 threaded) adapter ring (B), screw the (M52x0.75 threaded) adapter (A) into the
front lens of the photographic camera or video camera.
2. Remove the eyecup from the N-14 eyepiece.
3. Connect the adapter with the eyepiece and tighten the three fixing screws (C) located on the adapt-
er.
3.1.13 UNIVERSAL CAMERA ADAPTER APPLICATION
To mount the N-14 (affixed with a camera or video recorder) to a tripod, you will need a universal cam-
era adapter. Mount the connected devices to a tripod as follows:
1. Screw the adapter onto the tripod.
2. Remove the eyecup from the N-14 eyepiece.
3. Install the N-14 on the adapter rail (A) and tighten the fixing screw (B).
4. Install the camera on the adapter rail (C) and insert the fixing screw (D) into the tripod socket of the
camera. Tighten the fixing screw.
5. Loosen the screws one by one. Align the optical axis of the N-14 with the camera objective. Tighten
the screws (E and F).
6. To focus the image, loosen the screw (G) and adjust the distance between the monocular and the
camera’s eyepiece. Tighten the screw (G).
D
B
C
FIGURE 3-10. MOUNTING ACCESSORY LENSES TO N-14
A
B
C
FIGURE 3-11. MOUNTING A CAMERA/ CAMCORDER TO THE N-14
A
- NSMN140001P6DA1 N-14 GEN 3P Multi-Purpose Night Vision Monocular NSMN140001G6DA1 N-14 GEN 3 Ghost Multi-Purpose Night Vision Monocular NSMN14000136DA1 N-14 GEN 3 Alpha Multi-Purpose Night Vision Monocular NSMN14000136DB1 N-14 GEN 3 Bravo Multi-Purpose Night Vision Monocular NSMN14000126DS1 N-14 GEN 2+ SD Multi-Purpose Night Vision Monocular NSMN14000126DI1 N-14 GEN 2+ ID Multi-Purpose Night Vision Monocular NSMN14000126DH1 N-14 GEN 2+ HD Multi-Purpose Night Vision Monocular NSMN140001Q6DI1 N-14 GEN 2+ QS Multi-Purpose Night Vision Monocular