6 mounting the n-14 to a scope – Armasight NSMN140001F6DA1 N-14 FLAG Multi-Purpose Night Vision Monocular User Manual
Page 22
22
3. To uninstall the N-14 from the mount adapter, push down on the lever (C) and remove the unit.
4. If necessary, you can change the height of the N-14 using an additional plate (D).
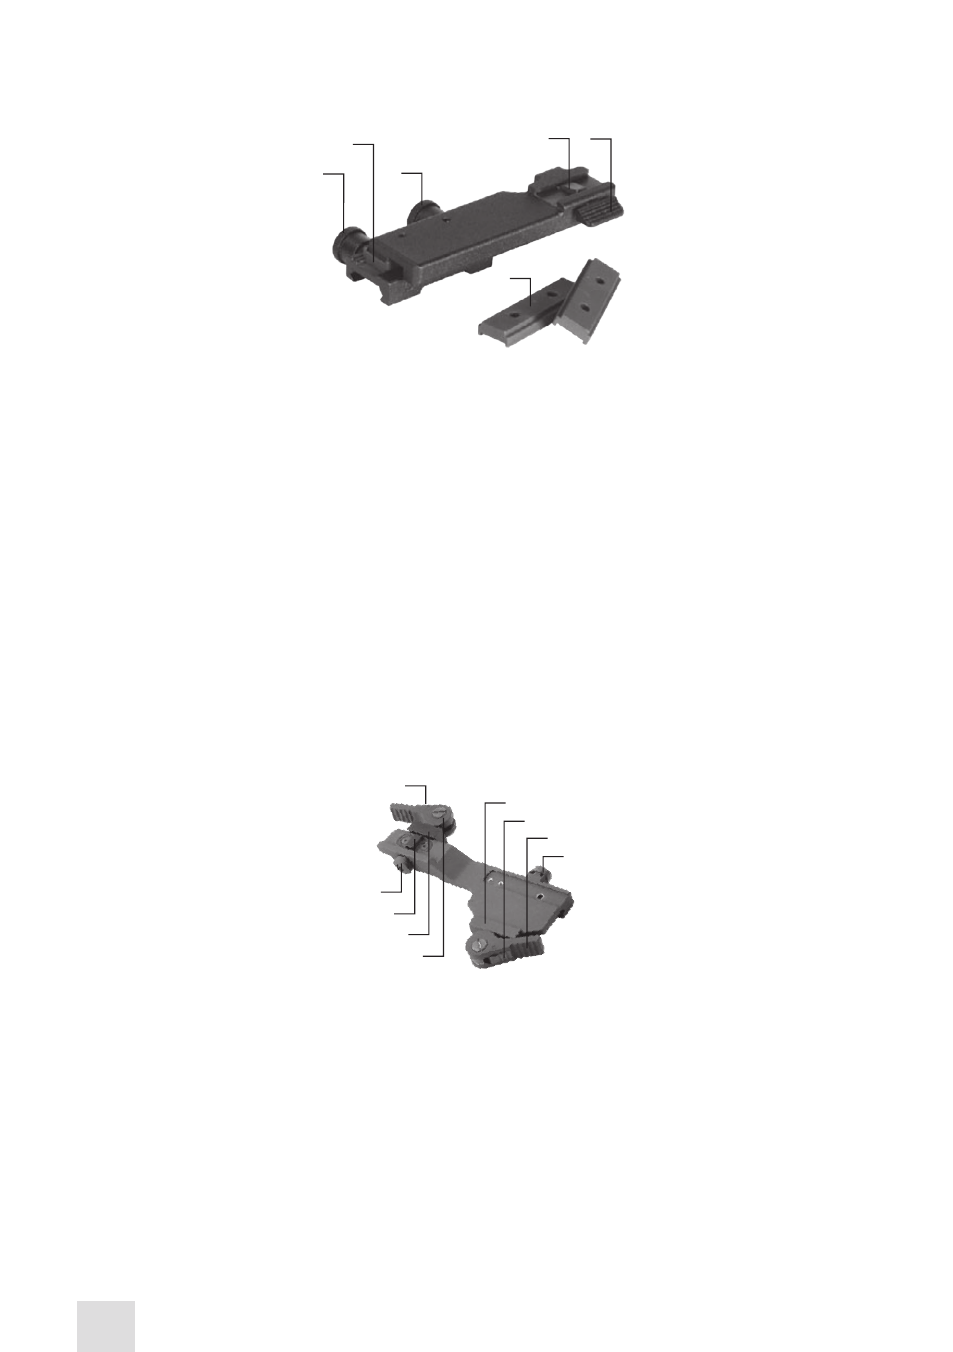
3.1.5 MOUNTING THE N-14 TO A WEAPON WITH A qUICK-RELEASE PICAT-
INNY MOUNT ADAPTER
To mount the N-14 to a weapon using an optional quick-release Picatinny mount adapter (QRM), per-
form the following:
1. While pushing down on the lever holder (C), turn the lever (B) backwards to loosen the QRM clamp-
ing device (A).
2. Install the QRM on the weapon rail by inserting the stop (not shown in Figure 3-5) into one of trans-
verse slots of the weapon rail.
3. To secure the QRM onto the weapon rail, turn the lever (B) forward. Secure the clamping device (A)
tightly to the weapon rail. To adjust the force of the lever clamp, loosen or tighten the nut (D) as neces-
sary.
4. While pushing down on the lever holder (F), turn the lever (E) forward.
5. Install the N-14 on the QRM rail by inserting the stop (G) into the transverse slot of the unit rail.
6. Attach the N-14 to the QRM rail by turning the lever (E) backwards. Secure the QRM clamping device
(H tightly to the N-14 rail. To adjust the force of the lever clamp, loosen or tighten the nut (I) as neces-
sary.
3.1.6 MOUNTING THE N-14 TO A SCOPE
To mount the N-14 to a daytime scope using an optional flip-up scope adapter, perform the following:
1. Loosen the adapter’s fixing screw (A).
2. Install the insert into the adapter (Armasight supplies inserts of different sizes for coupling with 38-
43mm eyepieces).
3. To attach the N-14 to the adapter bracket (B), push down on the button (C), loosen the fixing screw (D),
and insert the unit rail into the bracket guide. Tighten the screw (D) to secure the N-14 to the bracket.
4. Insert the daytime riflescope eyepiece into the adapter (now attached to the N-14). Be sure to leave a
small space between the riflescope eyepiece and the monocular’s front lens.
D
D
B
A
FIGURE 3-4. MOUNTING THE N-14 TO A WEAPON WITH A PICATINNY MOUNT ADAPTER
C
A
FIGURE 3-5. MOUNTING THE NYX-14 TO A WEAPON WITH A qUICK-RELEASE PICATINNY
MOUNT ADAPTER
A
B
F
D
E
C
G
I
H
- NSMN140001P6DA1 N-14 GEN 3P Multi-Purpose Night Vision Monocular NSMN140001G6DA1 N-14 GEN 3 Ghost Multi-Purpose Night Vision Monocular NSMN14000136DA1 N-14 GEN 3 Alpha Multi-Purpose Night Vision Monocular NSMN14000136DB1 N-14 GEN 3 Bravo Multi-Purpose Night Vision Monocular NSMN14000126DS1 N-14 GEN 2+ SD Multi-Purpose Night Vision Monocular NSMN14000126DI1 N-14 GEN 2+ ID Multi-Purpose Night Vision Monocular NSMN14000126DH1 N-14 GEN 2+ HD Multi-Purpose Night Vision Monocular NSMN140001Q6DI1 N-14 GEN 2+ QS Multi-Purpose Night Vision Monocular