Armasight NSMN140001F6DA1 N-14 FLAG Multi-Purpose Night Vision Monocular User Manual
Page 21
21
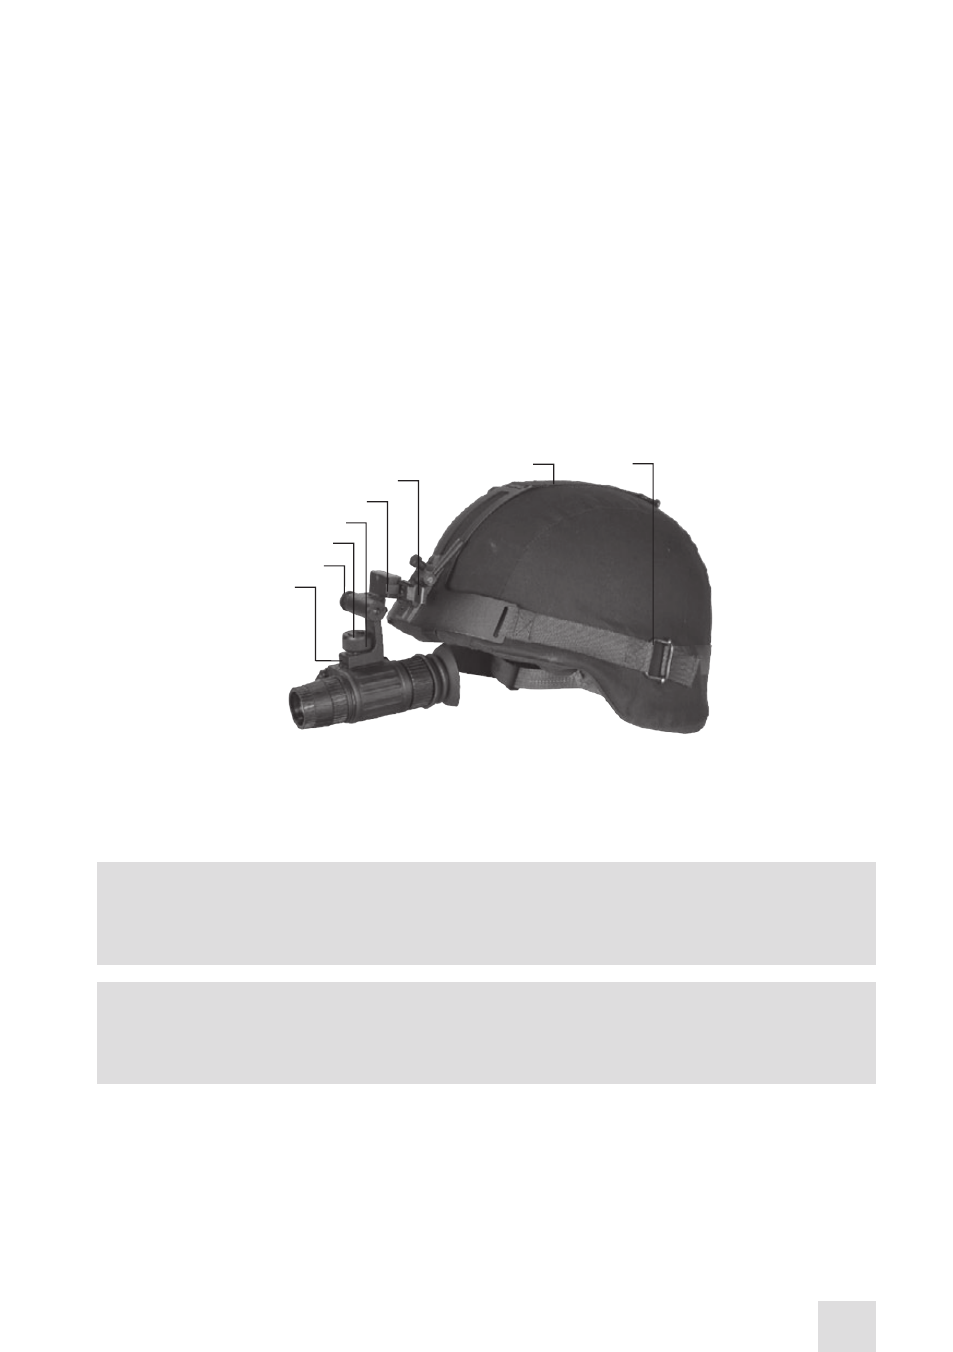
3. Loosen the screw (B). With the button (C) pushed down, insert the N-14 rail into the guide (D) of the
helmet mount bracket. Tighten the screw (B).
4. Put on the helmet with the N-14 attached.
5. Push the button (F) and move the unit along the slide-rail (G) until the most comfortable position is
reached.
5. To adjust the unit for comfort, loosen the screw (B) and move the unit along the guide (D).
7. To remove the N-14 and turn it around, push the button down (E) and lift the unit up until it reaches
the top position. Once it reaches this position, the unit will turn off automatically.
8. Push the same button (E) to lower the N-14 into the proper viewing position. Turn the unit on to
proceed with your mission.
In Figure 3-3, the N-14 is shown in the correct position for the right eye. To readjust the N-14 for the left
eye, reverse its positioning and reinstall it on the helmet mount bracket (see Figure 3-3). Use the second
unit rail located on the opposite side of the unit. Push the button (F) and move the unit along the slide-
rail (G) until the most comfortable position is reached.
To remove the N-14 from the helmet mount, loosen the screw (B), push down on the button (C), and
slide the unit out of the guide (D).
3.1.4 MOUNTING THE N-14 TO A WEAPON WITH A PICATINNY MOUNT
ADAPTER
NOTE
:
The N-14 is not a weapon sight. However, it can be used in conjunction with a collimator dot
sight or laser aiming device.
NOTE:
If mounting the N-14 to a weapon, Armasight recommends replacing the standard eyecup with
an eyeguard.
To mount the N-14 to a weapon using the optional Picatinny mount adapter, perform the following:
1. Loosen the clamping knobs (A) on the Picatinny mount adapter. Position the adapter on the weapon
rail. Adjust the adapter’s fore-and-aft positions by loosening the clamping knobs (A) and repositioning
the adapter on the weapon rail. Tighten the clamping knobs (A).
2. Align the N-14 and the mount adapter. Slide the unit backwards until its alignment boss is parallel
with the alignment groove (B) on the adapter. Push backwards until you hear a clicking noise indicating
that the unit is locked into the weapon mount adapter.
C
D
E
G
B
A
FIGURE 3-3. MOUNTING THE N-14 TO A HELMET
F
A
- NSMN140001P6DA1 N-14 GEN 3P Multi-Purpose Night Vision Monocular NSMN140001G6DA1 N-14 GEN 3 Ghost Multi-Purpose Night Vision Monocular NSMN14000136DA1 N-14 GEN 3 Alpha Multi-Purpose Night Vision Monocular NSMN14000136DB1 N-14 GEN 3 Bravo Multi-Purpose Night Vision Monocular NSMN14000126DS1 N-14 GEN 2+ SD Multi-Purpose Night Vision Monocular NSMN14000126DI1 N-14 GEN 2+ ID Multi-Purpose Night Vision Monocular NSMN14000126DH1 N-14 GEN 2+ HD Multi-Purpose Night Vision Monocular NSMN140001Q6DI1 N-14 GEN 2+ QS Multi-Purpose Night Vision Monocular