10 mounting accessory lenses to the n-14 – Armasight NSMN140001F6DA1 N-14 FLAG Multi-Purpose Night Vision Monocular User Manual
Page 24
24
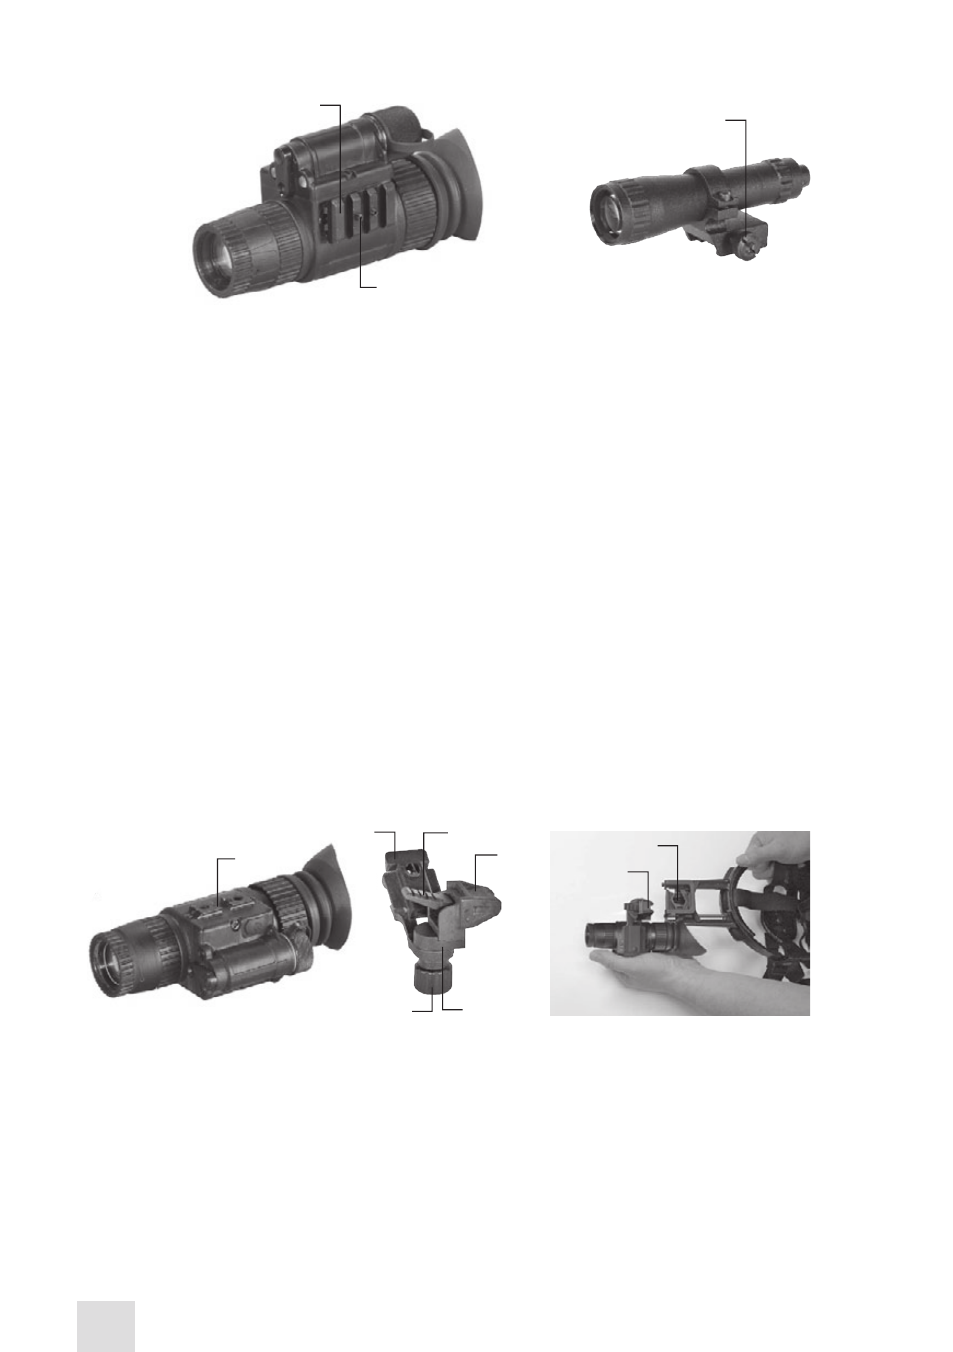
3.1.9 MOUNTING THE N-14 TO A STANDARD US MIL HELMET/ HEADGEAR
ASSEMBLY
To mount the N-14 to a Standard US Mil helmet or headgear assembly, use an optional transfer adapter.
Perform the following steps:
1. Push down on the lever (C). Mount the adapter (A) to the N-14 rail (B).
2. Align the adapter prism (D) with the helmet/ headgear assembly mount (E). Slide the N-14 backwards
until its alignment boss is in line with the alignment groove on the helmet/ headgear assembly mount.
Push down until the N-14 locks into the helmet/ headgear assembly mount.
To dismount the N-14 from the helmet/ headgear assembly, push down on the lever (F) and remove
the unit.
Push down on the lever (C) and remove the adapter from the N-14 rail.
The transfer adapter can be adjusted for either the right or left eye. In Figure 3-9, the N-14 is shown in
the proper position for the left eye. Readjust the adapter for the right eye as follows:
— Push down on the lever (C). Remove the adapter from the N-14 rail.
— Loosen the nut (G), and turn the adapter around between the two fixing devices. Retighten the nut
(G).
— Mount the adapter to the other N-14 rail located on the opposite side of the unit.
3.1.10 MOUNTING ACCESSORY LENSES TO THE N-14
To mount the 3X afocal lens (A) to the device, screw it into the threading of the standard 1X objective
lens on the N-14.
To mount the 5X (B) or 8X (C) lens, unscrew the existing 1X objective lens of the N-14 and screw in the
3X, 5X or 8X lens in its place.
The N-14 configured with an 8X lens can be installed on a tripod. To mount the unit on a tripod, use the
1/4’’ threaded socket (D) on the housing of the 8X lens.
B
C
FIGURE 3-8. MOUNTING AN IR ILLUMINATOR TO THE N-14
A
A
FIGURE 3-9. MOUNTING N-14 TO STANDARD US MIL HELMET/HEADGEAR ASSEMBLY
B
G
F
C
E
D
D
- NSMN140001P6DA1 N-14 GEN 3P Multi-Purpose Night Vision Monocular NSMN140001G6DA1 N-14 GEN 3 Ghost Multi-Purpose Night Vision Monocular NSMN14000136DA1 N-14 GEN 3 Alpha Multi-Purpose Night Vision Monocular NSMN14000136DB1 N-14 GEN 3 Bravo Multi-Purpose Night Vision Monocular NSMN14000126DS1 N-14 GEN 2+ SD Multi-Purpose Night Vision Monocular NSMN14000126DI1 N-14 GEN 2+ ID Multi-Purpose Night Vision Monocular NSMN14000126DH1 N-14 GEN 2+ HD Multi-Purpose Night Vision Monocular NSMN140001Q6DI1 N-14 GEN 2+ QS Multi-Purpose Night Vision Monocular