3 installing a dimm – Asus A7N8X Deluxe User Manual
Page 28
14
Chapter 2: Hardware information
2.5.2 Memory configurations
Install DIMMs in any of the following combinations.
DIMM Location
184-pin DIMM (DDR)
Total Memory
Socket 1 (Rows 0&1)
64MB, 128MB, 256MB, 512MB, 1G
x1
Socket 2 (Rows 2&3)
64MB, 128MB, 256MB, 512MB, 1G
x1
Socket 2 (Rows 4&5)
64MB, 128MB, 256MB, 512MB, 1G
x1
Total system memory (Max. 3GB)
=
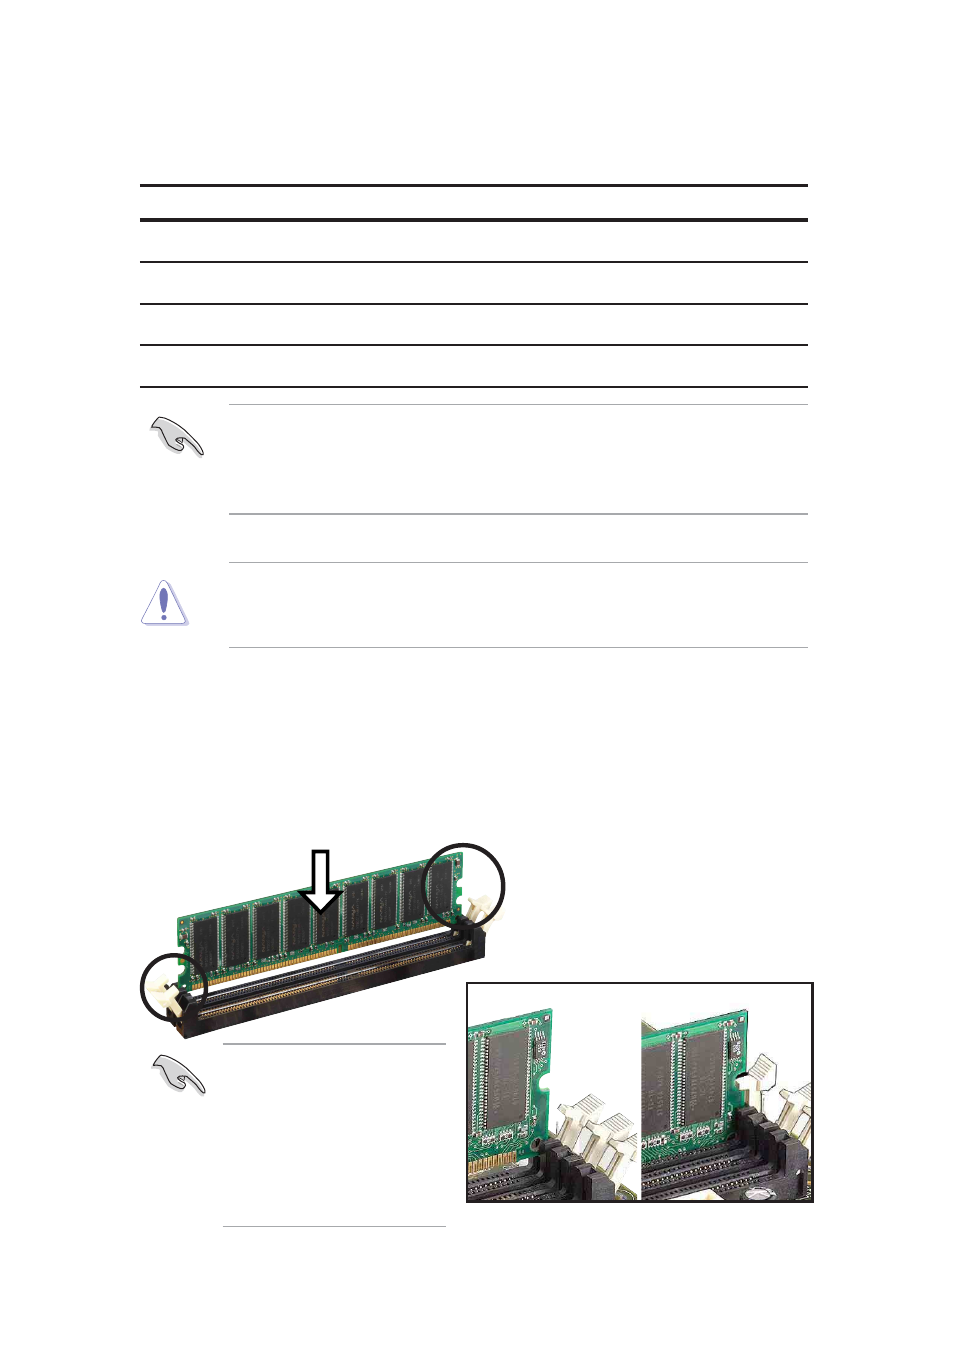
Installing a DIMM:
1. Unlock a DIMM socket by pressing the retaining clips outward.
2. Align a DIMM on the socket such that the notches on the DIMM exactly
match the notches in the socket.
3. Firmly insert the DIMM into the socket until the retaining clips snap back
in place.
2.5.3 Installing a DIMM
CAUTION!
Make sure to unplug the power supply before adding or
removing DIMMs or other system components. Failure to do so may cause
severe damage to both the motherboard and the components.
Unlocked Retaining Clip
Locked Retaining Clip
NOTE:
To enhance system performance, utilize dual-channel feature
when installing additional DIMMs. You may install the DIMMs in the
following sequence: Sockets 1 and 3 or Sockets 2 and 3 or Sockets 1,
2 and 3.
NOTE:
Visit the ASUS
website at www.asus.com
for the latest DIMM
Qualified Vendors List.
Make sure to use only
tested and qualified
DDR400 DIMMs.