Hardware setup – Asus MES-N User Manual
Page 36
36
ASUS MES-N User’s Manual
Connectors
3. H/W SETUP
3. HARDWARE SETUP
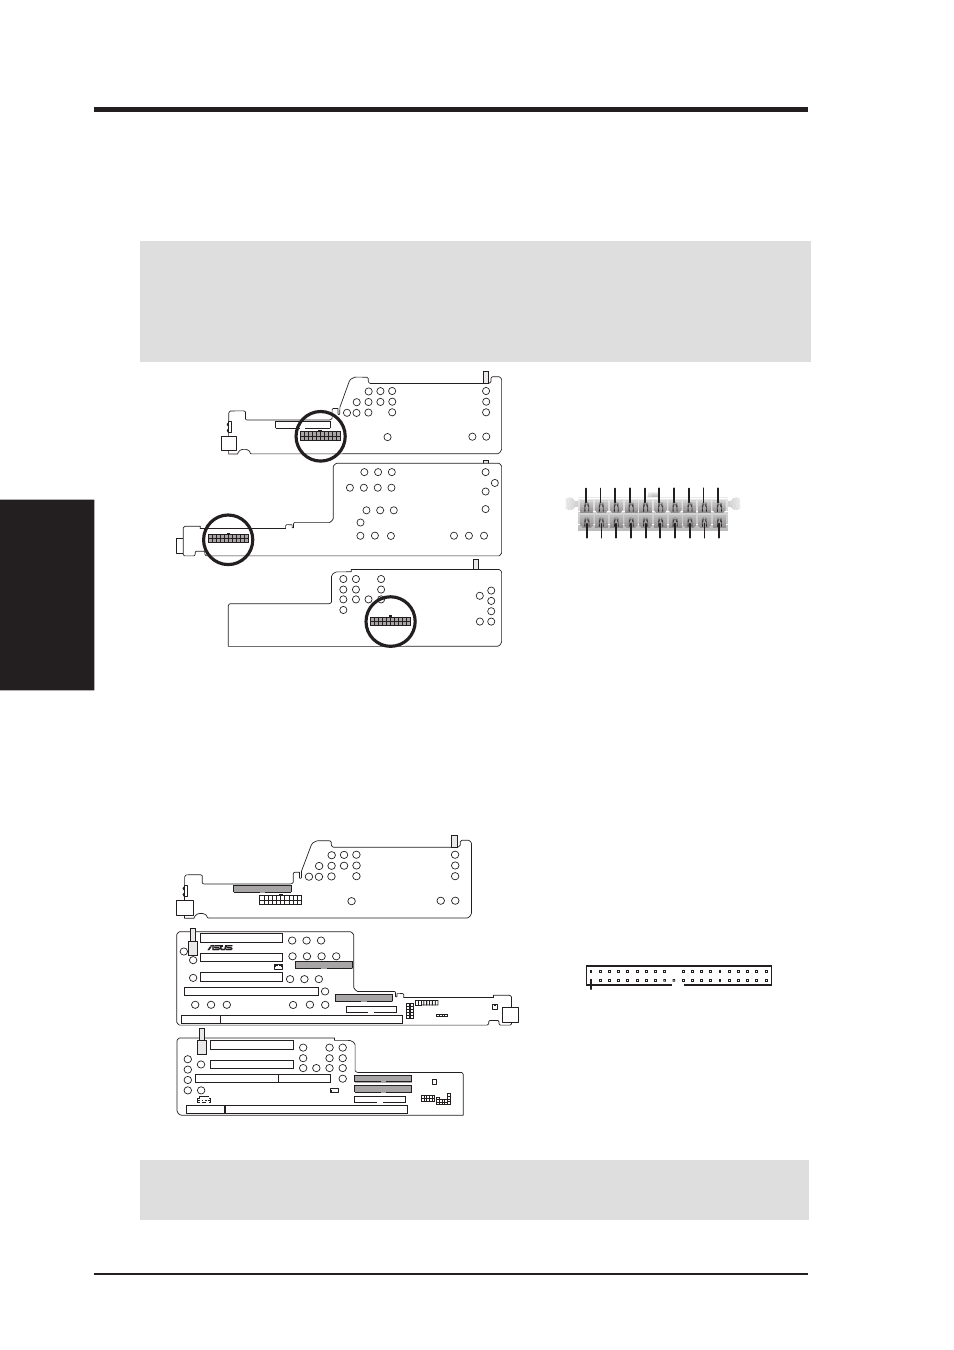
3) NLX Power Supply Connector
This connector connects to an NLX power supply. The plug from the power sup-
ply will only insert in one orientation because of the different size holes. Find the
proper orientation and push down firmly making sure that the pins are aligned.
IMPORTANT:
Make sure that the NLX power supply can deliver at least 720mA
on the 5volt standby lead (+5VSB). You may experience difficulty in powering
on your system if your power supply cannot support the load. For Wake-On-LAN
support, your NLX power supply must supply at least 720mA +5VSB.
NLX Power Connector
+3.3 V
o
lts
-12.0 V
o
lts
Ground
Power Supply On
Ground
Ground
Ground
-5.0 V
o
lts
+5.0 V
o
lts
+5.0 V
o
lts
Power Good
+12.0 V
o
lts
+3.3 V
o
lts
+3.3 V
o
lts
Ground
+5.0 V
o
lts
Ground
+5.0 V
o
lts
Ground
+5V Standby
NLX-R (Back)
B9-N (Back)
Yeong-Yang (Back)
NLX Power Supply Connector
IMPORTANT:
Ultra DMA/66 devices require a 40-pin 80-conductor cable to
be enabled and/or for Ultra DMA Mode 4.
4) IDE Connectors
This connector supports the provided IDE hard disk drive ribbon cable. After
connecting one end to the riser card, connect the other end to a hard disk drive.
The primary IDE channel supports both a master and a slave IDE device but the
system housing size only permits a standard IDE hard drive to be installed.
IDE Connectors
Orient the red stripe on the
IDE ribbon cable to Pin 1
Pin 1
®
B9-N
YEONG-YANG
NLX-R (Back)
B9-N (Front)
Yeong-Yang (Front)