Updating the bios file – Asus P8P67 WS Revolution User Manual
Page 115
ASUS P8P67 WS Revolution
3-41
4.
Select
Yes and press
exit BIOS Updater. Restart your computer.
DO NOT shut down or reset the system while updating the BIOS to prevent
system boot failure!
•
For BIOS Updater version 1.04 or later, the utility automatically exits to the
DOS prompt after updating BIOS.
•
Ensure to load the BIOS default settings to ensure system compatibility and
stability. Select the
Load Optimized Defaults item under the Exit BIOS
menu. See Chaper 3 of your motherboard user manual for details.
•
Ensure to connect all SATA hard disk drives after updating the BIOS file if
you have disconnected them.
Updating the BIOS file
To update the BIOS file using BIOS Updater
1.
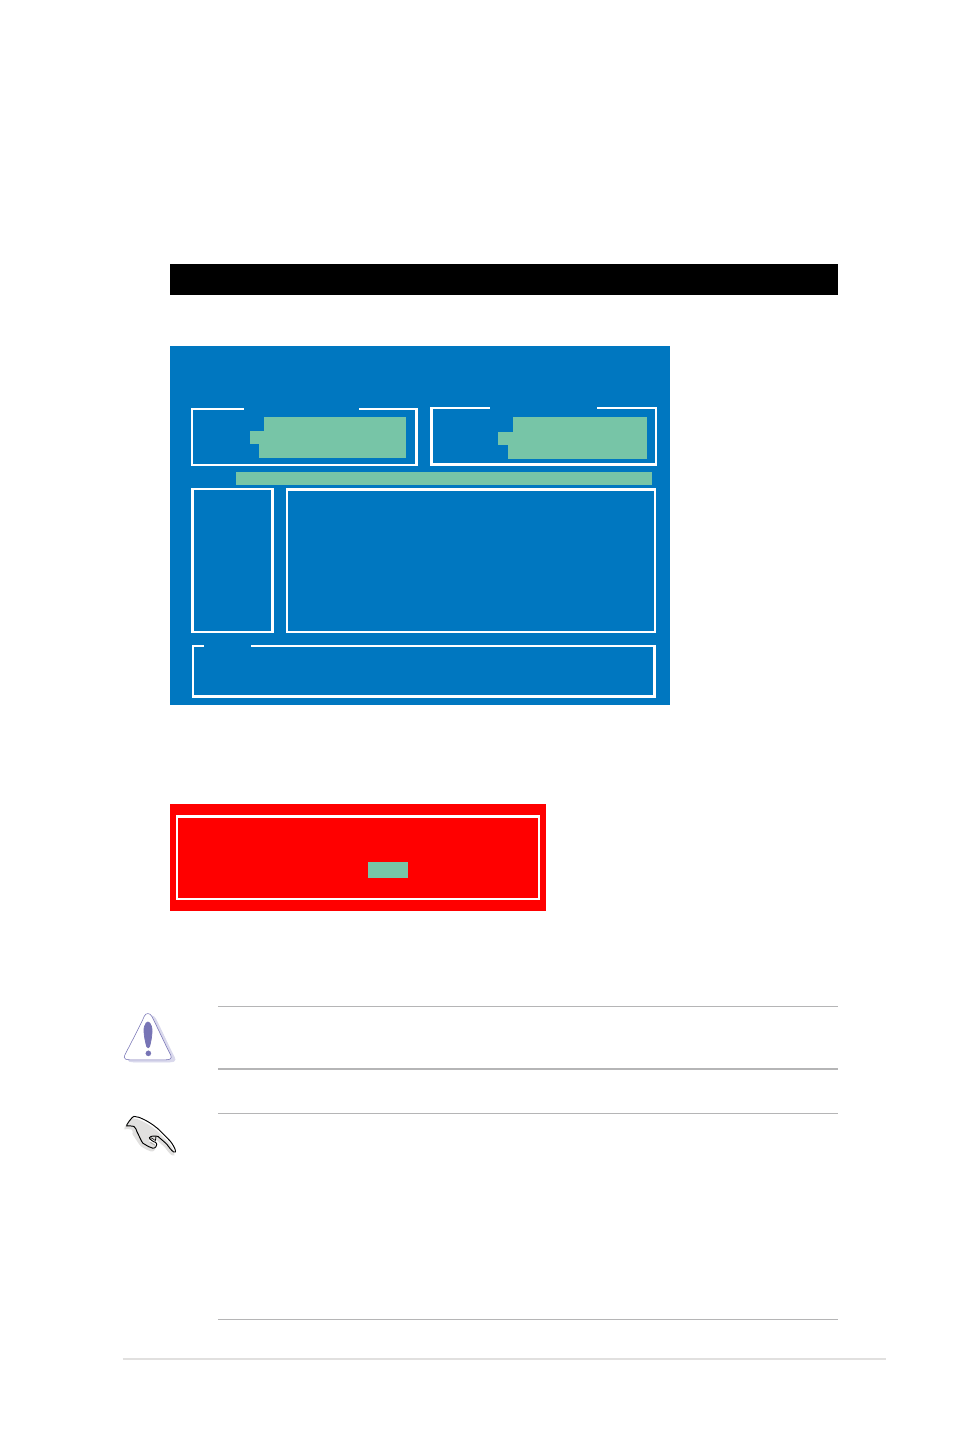
At the FreeDOS prompt, type bupdater /pc /g and press
ASUSTek BIOS Updater for DOS V1.18 [2010/04/29]
Current ROM
Update ROM
A:
Note
[Enter] Select or Load [Tab] Switch [V] Drive Info
[Up/Down/Home/End] Move [B] Backup [Esc] Exit
P8P67D.ROM 4194304 2010-08-05 17:30:48
PATH:
A:\
BOARD:
P8P67 DELUXE
VER:
0204
DATE:
08/05/2010
BOARD:
Unknown
VER:
Unknown
DATE:
Unknown
D:\>bupdater /pc /g
2.
The BIOS Updater screen appears as below.
3.
Press
the selected BIOS file and prompts you to confirm BIOS update.
Are you sure to update BIOS?
Yes
No