Journey bag installation – Mustang Motorcycle Seats Mustang Motorcycle Journey Bag, No Studs User Manual
Page 2
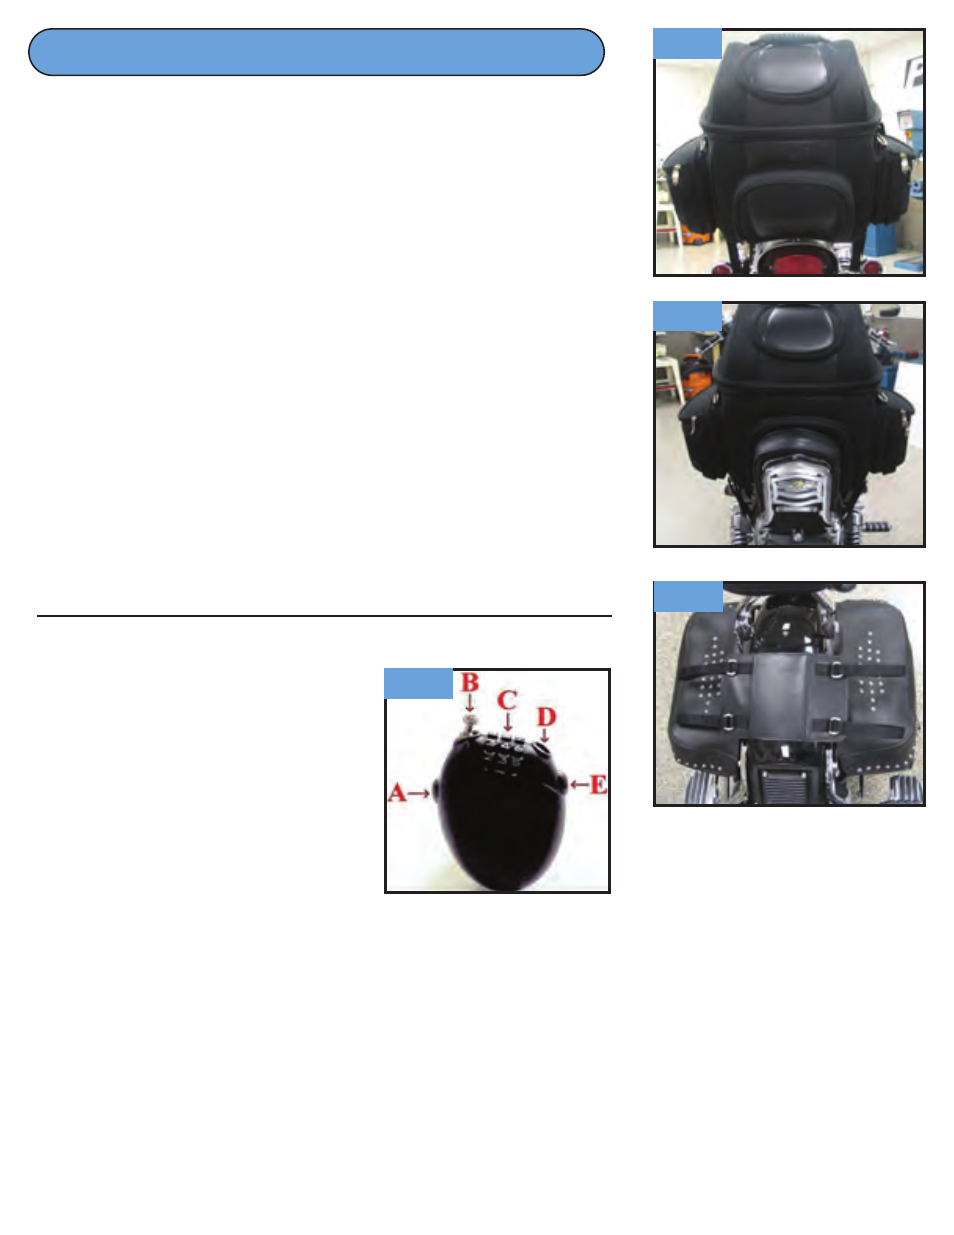
RETRACTABLE CABLE LOCK
STEP 1 To select a new
combination for the lock,
press button “A” and hold
down. Push the cable end
(labeled as “B”) down/inward
until you hear it click.
STEP 2 Choose your new
combination by turning the
three tumblers (labeled as “C”) to a three-digit combination
that you will remember. Then pull back up on the cable end to set your combination.
STEP 3 Press down on the “A” button to pull the cable end out. Plug the cable end
into the cable lock receptacle (labeled as “D”) until you hear it click into the locked
position. If you have too much slack in the cable, press the “A” button to recoil the
slack amount of cable. Turn the tumblers to a position that is NOT your chosen
combination to lock the mechanism.
STEP 4 To unlock, turn the tumblers to your chosen combination and press the
“E” button to release the cable and the “A” button to recoil the cable.
The following are guidelines and suggestions for many
common mounting situations:
PIC. 1 shows the Journey Bag mounted on a luggage rack
behind a sissy bar. The wide Velcro strap attached to
the bag wraps around the sissy bar backrest. Using the
supplied adjustable straps with steel hooks, secure the bag
to the bike. There are plenty of D hooks to be used for this.
PIC. 2 shows the Journey Bag mounted on the passenger
seat. This is where the Journey Bag’s adjustable backrest pad
will give the driver added comfort. You need to tri-fold the
wide Velcro strap in a manner to have the two strips of
Velcro line up with the ones on the pad.
PIC. 3 shows how the Two Piece Under Seat Mount is
placed under the passenger seat. The passenger seat
must be firmly secured over the Two Piece Under Seat
Mount to keep it in place.
Journey Bag Installation
Continued, page 2
PIC. 1
PIC. 2
PIC. 3
PIC. 4