Enclosed trailer installation instructions, Bill of materials – Buyers LT22 User Manual
Page 2
Quality since 1946
7700 Tyler Blvd. • Mentor, Ohio 44060
Phone (440) 974-8888 • Fax (440) 974-0165
Toll-Free Fax 800-841-8003 • buyersproducts.com
3004484 Rev. A
Warranty Information
Buyers Products Co. warrants all truck/trailer hard-
ware manufactured or distributed by it, to be free
from defects in material and workmanship for a
period of one year from date of shipment. Parts must
be pro-perly installed and used under normal condi-
tions. Any product which has been altered, including
modification, misuse, accident or lack of maintenance
will not be considered under warranty. Normal wear is
excluded. The sole responsibility of Buyers Products
Co. under this warranty is limited to repairing or
replacing any part or parts which are returned,
prepaid, and are found to be defective by Buyers
Products Co. Authorization from Buyers Products
Co. must be obtained before returning any part. No
charges for transportation or labor performed on
Buyers’ products will be allowed under this warranty.
6. With the rack clamped into position, drill a
13/32" hole through the center of 1" tube and the
trailer rail.
7. Fasten rack to the trailer rail with a 3/8-16 x
2" cap screw, two 3/8" flat washers, and a 3/8-16
nylock nut. Tighten all three screws at this time.
Enclosed Trailer Installation Instructions
Tools and Materials Required:
•9/16" Wrench or Socket
•Electric Drill
•13/32" & 1/4" Drill Bits
•Hack Saw
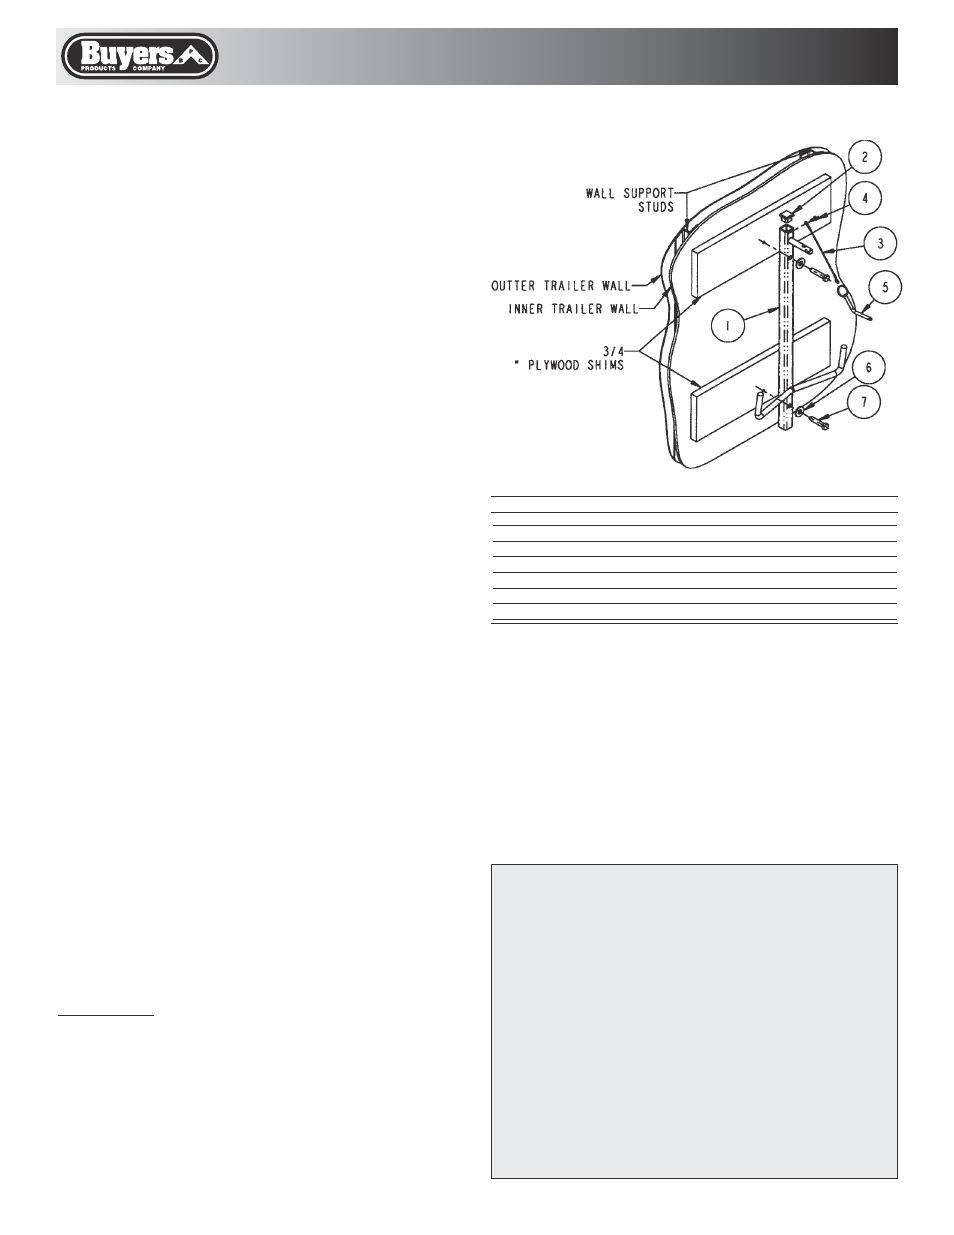
•3/4" Plywood Shim Strips
•Shim Screws
1. To maximize floor space in your trailer cut 18"
off the bottom of the blower rack with a hack saw.
2. Drill two 13/32" holes through the center of the
1" square tube at least 12" apart.
3. In order to mount this rack to an enclosed
trailer,
you must first add 3/4" plywood shim
strips to the walls. These shim strips must be
attached to at least two wall support studs with
suitable fasteners. If you don’t know what kind
or length of fastener to use contact your trailer
dealer or manufacturer for their recommendation.
4. Hold the blower rack vertical against the shims
and mark the position of the two 13/32" holes.
WARNING! Check for locations of brake lines
and electrical wiring etc., before drilling any
holes. Any damage to trailer during installation
is the installer’s sole responsibility.
5. Drill two 1/4" pilot holes in the positions just
marked for the 3/8" lag screws.
Be extremely care-
ful not to drill through the outside trailer wall.
6. Fasten the blower rack to the trailer wall with
the two 3/8" x 2" lag screws and two 3/8" flat
1
3004464
1
Rack, STIHL
®
Blower
2
0204300
1
Plug, Plastic Finish, 1" Square Tube
3
3004488
1
Lanyard, 1/16" dia. x 6" w/.190 Eyelets
4
3003080
1
Rivet, Pop, 3/16 x 3/16 Steel
5
3004485
1
Pin, Detent, 1/4" Formed
6
-
2
Washer, Flat 3/8 USS Zn
7
-
2
Screw, Hex Head Lag, 3/8 x 2 Zn
ITEM
PART NO.
QTY.
DESCRIPTION
Bill of Materials