Warning, Np o – Peerless-AV DS45 - Installation User Manual
Page 3
3 of 3
ISSUED: 5-25-95 SHEET #: 081-9001-4 06-08-11
Visit the Peerless Web Site at www.peerlessmounts.com
For customer service call (800) 865-2112
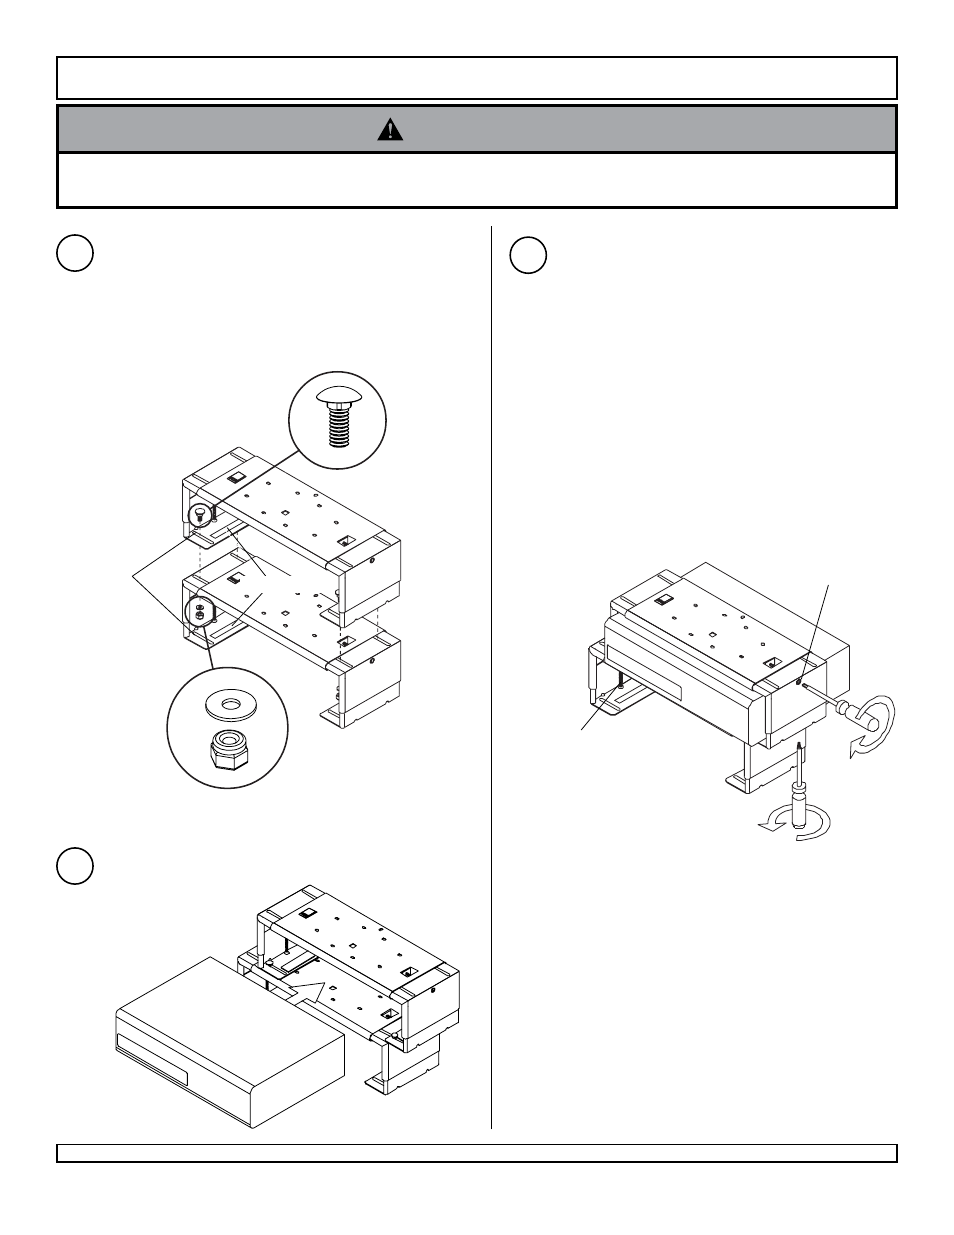
Insert four carriage bolts (
P) into slots in upper VCR
mount. Attach lower VCR mount using four nuts (
O)
and four washers (
N). HAND TIGHTEN ONLY.
Note: If adhesive pads on VCR Mount are covering
slots, trim away excessive pad to expose slots.
Align front of VCR with front of TV on TV Mount
(TV Mount not pictured). Tighten expansion
screws in sides and bottom of VCR Mount to
clamp the VCR with a firm, secure grip.
Note: To access the vertical expansion screws
located on the bottom of the upper VCR Mount,
slide the lower VCR Mount to the side expos-
ing vertical expansion screw. Repeat this step
on opposite side of VCR Mount. Center lower
VCR Mount and tighten four nuts (
O, see step 4)
securely.
Expand lower VCR Mount to slightly larger than
the height and width of the VCR that it will hold.
Insert and clamp lower VCR into lower VCR
Mount.
OPTIONAL: If attaching multiple VCR mounts to a TV mount, proceed with step 4 through 6.
© 2011 Peerless Industries, Inc. All rights reserved. Peerless is a registered trademark of Peerless Industries, Inc.
All other brand and product names are trademarks or registered trademarks of their respective owners.
• Do not stack more than three VCR Mounts from a single Peerless TV Mount. Stacked load cannot exceed
50 lb (23 kg).
WARNING
4
5
6
Insert VCR into upper VCR Mount.
SLoTS
ADHESIVE PAD
ExPANSIoN SCREW
ExPANSIoN
SCREW
N
P
O