Warning, Da i, Installation to metal studs – Peerless-AV GC-PS3S - Installation User Manual
Page 5: Figure. 1.4
5 of 7
ISSUED: 1-17-11 SHEET #: 125-9181-1
1
• Drywall must be 1/2" or thicker, and metal stud must be 24 gauge or thicker.
• Make sure that the wall will safely support the combined load of the equipment and all attached hardware and
components.
• Make sure that togglers are anchored into the center of the studs. The use of an "edge to edge" stud finder is highly
recommended.
WARNING
Installation to Metal Studs
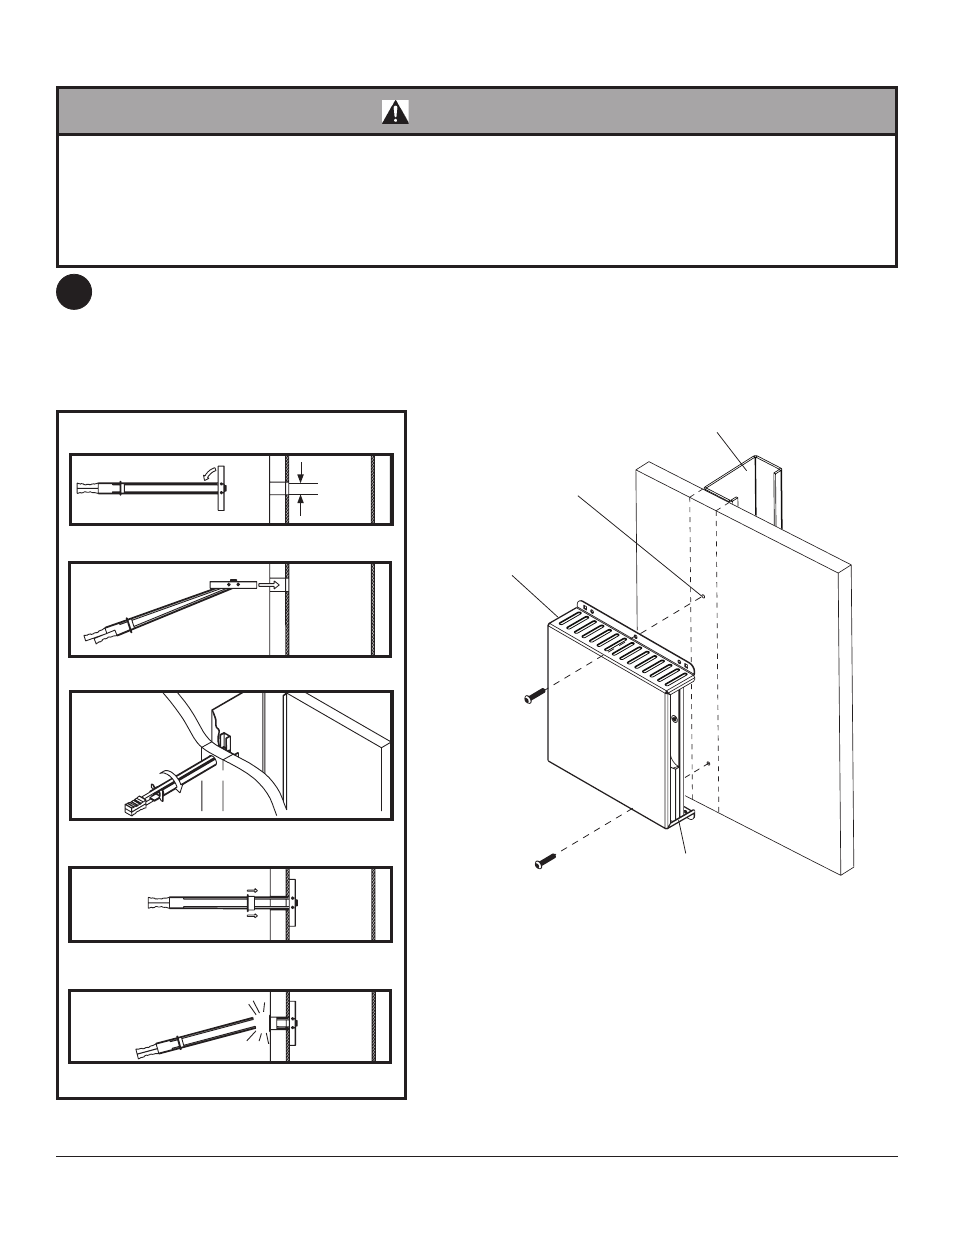
Rotate toggler (
I) clockwise to wedge it against
inside walls of metal stud.
Push into hole.
Pivot end of toggler (
I).
Slide plastic cap forward while pulling back
firmly on ring.
Break off excess.
I
1
2
3
4
5
fig. 1.3
drill
1/2"
hole
I
I
I
I
METAL STUD
D
A
I
Figure. 1.4
Using a stud finder, locate and mark the edges of the metal stud used in mounting this product. Use of an edge to
edge stud finder is highly recommended. Use a level to draw a level, vertical line down the center of the stud. Level
wall plate (
A), and mark the center of the two mounting holes. Make sure that the mounting holes are on the stud
center lines. Drill two 1/2" holes through drywall and metal studs.
NOTE: It may be necessary to drill 5/32" pilot
holes prior to drilling 1/2" holes. Install togglers (
I) as shown in figure 1.3. Loosely fasten wall plate to wall using two
1/4-20 x 1.5" screws (
D) using 4 mm allen wrench (H) as shown in figure 1.4. Level, hold,
and then tighten all screws.
PlayStation
®
3