Daystar KCO9106 User Manual
Page 7
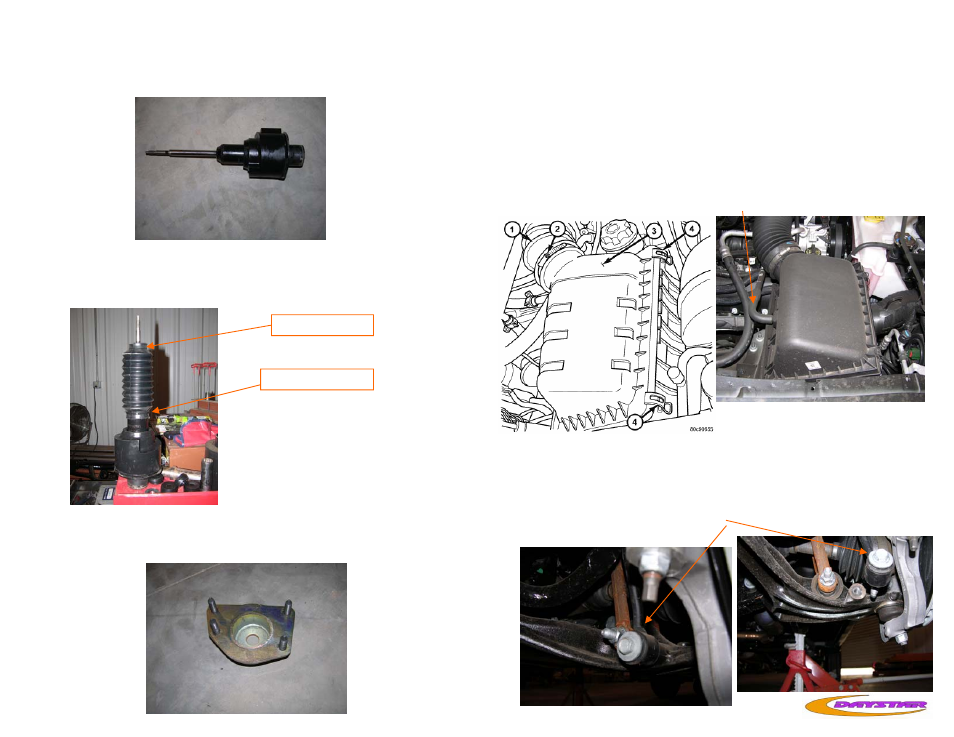
27. Install the spring spacer onto the strut, note the location of the spacer
bump stop on the side of the spacer, as it needs to face out ward on
the strut. There is a notch on the spacer that will match a locator on
the strut.
28.
Install the boot over the strut and with one of the replacement wash-
ers, pull the boot over the washer at the top of the strut and zip tie
the boot to the bottom of strut.
29. Press out the stock upper strut plate studs and press them into the
lift strut plate. Note that the plate matches what strut that you are
working on. There are LT and RT side plates.
ZIP TIE
WASHER
13. Working on the right side of the vehicle
14. With a flat head screw driver lessen the clamp ( 2 ) for the air intake
hose (1).
15. Pry up spring clips (4) from the front of the housing cover ( spring
clips retain cover to housing ).
16. Release housing cover (3) from the 4 locating tabs on the rear of
housing, and remove cover and disconnect the hose at the back of
the air cleaner led. Remove the air filter and pull up on the bottom
air cleaner housing to remove it.
17. Place a floor jack under the vehicle and jack up the front enough to
secure the vehicle on jack stands. Place wheel blocks behind the rear
wheels.
18. Disconnect the sway bar end link from the lower control arm with a
18mm socket.