Daystar KCO9106 User Manual
Page 3
•
NOTE: Double check that all the upper strut mounting nuts are
tightened to factory spec.
42. Reinstall the air cleaner assembly on the right side, follow steps
13 to 16 working in reverse order.
43. Reinstall the TIPM and battery on the lift side of the vehicle by
following steps, 4 to 12 . Working in reverse order.
Installation steps
1. Place the vehicle on a level and clean work service.
2. Read the instructions carefully.
3. Open the hood of the vehicle.
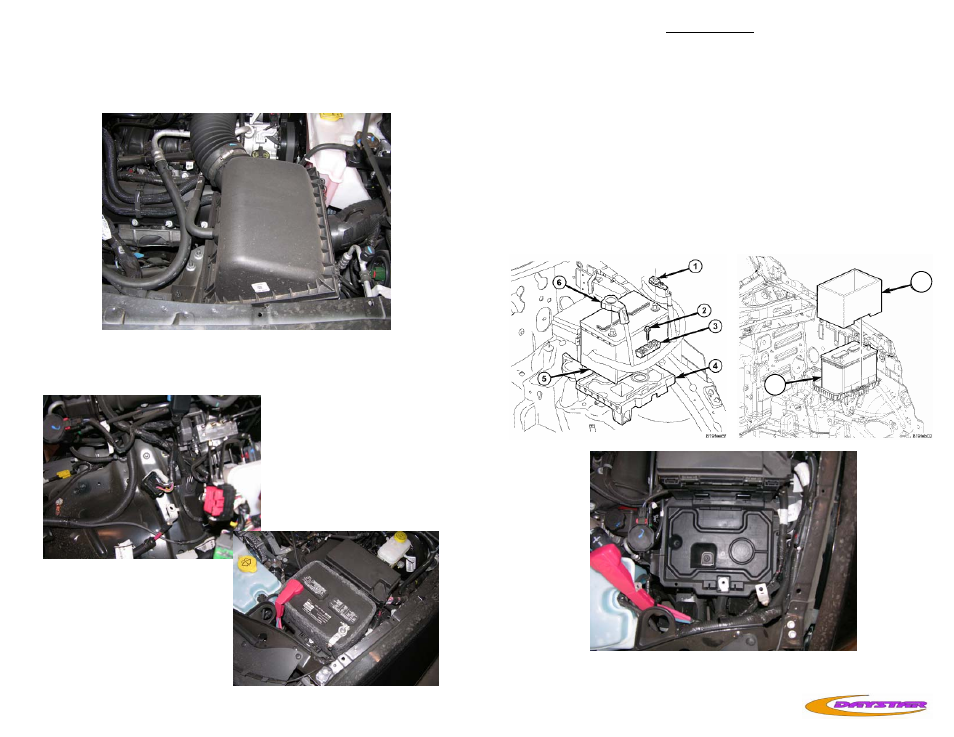
4. Working on the driver side of the vehicle, disconnect the battery
pinch clamps ( 1,6 ) and remove the thermal guard (7) around the
battery. Remove the battery hold down clamp (2,3) and remove the
battery (5) from tray(4).
5
7
See also other documents in the category Daystar For the car:
- KJ09112BK (1 page)
- KJ09113BK-1 (1 page)
- KJ61004BK (1 page)
- KF09112BK (2 pages)
- KA09100BK (6 pages)
- KC09102BK (1 page)
- KJ60003 (1 page)
- KJ04503BK (1 page)
- KJ71043BK (4 pages)
- KT09118BK (1 page)
- KC09122-2 (2 pages)
- KF09102 (1 page)
- KJ60005 (1 page)
- KJ61003 (1 page)
- KT09120BK (4 pages)
- KT09110BK (2 pages)
- KN09107 (2 pages)
- KJ09152BK (1 page)
- KJ02001 (1 page)
- KJ09156BK-2 (4 pages)
- KJ61009BK (1 page)
- KG09108 (4 pages)
- KF09108 (4 pages)
- KJ71034TN (8 pages)
- KJ09117BK-2 (1 page)
- KJ61002 (1 page)
- KU70038BK-1 (4 pages)
- KJ61017 (1 page)
- KT09103BK (1 page)
- KJ61005BK (1 page)
- KC09107 (1 page)
- KJ09155BK-2 (4 pages)
- KU70035BK-2 (4 pages)
- KC09121 (2 pages)
- KT09105BK (1 page)
- KJ09153CAMO (6 pages)
- KG09109 (4 pages)
- KU70037BK-1 (4 pages)
- KJ61019BK (1 page)
- KJ09103CAMO (2 pages)
- KJ09123BK-1 (2 pages)
- KF09050 (2 pages)
- KT09116BK (3 pages)
- KT09115-1 (3 pages)