Daystar KCO9106 User Manual
Page 5
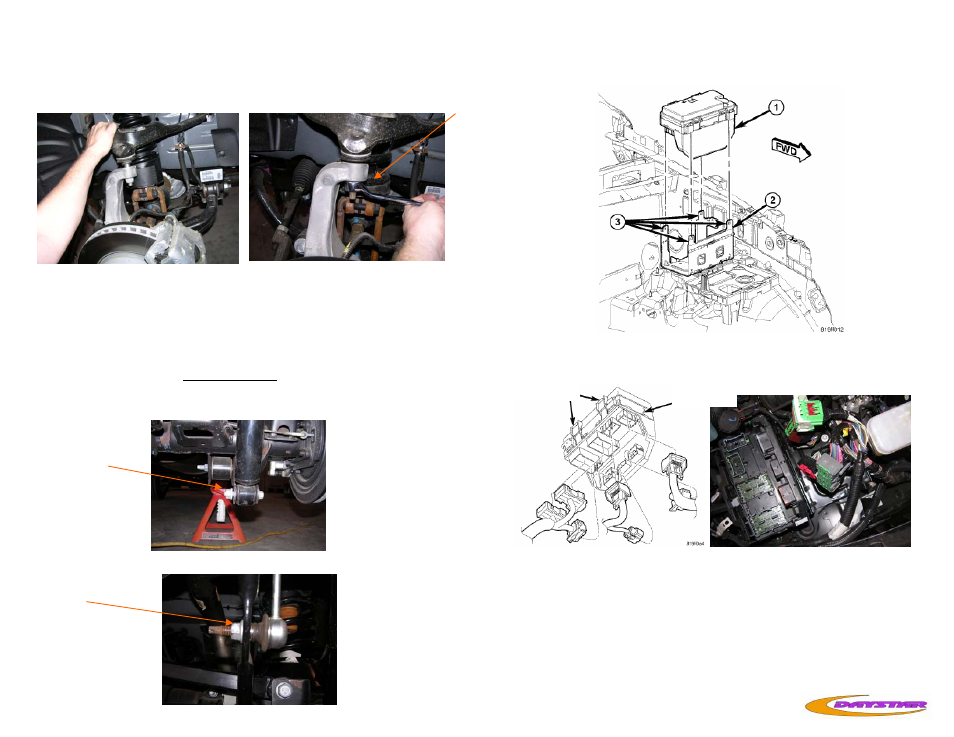
32. Tighten the clevis bolt with a 24mm socket to factory specifications.
33. Place the floor jack under the lower control arm and jack up. Pull
down on the upper control arm to reinstall the ball joint and nut into
the knuckle. Tighten the ball joint nut with a 21mm wrench.
34. Repeat sets 18 though 33 on other side.
35. After both front lift spacers have been installed, reinstall the sway
bar end link with a 18mm socket and tighten. Double check all fas-
teners for proper torque.
36. Reinstall the front tires/wheels and lower the vehicle to the floor.
Tighten the upper strut nuts with a 18mm socket.
Rear installation
37. Disconnect the rear lower shock bolts with a 16mm wrench and a
18mm socket.
38. Disconnect the lower sway bar end link nut with a 16mm
wrench.
7. Using a appropriate flat bladed tool, depress the four mounting
clips ( 3 ) to disengage and remove the TIPM housing (1) from
the TIPM bracket ( 2 ) mounting tabs.
8.
Disconnect each of the seven TIPM wire harness connectors
from the TIPM housing. NOTE: Take care when removing the
connectors.
TIPM cover
TIPM
9. Remove the TIPM and put it in a safe place.